
3 minute read
Phil Rhodes on the subtleties and challenges inherent in recreating grain.
Check out the other two excellent posts in this series: Recreating vintage looks by digital methods: titles and Recreating vintage looks via digital methods: lens aberrations.
Adding grain to over-pristine digital images is nothing new, and recent techniques such as RFG (for Real Film Grain) at Color by Dejohnghe, or FotoKem’s Shift.ai (for analogue intermediate) laser things out to film then scan them back in for grain so real it makes your workstation smell of developer.
Creating an acceptable (if not entirely accurate) grain simulation is not particularly difficult, although it can be surprisingly slow to render, and it’s been done badly so often that the idea is often frowned at. It’s also subject to a few gotchas. The grain pattern of most modern colour films is often very subtle and intentionally minimised in scanning. Perhaps worse, real grain can look much more like video noise than a lot of people expect it to. Popular film grain effects, whether derived from actual scanned film or simulated electronically, tend to be a lot more contrasty and monochromatic than the real thing. Still, if we generate it in software, all of that’s an option.
![]()
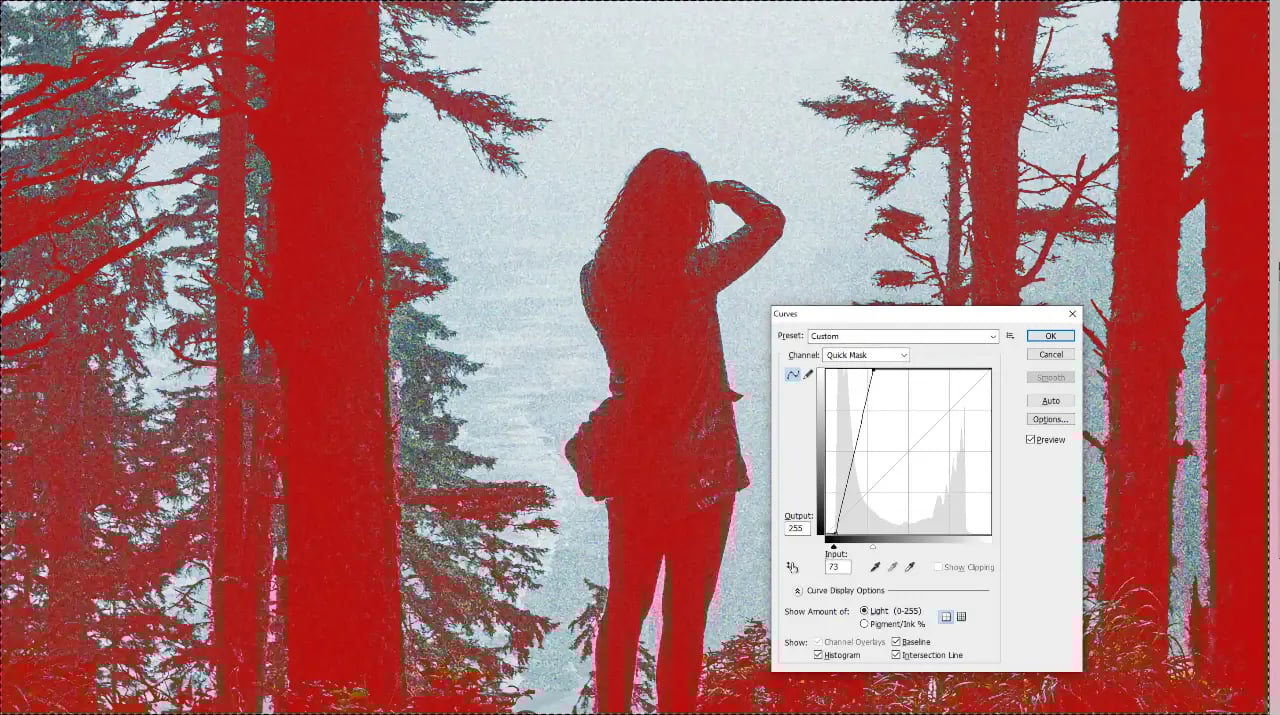
While film grain is not just noise, it’ll inevitably be based on noise to keep it changing every frame. That means random numbers, and good ones. Generating high quality random numbers is notoriously difficult, and one of the ways that computer random number generators are tested is to view the output values as an image and look for any hint of repetitive patterns. This is why many noise filters are slow, so it can sometimes be worth rendering out a second or two’s random noise to an uncompressed file and looping that.
If there’s a trick to turning random noise into convincing grain, it’s a combination of blur and sharpening. Taking random noise, blurring it a pixel or three, then sharpening the result creates a cellular texture which approximates what film grains actually look like. This is best done at higher resolution than the final effect, so that we can scale the channels appropriately: generally, the green should be smallest, followed by red, followed by blue with the largest clumps. Intensity can be modified either by turning the opacity down, or by scaling the effect, which more accurately simulates the tighter grain of a faster film.
Most people will prefer to reduce the saturation of the grain effect, or just use monochrome noise in the first place to create black and white grain. Transfer modes such as “overlay” work well, although theoretically it should be less visible in brighter areas of the image (assuming we’re simulating negative), and making that happen tends to help it look more convincing. That’s possible if we take the base image as a luminance map, so that brighter areas of the image provoke greater transparency in the overlaid grain.
There are a lot of other simple grading tricks we can use to make our image look more like it’s been through a photochemical process. Warmer highlights and cooler shadows is a common approach, although, again, there’s some debate as to whether that’s what film looks like, or whether it’s what people think it looks like, and thus what we have been conditioned to associate with nice pictures. Some of the commercial film effects tools will add glow and flare around bright highlights, which brings us back to the techniques we discussed in the first part of this series.
What should go without saying is that all of these effects are at their best when they’re done very, very subtly. The best approach is often to wind the effect up until it’s clearly too much, then thin it out until it’s just barely visible. Approaching it from the other direction - increasing it from zero - sometimes tends toward underdoing it, but it’s very much in the eye of the beholder. Some of these effects, particularly film grain, may also interact with video compression in unpredictable ways - that is, the compression may remove the effect - so take some time to test.
_and_without_(right)._Because_of_the_use_of_multiply_transfer_mode_for_the_shadow_grain%2c_the_shadows_are_darkened_in_a_manner_which_follows_the_grain.webp?width=1280&height=715&name=6._With_grain_(left)_and_without_(right)._Because_of_the_use_of_multiply_transfer_mode_for_the_shadow_grain%2c_the_shadows_are_darkened_in_a_manner_which_follows_the_grain.webp)
Anyone who’s ever finished anything that had to get through the quality control process of a picky distributor will be painfully aware of how things just like simulated grain and aberration can attract negative attention. What’s important is that none of the effects we’ve covered should be any less subtle than actually shooting Speed Panchros on pushed reversal, and that’s something most people would be proud to exhibit.
At the same time, none of this is a panacea. It can’t be said enough that the most powerful way of making any production look like a real movie begins in production design, choice of locations, and lighting, long before the photons hit the lens. Grain simulation can sometimes mitigate marginal highlights, but what we’re talking about here are the absolute last and final finishing touches. There are many great tools to do these things, but in a pinch, most of it can be done with tools that almost everyone already has.
Tags: Post & VFX

RedShark 2020 @ All rights reserved.

Comments