3 minute read
Given that vintage glass is not only holding its value but getting more expensive, digitally recreating some of that classic look digitally is a sound option. It also comes with an undo button.
When something in a movie needs to look old, someone from the art department dumps bleach all over it then rubs the edges with a cheese grater (or something). As we discovered last time, however, there are ways to do similar things to pictures without needing to don protective clothing. Many of those things we’ve already discussed in relation to titles are already lens effects, though treating the whole production in the same way feels a lot riskier.
There are good reasons that post is the actually best place to pretend we’ve paid lots of money for creative lenses. If our “creative” turns out to be the quality control analyst’s “fuzzy,” there’s an undo key. Real lenses cause glow and flare, diffusion, an impressive catalogue of geometric distortions, vignetting and various kinds of blur with or without chromatic aberration, and that’s if they’re clean. People like clever lenses because they are almost infinitely subtle and exquisitely nuanced, but happily so are pixels.
On the subject of flare, glow and veiling effects are effectively variations on lens flare. Computers have been attempting lens flare effects since the mid-90s, and by the time Knoll Light Factory emerged, it was possible to create things that looked reasonably realistic. So popular was the technique that some visual effects sequences still look like they’d been shot with several wildly different lenses all in the same frame; the undersea visual effects for 1990s submarine sci-fi SeaQuest DSV were effectively a lot of glowing lights in the dark.
The thing is, when we’re trying to make something made on a Canon kit lens look like it was shot with classic Cookes, we’re not after the rings and dots of a Photoshop lens flare. We’ll derive the glow from elements of the image itself. Totally accurate flare in post is difficult because no camera has enough dynamic range to let us pick out the very brightest parts of every possible frame and add glow to them, but subtle veiling is really just a large glow, and less sensitive to being precisely located over its motivating light source. Simulating them is a simple matter of blurring and recompositing.
Like a lot of lens effects, that sort of glow can reflect from the inside of the lens barrel, creating an image that’s flipped horizontally and vertically from the light source which motivated it. This is the sort of brightly coloured flares sought by people who paint the inside of lens barrels with fluorescent paint. Mirroring the frame and using that to create glows sounds ridiculous until it becomes clear how realistic it can be; again, it’ll work best when it’s barely visible. This is a large part of why old lenses have low contrast.
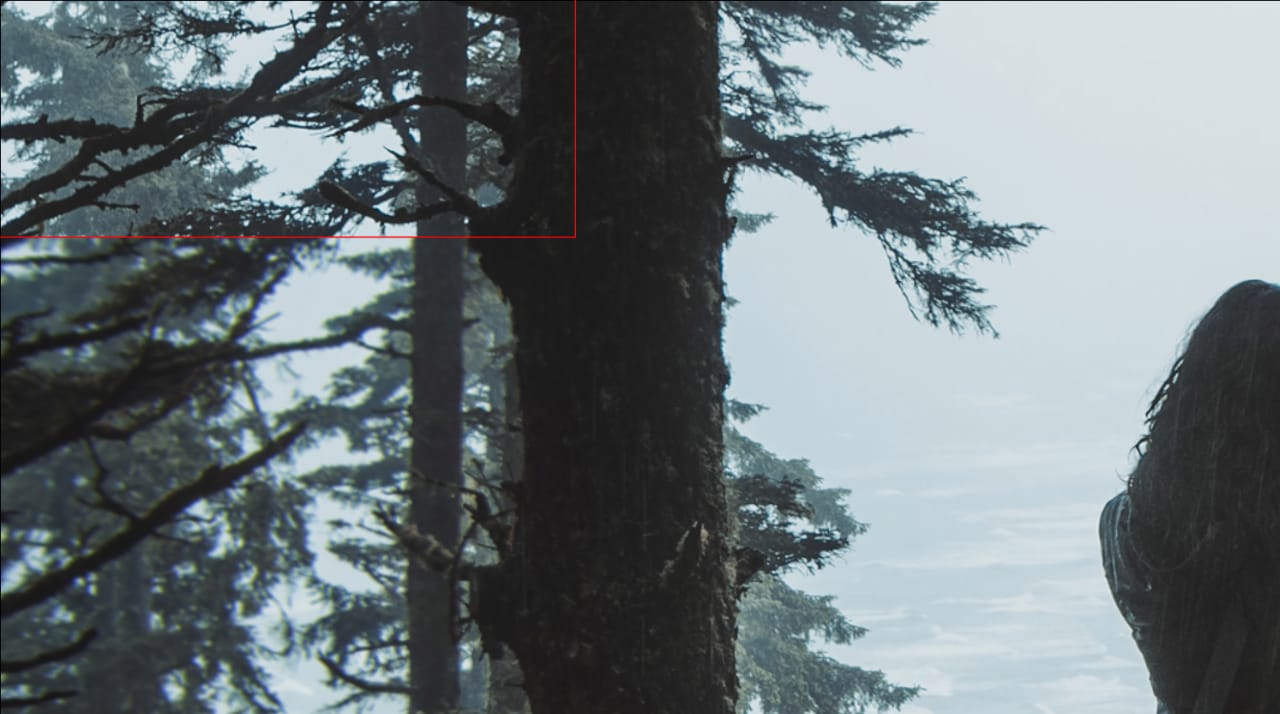
Spherical aberration tends to look like a combination of conventional blur and radial blur, often combined with some sort of chromatic aberration. Most compositing tools will let us duplicate a layer, blur it, and then have that layer appear outside a vignette, though that’s often not really appropriate. What we actually want is a varying amount of blur, not a transparent blur. Transparent blur just creates glow or diffusion. That might be useful (lots of filters do it) but it’s worth thinking about blur and diffusion separately.
Some software has a compound blur tool which varies the blur radius according to a reference image, and if we make that reference image a vignette, we end up with appropriately blurred corners. Often, a comparable compound radial blur is missing, but by the time the corner blur has been implemented, we can often get away with radially blurring the whole image and then compositing the corners with a vignetted transparency.
Chromatic aberration can often be simulated simply by differentially scaling the RGB channels of the image, though in an ideal world the effect would only appear near the corners. Scaling around the centre of the image will certainly make the effect more apparent in the corners, although sometimes it’s better to use a bulge or spherical warp effect which allows the centre of the image remain untouched. Often there’s no easy way to apply that sort of effect only to one layer, so it can be necessary to apply some simple compositing to isolate one layer - often blue - process it, and then recombine the colour image.
These three effects alone can be shockingly effective in simulating an optical artefact - and it’s trimmable to suit the shot. It only requires filters (blur, radial blur, spherical warp) which have long been common in even the most basic video editing tools, let alone compositing tools. All of this can certainly be done very nicely by proprietary grunge plug-ins, and probably faster, but in the end more or less everyone has access to the tools to do all this.
The same is also true of the elephant in the room of vintage image processes: the simulation of grain. More on that next time.
Tags: Production Lenses

RedShark 2020 @ All rights reserved.

Comments