3 minute read
Looking for a project to kill the winter months while you wait for a vaccination? Why not try making a pinhole attachment for your analogue or digital SLR?
The pinhole camera is the simplest image-making device possible. Because light rays travel in straight lines, when they pass through a very small hole they emerge from the opposite side in exactly the same arrangement, only upside-down, and thus form an image on a flat surface on the other side. Make that flat surface a sheet of film or a digital sensor and you can capture this image.
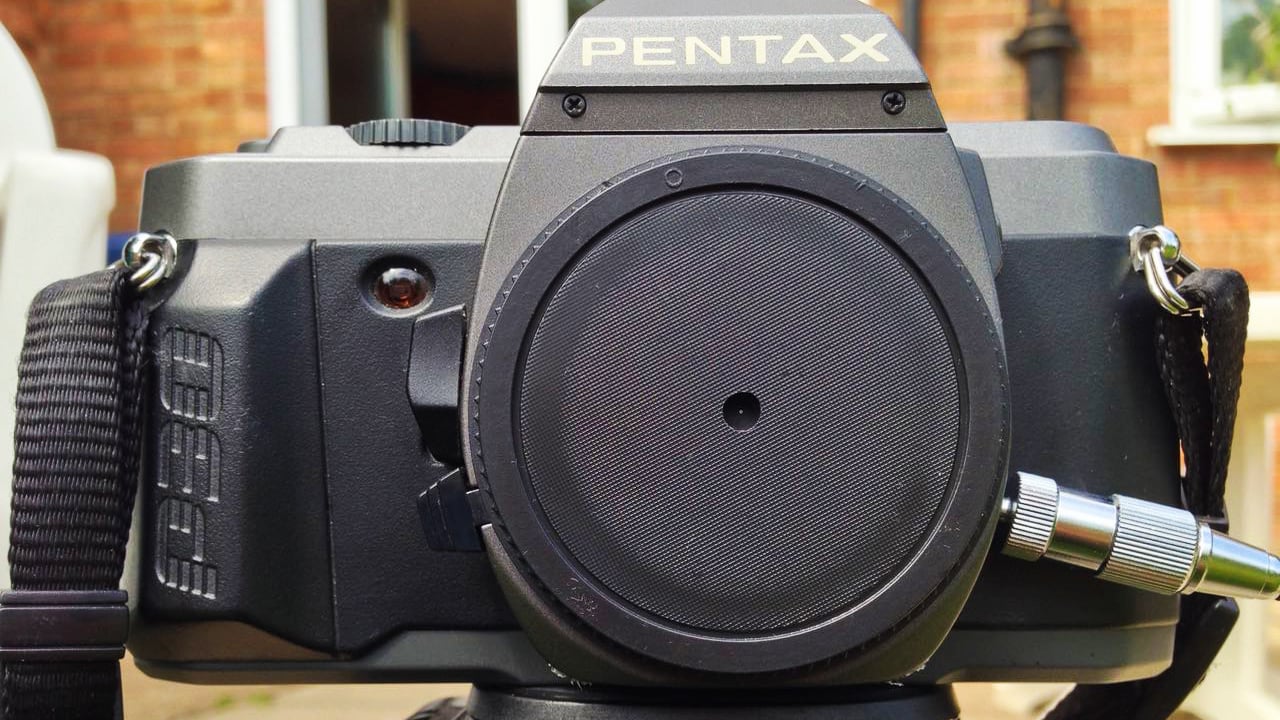
Other than a few common tools and a camera with a removeable lens, all you need is an extra body cap for that camera, and a small piece of flexible metal. Blackwrap is ideal, but failing that part of a drinks can will do as long as you paint it black.
Begin by drilling a hole in the centre of the body cap; the size is unimportant.
Use a pin or needle to pierce a hole in the blackwrap, at least a couple of centimetres from the edge. Don’t push the pin all the way through because that will make the hole too big. Just apply the minimum pressure to prick the metal.
Cut out a rough circle of the blackwrap, with the pinhole in the middle. This circle needs to fit on the inside of the body cap, with the pinhole in the centre of the drilled hole.
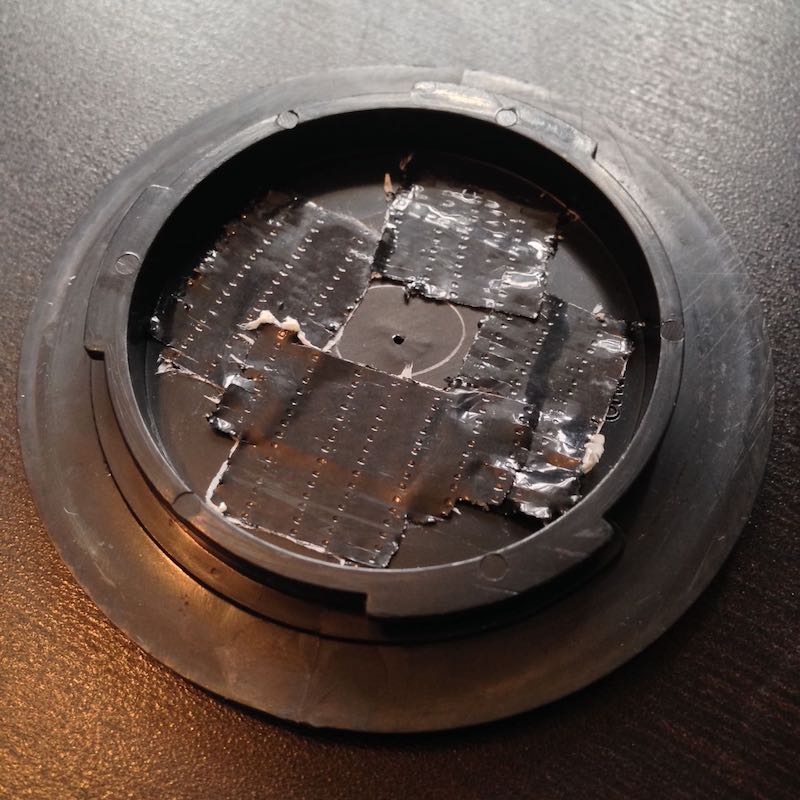
The final step is to tape the black-wrap tightly to the inside of the body cap, but if you plan to use your pinhole on an analogue camera then there’s something else you need to do first: put the blackwrap in a scanner and use software like Photoshop to measure the diameter of the pinhole. You’ll need to know this to get your exposure right, because your TTL (through the lens) light meter probably won’t work with the pinhole.
If you’re using a digital camera then you can of course judge your exposure off the live-view screen, but for film you’ll need to work it out from first principles. You need to calculate the pinhole’s f-stop, which like any f-stop is defined as the ratio of the focal length to the aperture diameter.
Focal length is the distance between the point where the light rays focus (i.e. converge to a point) and the image plane, so the focal length of a pinhole camera is very simply the distance from the hole itself to the film or digital sensor. Once attached to your camera, your pinhole is more or less level with the top of the lens mount, so the focal length is going to be approximately equal to the camera’s flange focal distance (defined as the distance between the lens mount and the image plane). You can find your camera’s flange focal distance in the manual or online.
So your pinhole’s f-stop is equal to your camera’s flange focal distance divided by the hole’s diameter. The result will be a much bigger number than you’ve ever seen on any lens! Now you can derive the correct exposure for your analogue pinhole images by using an external light meter or the Sunny Sixteen rule.
A bigger hole means more exposure, of course, but the trade-off is sharpness. The website Mr Pinhole has a handy calculator to help you figure all this out, and it even tells you the optimal pinhole diameter for your focal length.
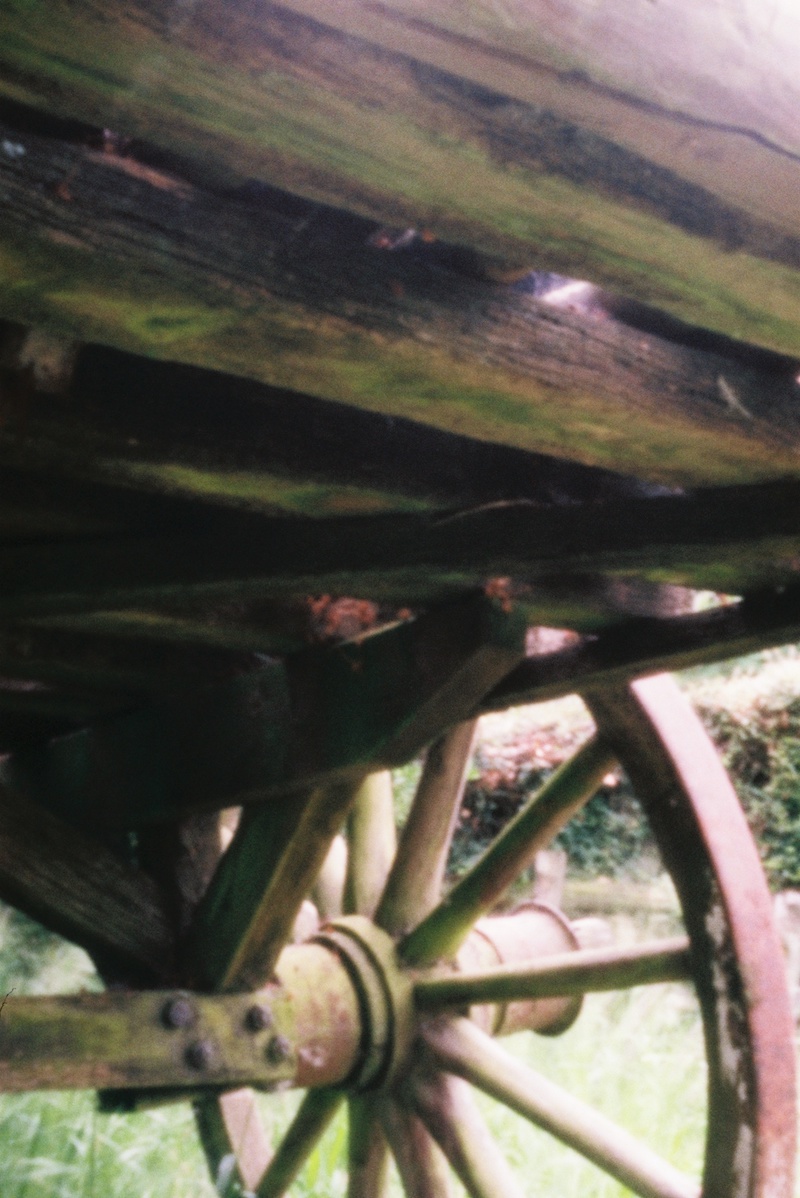
I experimented with pinholes for my 35mm Pentax P30T SLR, and I found it a fun and fascinating exercise. I took a few pictures with a 0.7mm pinhole – with which I could see a very dark image through the viewfinder, just about good enough to frame with – before deciding this would probably be too blurry. I switched to a 0.125mm hole and now couldn’t see a thing.
But not being able to frame using the viewfinder forced me to visualise the composition mentally. Knowing that the images would be soft made me concentrate on colour and form far more than I normally would. And it was incredibly freeing not to have to worry about focus (pinholes have infinite depth of field), not to have to squint through the viewfinder at all, but just set the camera up where it looked right.

Shooting with the pinhole was a great exercise in exposure too. I calculated the 0.125mm hole’s f-stop as about f/358, eight stops slower than the f/22 minimum aperture of a typical lens. Consequently my exposure times for ISO 400 film were 2-16 seconds (on a bright day). With high ISO film or a digital camera, you can get that down quite a bit. You could even record video, albeit at a low frame rate.
In our world of high-tech imaging, there is something very comforting about the simplicity of a pinhole, and I for one love the ethereal, haunting quality of the images.
Tags: Tutorials Editor Featured

RedShark 2020 @ All rights reserved.

Comments