
6 minute read
If you're a vlogger or even just making a video for you and your mates, good B-roll can bring a lot to a video - as long as it's shot well.
We know that the term 'cinematic' brings up all sorts of discussions about whether it is a tangible 'thing' or not. But I think most people understand what is meant by the term. Despite the plethora of feature films that use shaky handheld cameras, or even static ones, when we think of the term 'cinematic', we generally conjure up images of graceful moving shots or expansive vistas.
If you are out travelling and you want to be enjoying your environment and the people you are with more than making a video, you often don't want to be taking a lot of kit with you. Likewise, if you're going climbing or hiking extra kit is an extra faff.
Luckily most modern action cameras have some incredible stabilisation built into them, giving gimbal-like smoothness to the shakiest hands, but there's still a trick to getting good shots.
Generally, for establishing shots and b-roll like this, you'll want the camera to produce a more natural-looking image without the fisheye effect. Most action cameras now have a "Linear" mode, which gives you straight edges.
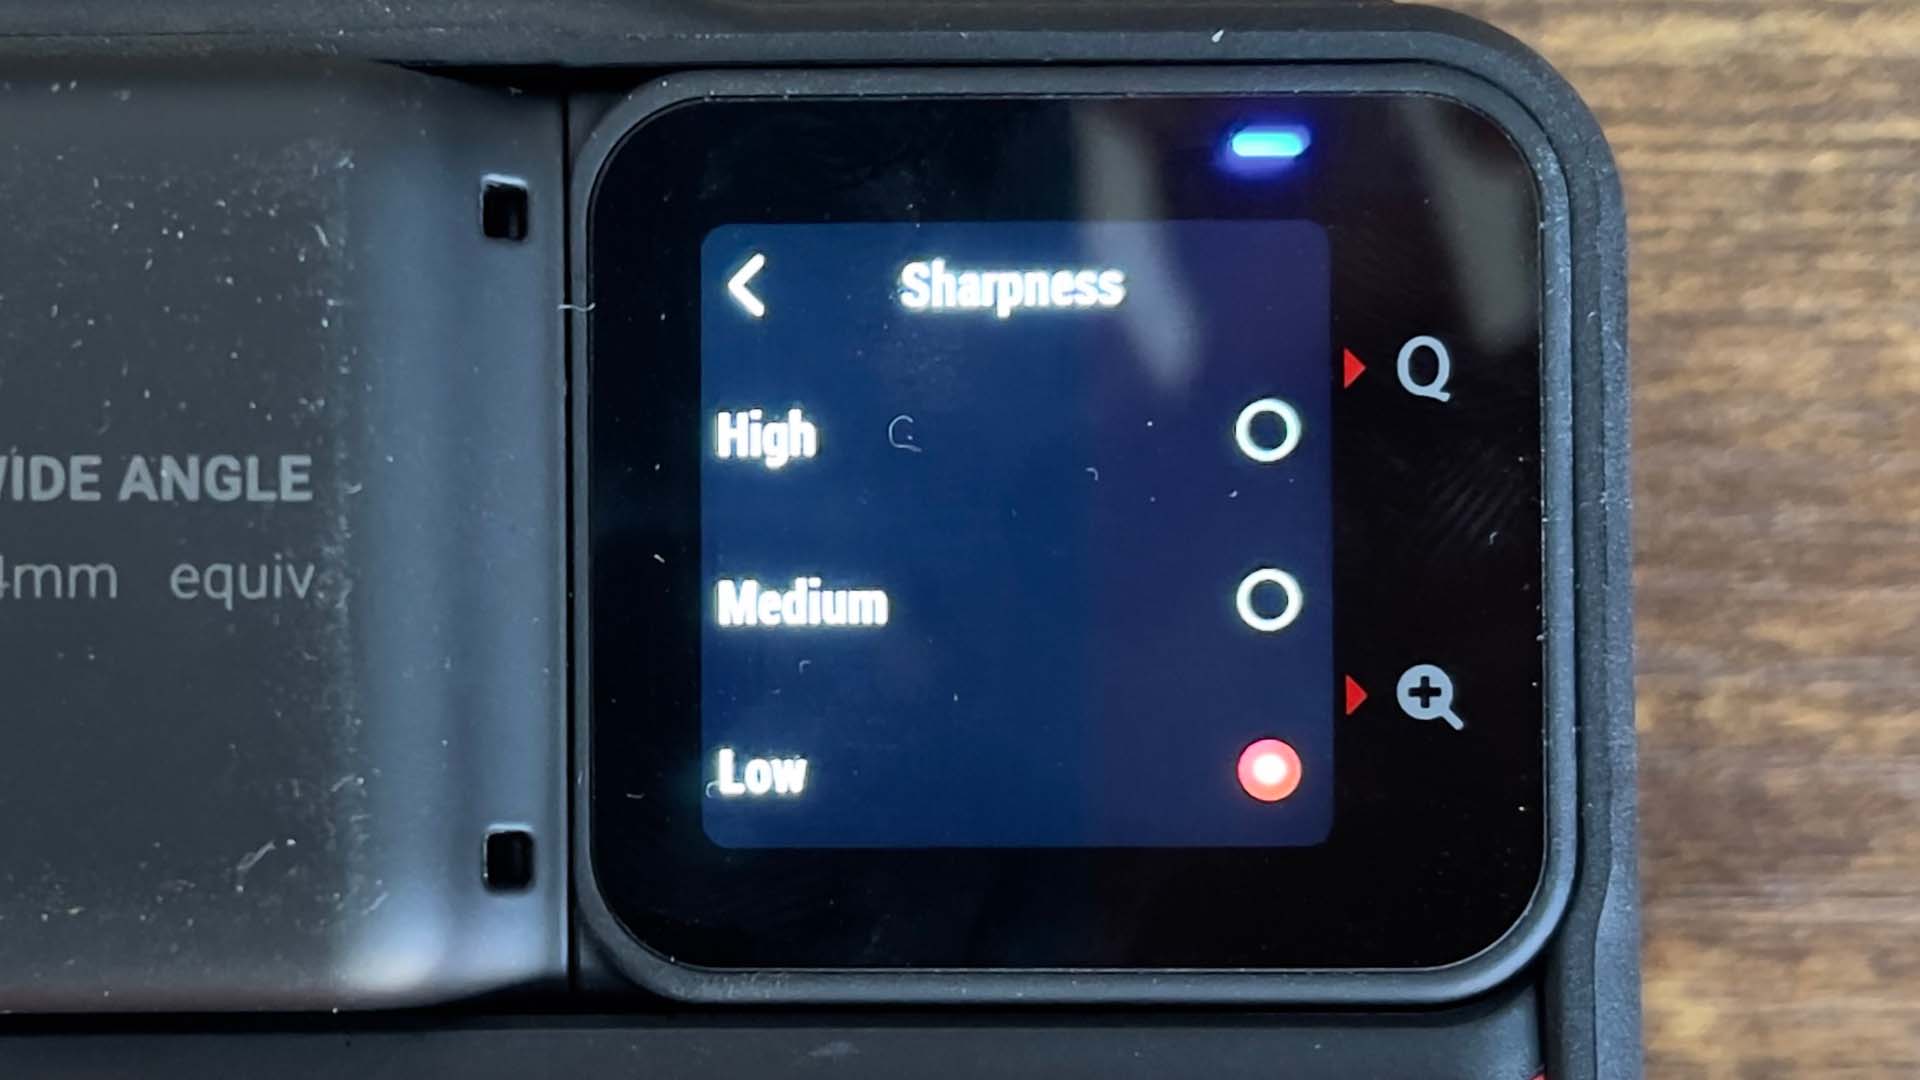
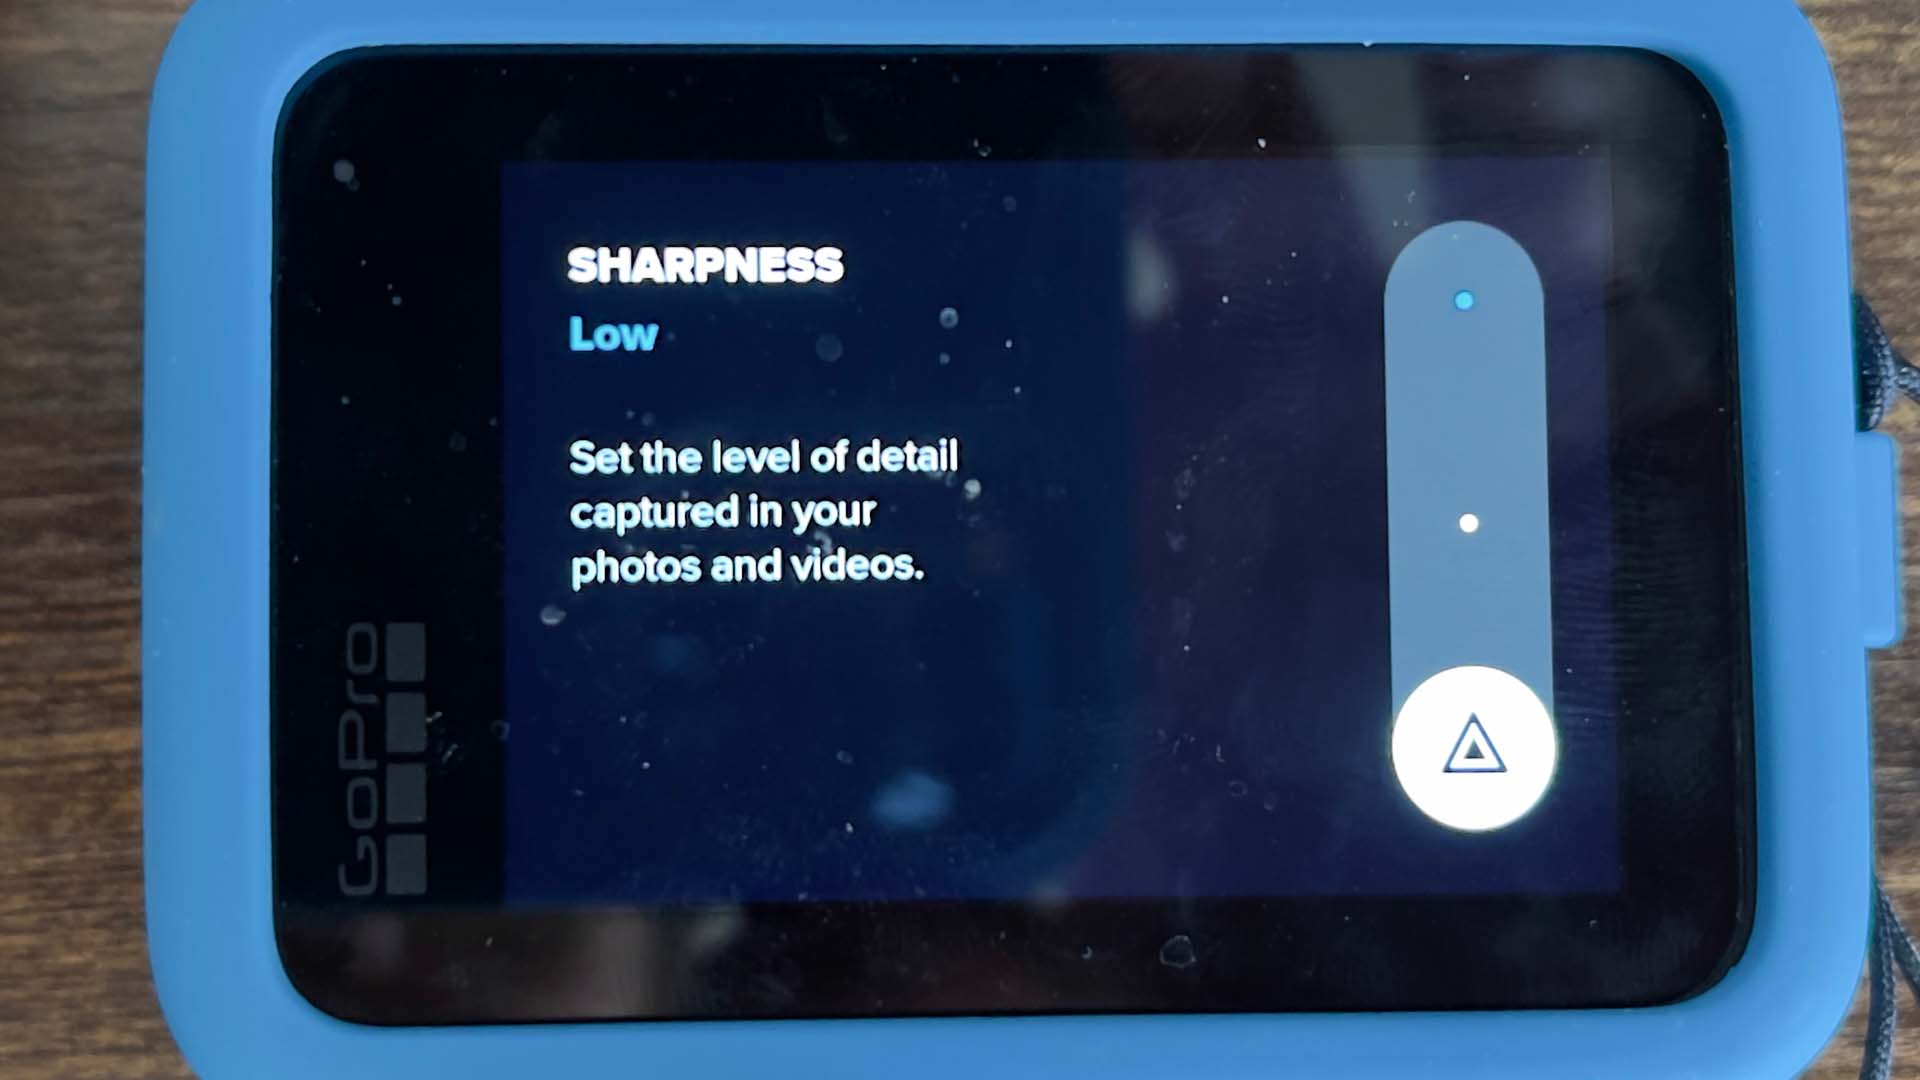
Other settings I recommend changing are to reduce the sharpness setting to the lowest possible and to increase the stabilisation setting to High, or even Boost if you have a GoPro.
Alternatively, with both the GoPro and the Insta360 ONE RS, you can do all the stabilisation in post with each camera's respective software. With the GoPro you can also use the camera's built-in stabilisation and then stabilise the shot further with the GoPro Player app. Whichever method you decide to use, it's possible to get a great result.
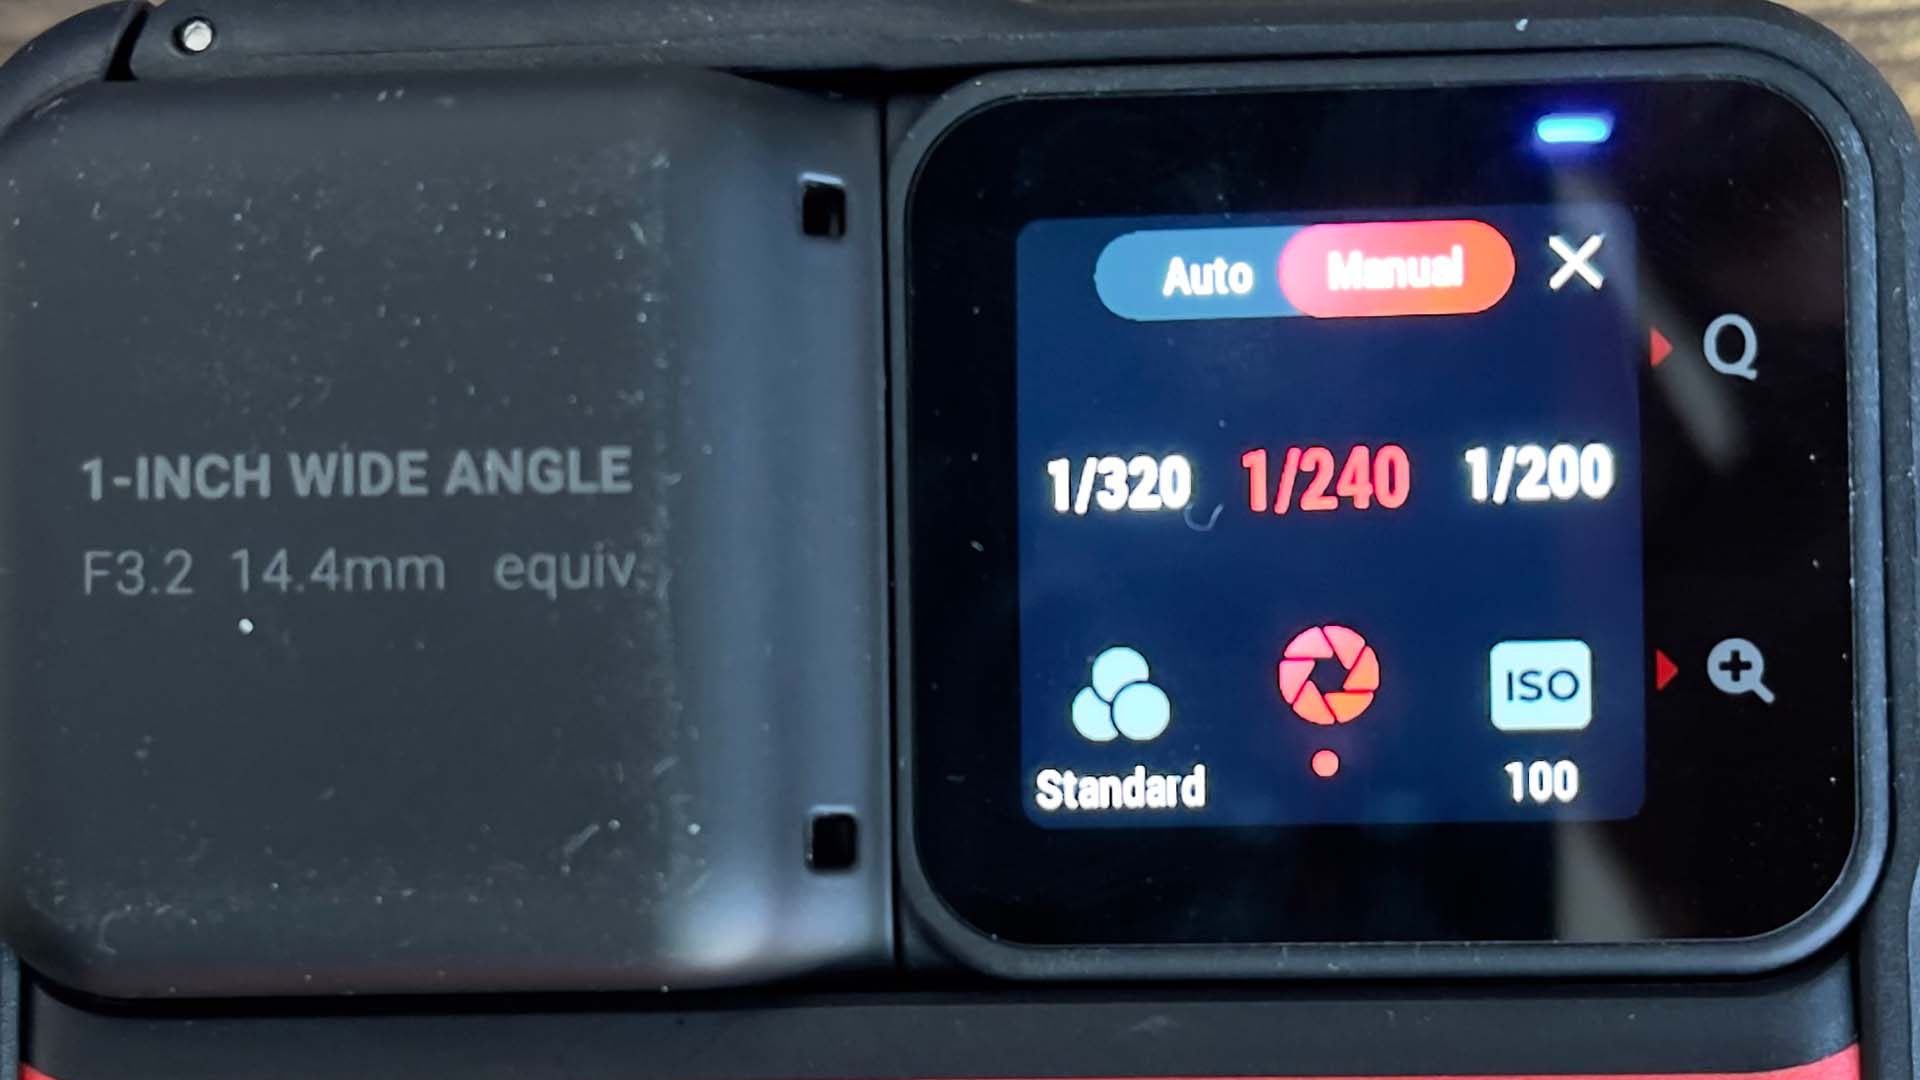
Shutter speed settings on an action camera are a tricky business, because along with ISO, it is the main way that the camera adjusts its exposure levels. The camera also relies upon a fast shutter to make the inbuilt stabilisation work. From the HERO5 Session and up, you can download the GoPro Labs firmware, which allows you to set a minimum shutter speed that the camera will go to, or you can set things up manually. no matter what type of camera you are using.
However, to make sure that the stabilisation works without any weird blur effects, I would recommend making sure you don't set the shutter below 1/240th. For traditional video and filmmakers this would be considered far too high at traditional frame rates, but for slow, graceful, establishing shots where there isn't much fast motion, it's absolutely fine. I usually prefer to dial in motion blur in editing anyway.
ND filters are a good way to have control over the exposure in your action camera image, particularly in bright light where you might want to bring the shutter speed to to the lowest possible and the ISO at a minimum. ND filters are for more advanced users, and they certainly have a place. However, for spontaneous use of the camera, where you're grabbing footage on the fly, they are an extra hassle.
Having said that, if you do want to progress to more advanced use of your camera, they are worth the time to learn how to use.
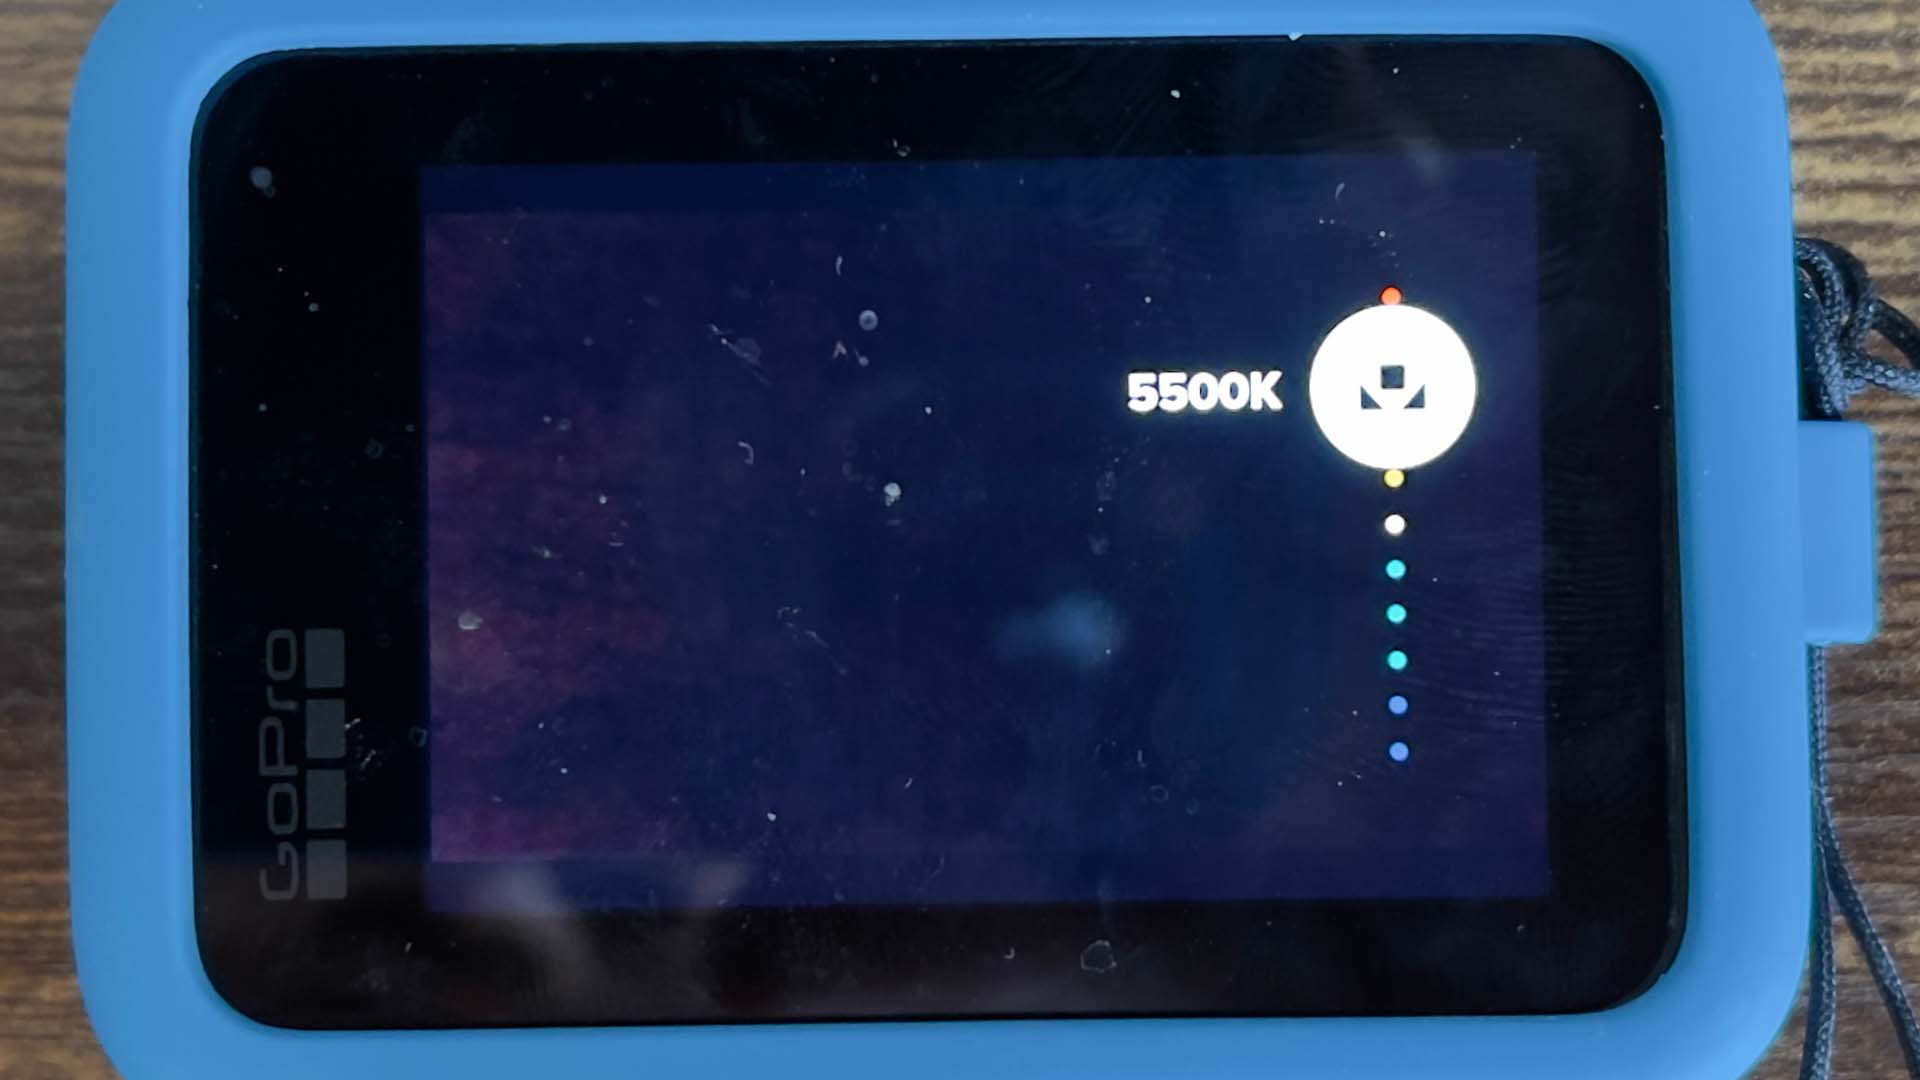
One setting that I would definitely recommend locking down for single shots is the white balance setting. Unless you're indoors under artificial light, a setting of around 5500K is a good starting point. Why do we want to lock this setting?
Let's say your shot begins in shadow and ends in bright sunlight. When the camera is in shadow, if the white balance is left to its own devices it will adjust the colour temperature to a higher setting, making any sunlight areas of the image that are in view very 'warm' looking. Once the camera is moved out into the sunshine the colour temperature will adjust and you'll see what's known as a colour shift as the camera changes the setting. This is not generally desirable, so setting the white balance to a fixed setting eliminates this problem.
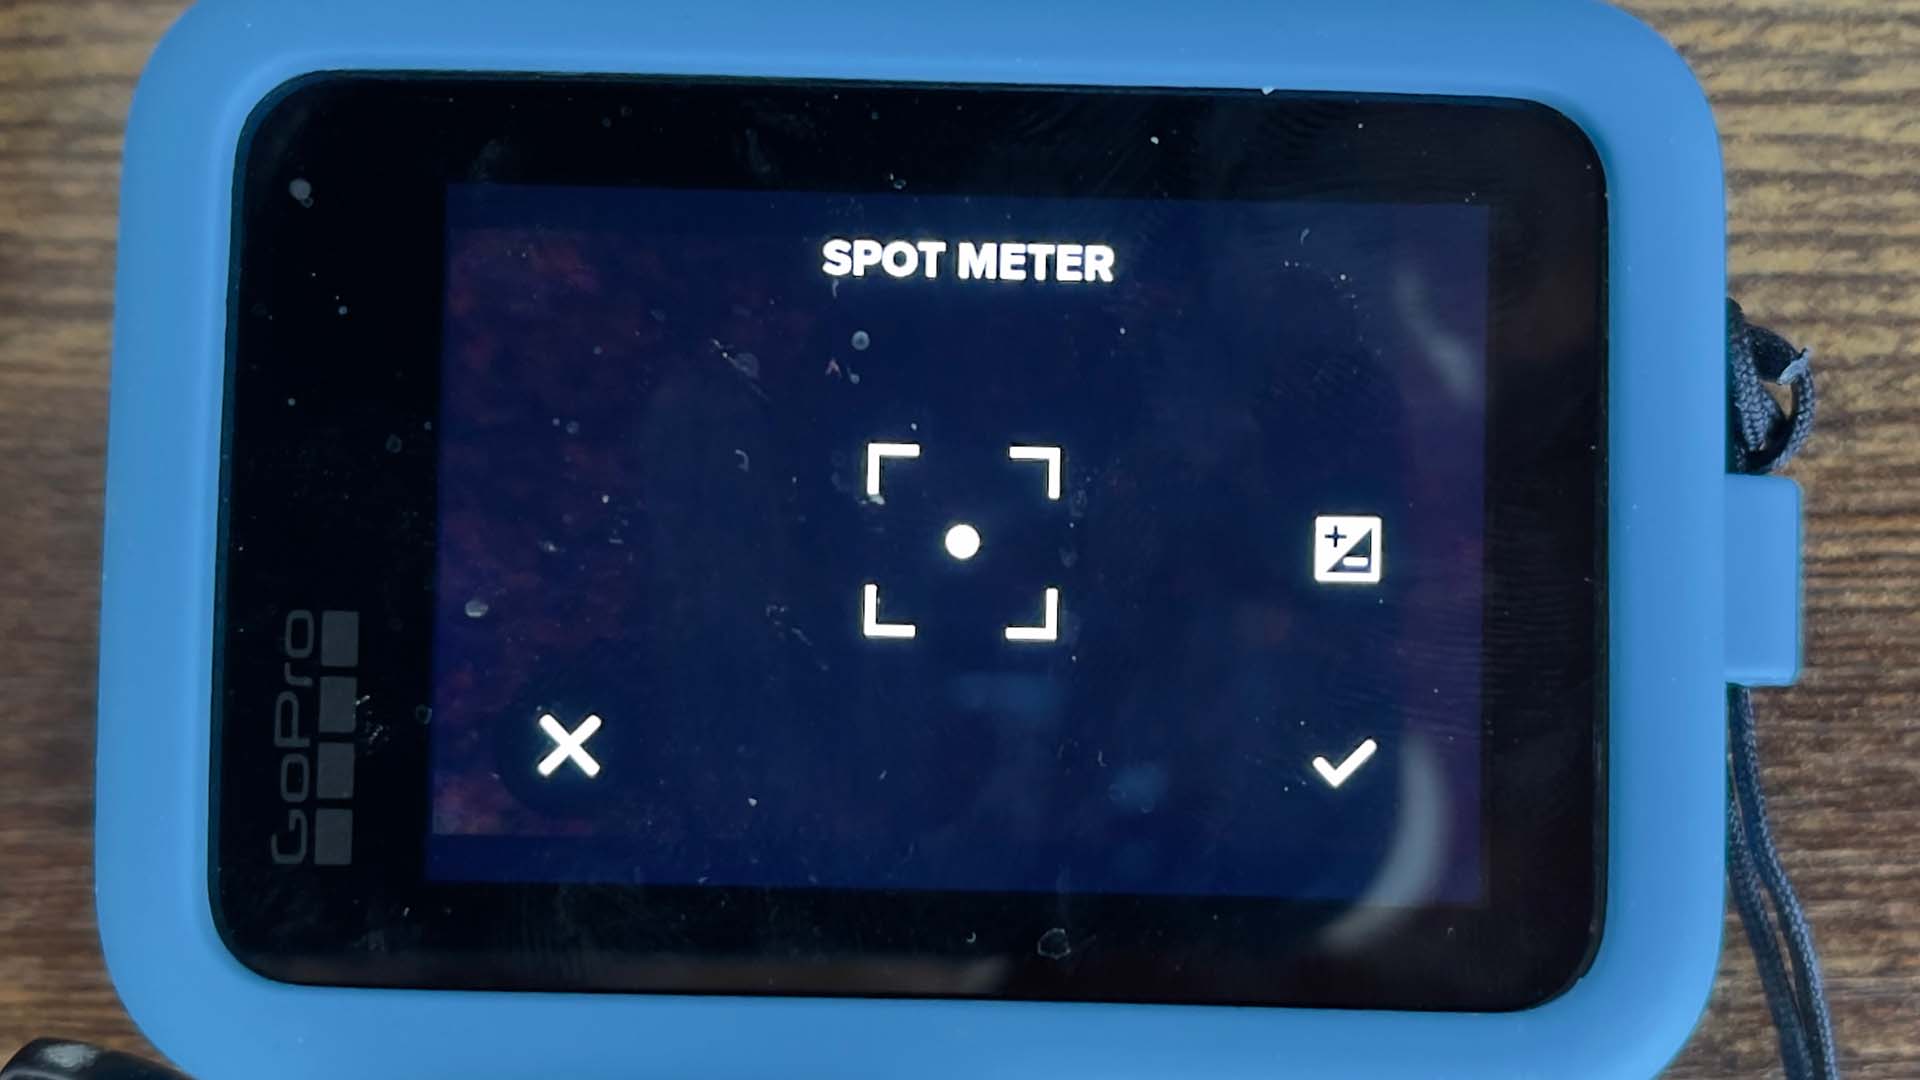
Exposure lock is extremely important for making sure you don't get any unwanted changes in the image during the middle of the shot. On the GoPro, if you aren't setting your shutter and ISO manually, press your finger on the LCD screen on the part of the image you want to expose for, and hold it there. The camera will then lock the exposure for that portion of the image.
On the Insta360 cameras, you will need to manually set your shutter speed and ISO in order to fix the exposure. Why would we do this? Again, if we use the previous example of moving the camera from a shadow area to bright sunshine during the shot, if we don't fix the exposure you'll see a drastic shift during the shot. This is because the camera might be exposing for the shadow portion of the image to begin with, thus making any of the sunlit parts of the picture over exposed. Then as the camera moves into the sunshine you'll see the exposure change to bring the bright areas down to the correct brightness.
Before you start getting the shots, find an interesting composition. The best shots are the ones that would look great if there was no camera movement at all. Think about your foreground, something that is particularly important with the wide angle lens of an action camera. Also, think about leading lines and where you want the viewer's attention to be in the shot and design your composition around guiding their eye to it.
Another tip is to make the shot motivated. In other words, give it a purpose. You might, for example want to show your location via a series of shots that gradually reveal the environment.
An example of a reveal shot could be positioning the camera at the beginning of the shot behind a large tree. The camera then moves away from the tree, revealing the location.
You might also want to think about how one shot transitions into another. An example could be that at the end of one shot you whip pan to finish it, and then at the start of your next shot, you whip-pan from the other direction to begin with.
The fake slider shot is perhaps the most widely seen and applicable shot on this list. It does pretty much what it says on the tin, and gives the impression that you've used a slider or dolly.
Now, you might think that all you need to do is move your camera sideways, and, yes, this is a large part of achieving the shot. However, a crucial thing to do is not to keep the camera pointing straight ahead. For an effective shot, pick a target, and try to keep it in the same position on the LCD screen as you perform the move. Doing this makes the shot an order of magnitude better.
A fake jib shot could encompass a few different camera moves. The most obvious ones are when the camera starts at floor level and moves to a height, or vice versa.
For this type of shot, use the same principles as the fake slide shot and keep a target object or horizon in the same part of the frame throughout the move.
A jib shot could also involve rotation. For example, if you mount the camera onto a selfie stick or pole, you can start high in the air facing the opposite direction of where you want the shot to end. You could then bring the camera to the final composition using your body as the pivot point at near ground level. This is another good way to reveal or establish a location.
A push or pull reveal, particularly the latter, can be more interesting for people watching than the previous shots, depending on the subject.
With the camera moving backwards, a pull reveal helps reveal a specific object or person/people. It can be more interesting to do because you can completely change the shot's dynamic in ways the viewers won't expect.
An example could be, with the camera in slow motion mode, you're on a beach at sunset, and the audience sees the waves lapping at the shoreline. Of course, at this point, the audience thinks it's just a standard landscape shot, but you could track the camera back in amongst a group dancing at a beach party or having a BBQ: And yes, I know that's my fanciful UK head dreaming of warm weather and lovely locations!
Here's a video I made during a short trip to North Wales that shows some of the camera moves above. This isn't high art, but it is fun!
Okay, I know advanced camera users and DPs who are reading this article will take issue at how I might have glossed over things like shutter speed settings and ND etc in terms of their importance. And, others may take issue at the use of the word 'cinematic'. But it's important to remember that this article is aimed at people who are casual camera users, and who are unlikely to be completely familiar with traditional camera techniques and operation rather than at making fine art feature films. What I'd like to do is instil an idea that even casual users can lift their videos with a little more thought and structure. Your friends and family will thank you for it!
Tags: Production Tutorials Action cameras

RedShark 2020 @ All rights reserved.

Comments