
4 minute read
 How can we ensure the most robust image from low bitrate cameras?
Sometimes we might have to shoot using a less than ideal camera, or circumstances dictate that the one we use has a low bitrate recording system. Craig Marshall tackles the best workflows for such cameras and how to ensure the highest quality throughout the post production chain.
I recently returned from a month long promotional video shoot across Japan and Taiwan but it was the first time I had shot nearly 1TB of material almost entirely on a DJI Osmo hand held gimbal device fitted with DJI's entry level Zenmuse X3 camera.
Apart from an inconspicuous 20mm (equiv) fixed focus wide angle lens on a gimbal, the specs of the Osmo camera are not very compelling from a professional perspective. The X3 has a 1/2.3" sensor and records C4K, UHD4K and HD to a Micro SD card with a bit rate of only 60Mbps, so it's hardly in RED or even GH5 territory. However, to extract the very best quality from all my gear irrespective of price, I have developed a few tips for working with 8-bit compressed LongGOP codecs which should help maintain your initial picture quality throughout the post production process.
For this Asian shoot, my video format was 3840x2160 4K at 25P, and my initial pre-travel 4K test recordings to a high quality Class 10 Micro SD card proved very successful with no dropped frames. But when I examined the images more closely on our 55" 4K TV, I noticed the often reported 'lag' or jumping' combined with some compression artifacts which typifys low bitrate acquisition codecs.
Unperturbed, I next trailed a Class 10 U3 micro SD card and the results saw none of these issues, even with fast moving fine detail such as tree foliage. Running Blackmagic Design's Disk Speed Test via a USB3 micro SD Card reader at the 5GB stress level, showed the U3 rated card (64GB Sandisk Extreme Pro) recording a consistent 185Mbps write speed as opposed to only 104Mbps recorded by a typical Class 10 U1 rated card. Tech specs may point to slower card compatability with the X3 but as always, experimenting can prove the opposite.
One of the biggest issues I've noticed with material shot on popular action cameras such as GoPro's and the like, is an unnatural looking staccato or jitter caused by a shutter speed set too high for a given frame rate. Modern digital cameras are so sensitive that if the shutter is set to auto so as to maintain correct exposure, the resulting pictures can look extremely unnatural. The traditional rule of thumb used to achieve a smooth video image is a 180 degree shutter. That is: 1/50th of a second for 25fps, 1/60th for 30fps and 1/100th for 50P and so forth. My tests on the Zenmuse X3 would seem to indicate that using a slower shutter speed to add that little bit of 'motion blur' to each frame might help the low bitrate acquisition codec perform to it's best. Shooting a low saturation 'log' gamma option might help too as it should reduce the amount of colour data that the codec has to deal with.
Of course, a slow shutter speed will require the use of at least an ND16 filter in bright daylight to limit the amount of light hitting the sensor. Variable ND filtes are a great idea so long as they are of slim design so as not to create any unwanted vignetting of your image.
If we must settle for low bitrate compressed 8bit 4:2:0 codecs, then they are best suited to acquisition and delivery but not for post production. Although this may fly in the face of current popular practice, I'm still a big fan of the humble transcoder. Disk space is a tradeoff and although converting an 8bit 4:2:0 codec to 10bit ProRes or DNxHR Post codec may or may not offer increased grading latitude (I believe it does, especially with log images) but it certainly offers at least four pro level video post advantages:
1) You will get an independent and easily edited video frame thereby avoiding the need for your CPU to work overtime building frames from the compressed stream
2) You will get uncompressed PCM audio in as many discrete channels as you need.
3) You will get proper SMPTE timecode with the ability to reset the start code to zero, set a specific start frame number or have it based on the original codec's time of day metadata
4) You will get the ability to embed a meaningful Reel Names directly into your transcode. eg: 'Tokyo Nights' rather than just '001'
Your favourite transcoder may also offer smooth, pre-edit frame rate speed conversions, image re-sizing, viewing LUT implementation for log files and even image stabilisation. Why does any of this matter? Well, apart from good file house keeping, in today's era of affordable post production grading where you may be asked to hand off your edit's EDL/AAF or XML Export to a professional colorist, transcoding ensures a clean timecode list which can save your colourist a big headache and you a lot of money. Transcoding takes too much time I hear you complain. Maybe but in my experience with modern batch transcoders and fast CPUs, a little time spent in preparation can be offset a dozen fold later with time and money saved.
Ask any professional colorist what his or her biggest issues are when receiving files from inexperienced editors and they will tell you all about the conform where it is their job (mostly at your expense) to precisely reproduce your edit inside their grading programme. If you have reels with multiple timecode resets or broken code, expect to be billed big time. Speed ramps, multiple frame rates and EDLs that make no sense at all are a colorists worst nightmare.
I'm a firm believer in creating high resolution master files, usually as an uncompressed .MOV or even as an RGB .DPX image sequence. The latter requires a lot of disk space but that is cheap today, and as the popular DaVinci Resolve operates internally in RGB 32bit float, keeping your Master in RGB format makes sense. Finally, your favourite transcoder can also be used to create any sort of deliverable from a wedding DVD, to an H.265 file for Facebook or an MP4 for Youtube, all the way to a high quality ProRes deliverables for cable or TV distribution.
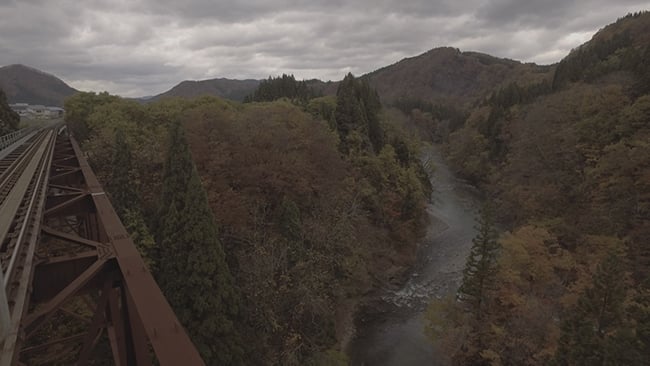
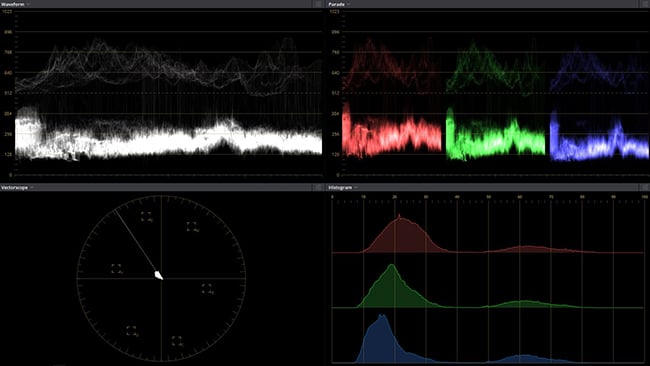
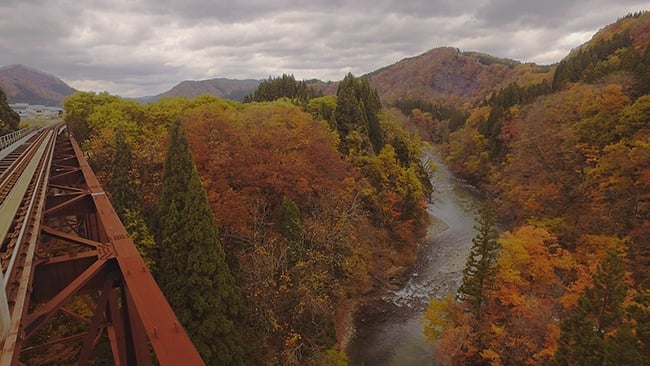
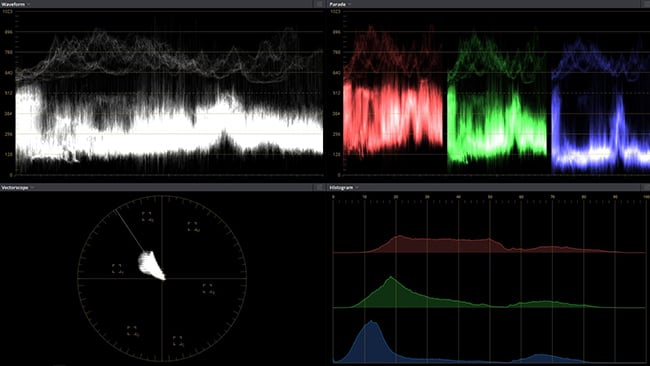
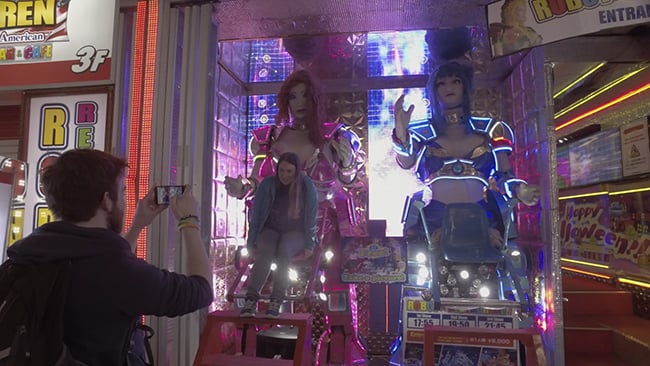
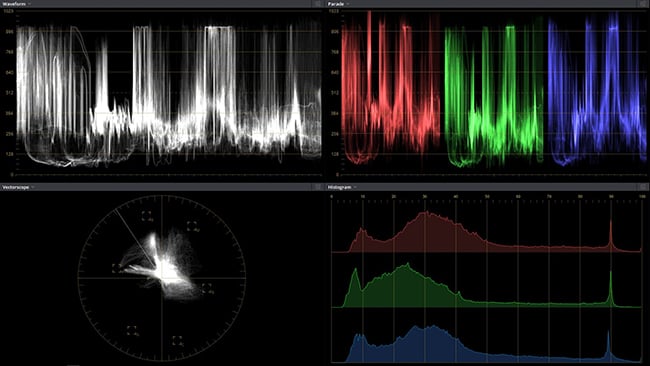
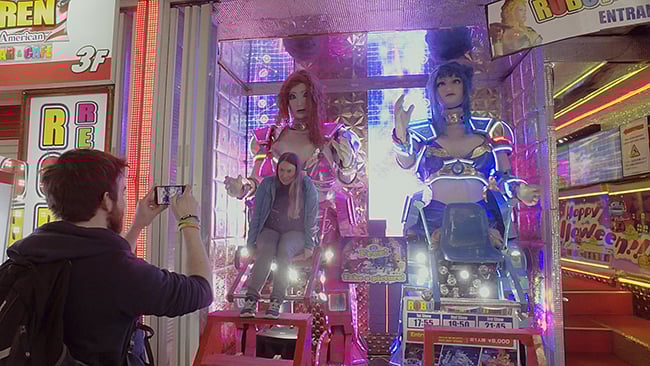
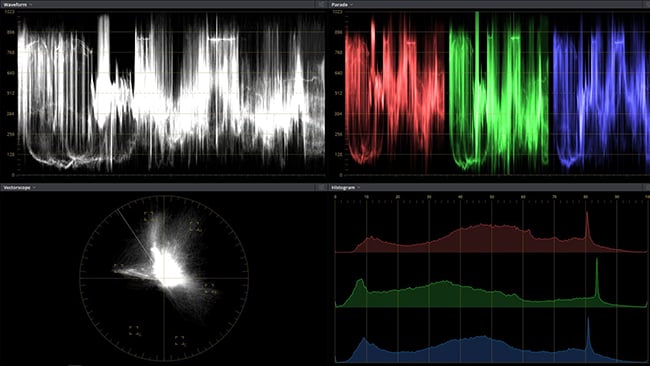
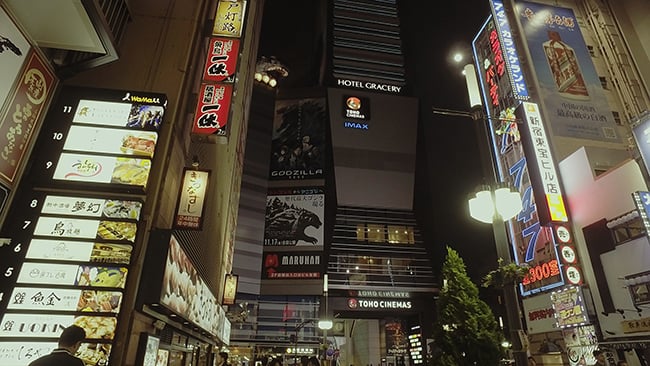
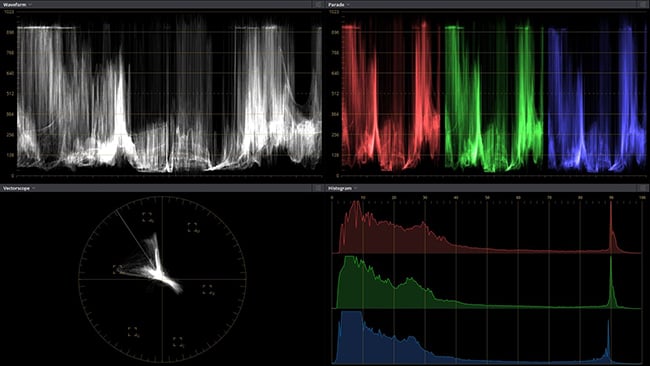
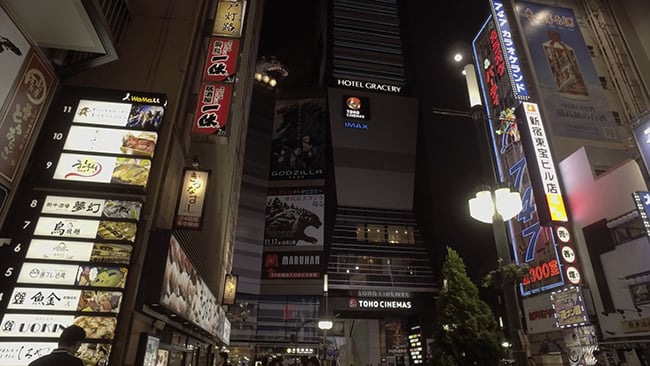
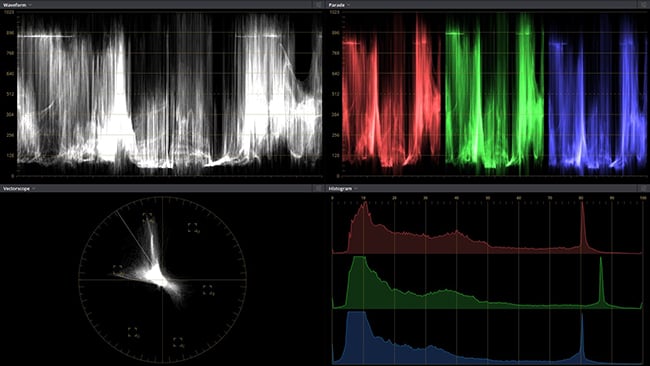
Here are some stills exported directly from my DaVinci Resolve COLOR page. The first image in each example is the ungraded frame exported from a 10bit 4K DNxHR HQX 4:2:2 transcode from the Zenmuse X3 camera's native 8bit H.264 4:2:0. Some frames show an almost insane level of grading but in most cases, the DNxHR codec holds up well.
Note that the original Resolve 4K Tiff Export has been resampled to an JPG for publication. Let me know what you think in our Reader's Comments below.
Tags: Tutorials

RedShark 2020 @ All rights reserved.

Comments