3 minute read
Previously we looked at the camera. In this part Craig Marshall looks at how best to record the image from the FS5.
If you missed the first part of this series, read part 1 here.
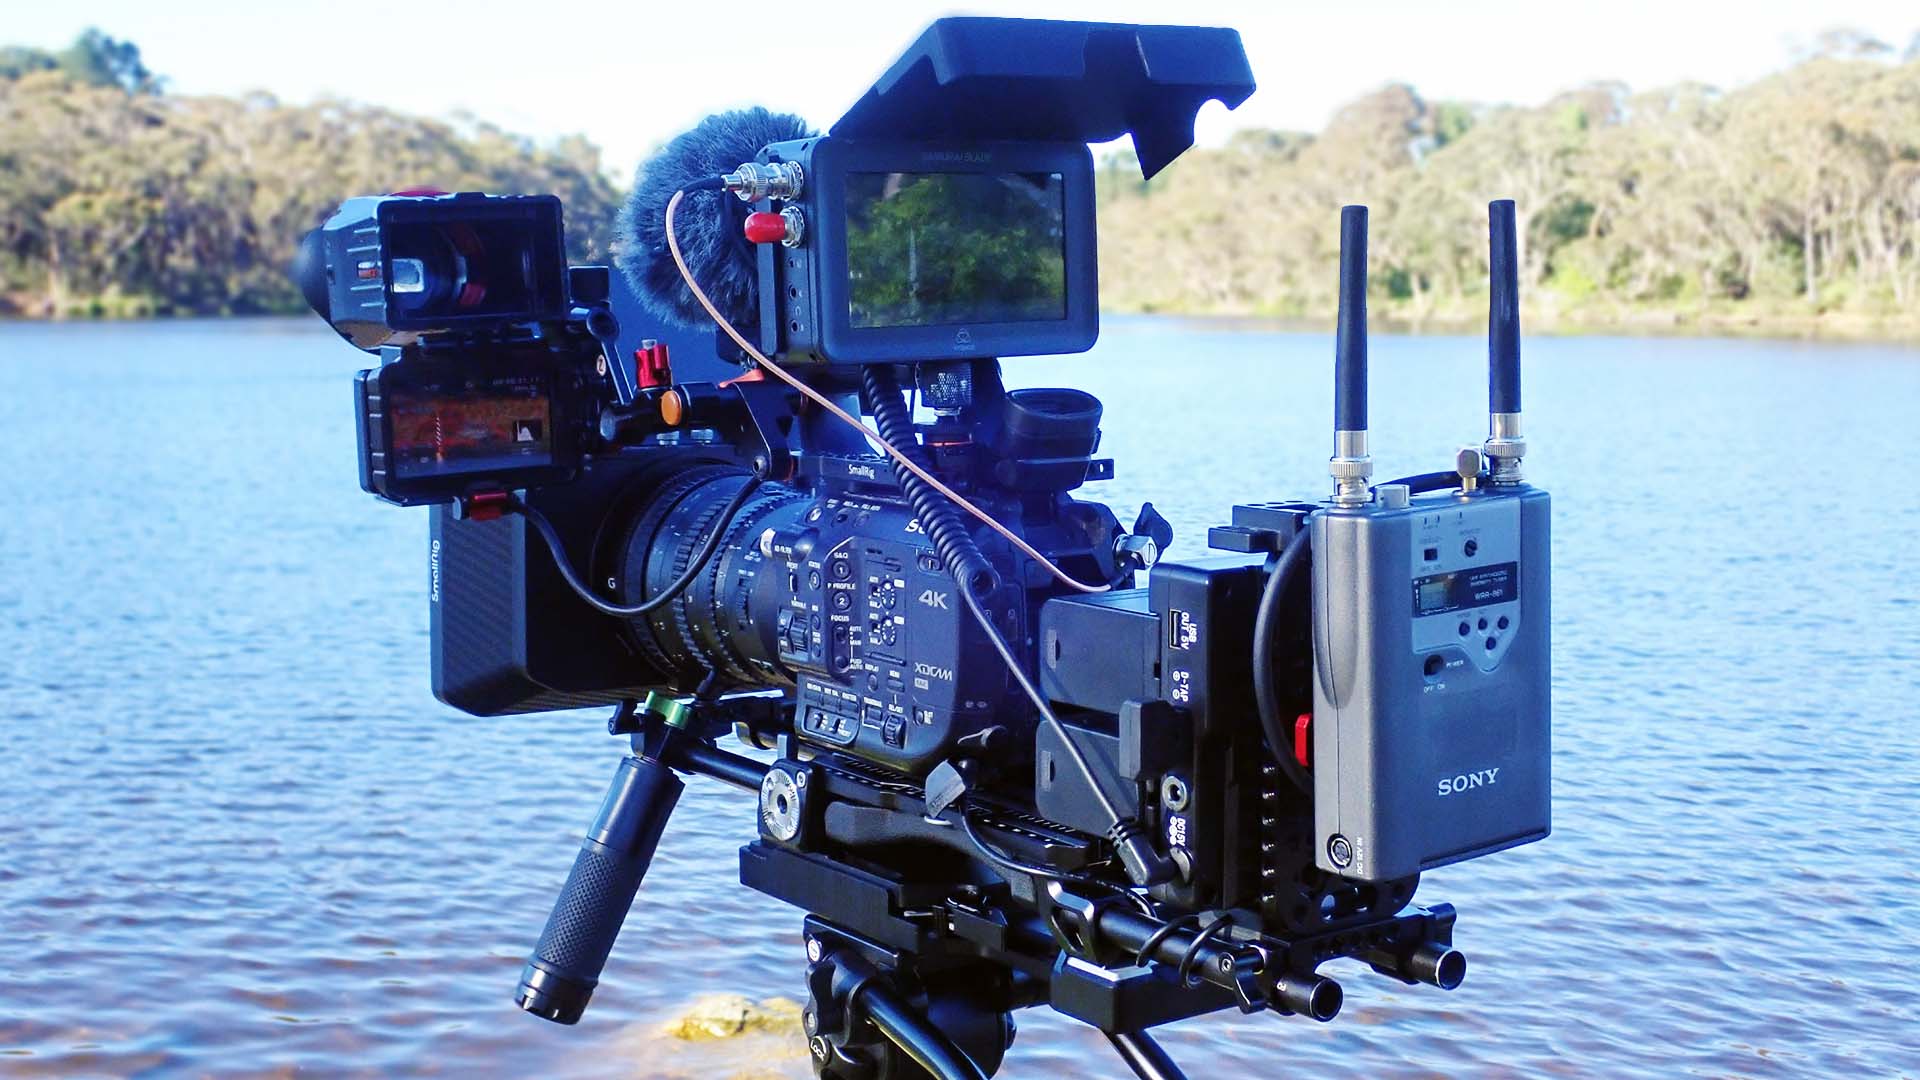
Voila! Enter the Atomos Samurai 'Blade' SSD recorder. This model features a very bright, high resolution 5" IPS screen with optional waveform/vector/parade overlay, file playback, 12 channel SDI/Analogue audio recording with a useful gain control on the stereo analogue input. Although high-capacity SSDs are now very affordable, the Blade is a discontinued product, but they can still be found cheaply as they were superseded by designs with larger 7" screens, 4K capability and even RAW recording. The Atomos Blade tops out at HD/30P but it will capture 10bit 422 colour direct from the Fs5's 3G SDI output and can be triggered to automatically start/stop from any of the camera's multiple controls. It is small & lightweight so seemed to be the perfect solution for my needs if only I could hide it somewhere out of the way.
With the Sony 18-110mm zoom fitted to the Fs5's native E-Mount, I wanted to fit a protection filter to the front glass. Call me old fashioned if you will but for a 95mm thread, high quality digital filters are expensive but as I already owned a selection of 4x4" Schneider Optics glass, my solution was to fit a matte box instead. Remarkably, Smallrig's excellent carbon fibre 'clip-on' matte box proved cheaper than a high-quality screw-on filter for 95mm thread but with the combined weight of one or two glass filters, I would need proper support so rods or rails would be essential.
Whilst my second hand Fs5 came with a heavy duty Smallrig tripod quick release plate & camera base plus a 400mm rod set with sliding shoulder rest, I wanted to do this properly. Unlike many setups I've seen, a shoulder rest needs to be located directly below the center of balance and this is generally the camera itself but as many have found, this can lead to another issue: for a shoulder mounted ENG rig to be properly balanced, it's important that there's not too much weight forward. Coupled with my multiple power supply voltage needs, I researched a suitable D-Tap battery solution which could provide power for the camera and all its accessories. If successful, the latter could also act as a counterweight to the lens/matte box whilst the shoulder rest provided the fulcrum.
-JPG.jpeg)
The Atomos Blade SSD recorder provides one or two cheap 'hot swappable' 7.4v NP batteries to power it but the Fs5 needs a special 14 volt battery which can be very expensive. After purchasing a low-cost rail mounted vertical cheese-plate, I found a simple D-Tap device which would accept two large capacity NP 7.4 volt batteries wired in series so would be able to power the Fs5 via it's auxiliary DC input. With my D-Tap device screwed to the cheese-plate, on-board 15 volt battery charging is possible and it includes several 15 volt and 5 volt outputs but the high capacity Li-Ion batteries I bought for it each came with their own micro USB charging socket, 5 volt USB socket plus a capacity check switch with LED readout.
My solution for powering the Atomos Blade recorder was to fit a 'dummy battery' which looks like a regular 7.4 volt NP battery but is in fact a regulated D-Tap converter, able to supply the Blade from a 14v D-Tap power source. To power the Fs5, I found a special 'regulated' D-Tap cable from Wooden Camera which would supply a stable 11 volts DC, more than enough to power it all day long from a 14v D-Tap battery bank. It is possible (and recommended) to power the Fs5 using both the regulated D-Tap cable and the internal battery. More about this later...
My second-hand but never used Atomos Blade recorder came with the native ProRes codec installed but as it had not been registered, I was able to install both the latest firmware and a free Avid DNxHD codec which I prefer to use. Because I record to 10bit 220x at 30P directly from the Camera's SDI using timecode to trigger the recorder's start/stop, I have no need to see the screen once the recorder is activated so I was able to 'hide' it on the battery pack using V-Locks where they could both act as counterweights to the lens. However, I made it possible to quickly relocate the Blade to the top of the camera and flip up its home-made screen cover so I could use the camera/monitor in a 'studio' configuration if required.
In the final part of this series, Craig looks at how to build a balanced rig.
Tags: Production Cameras

RedShark 2020 @ All rights reserved.
Comments