3 minute read
Blake Jones has been working as a colorist and film restoration specialist for over 27 years. Here, in the first part of a tutorial series, Blake lifts the mysteries behind colour grading, and precisely how to do it. In this part he looks at primary colour correction, which will form the basis of all your subsequent picture adjustments.
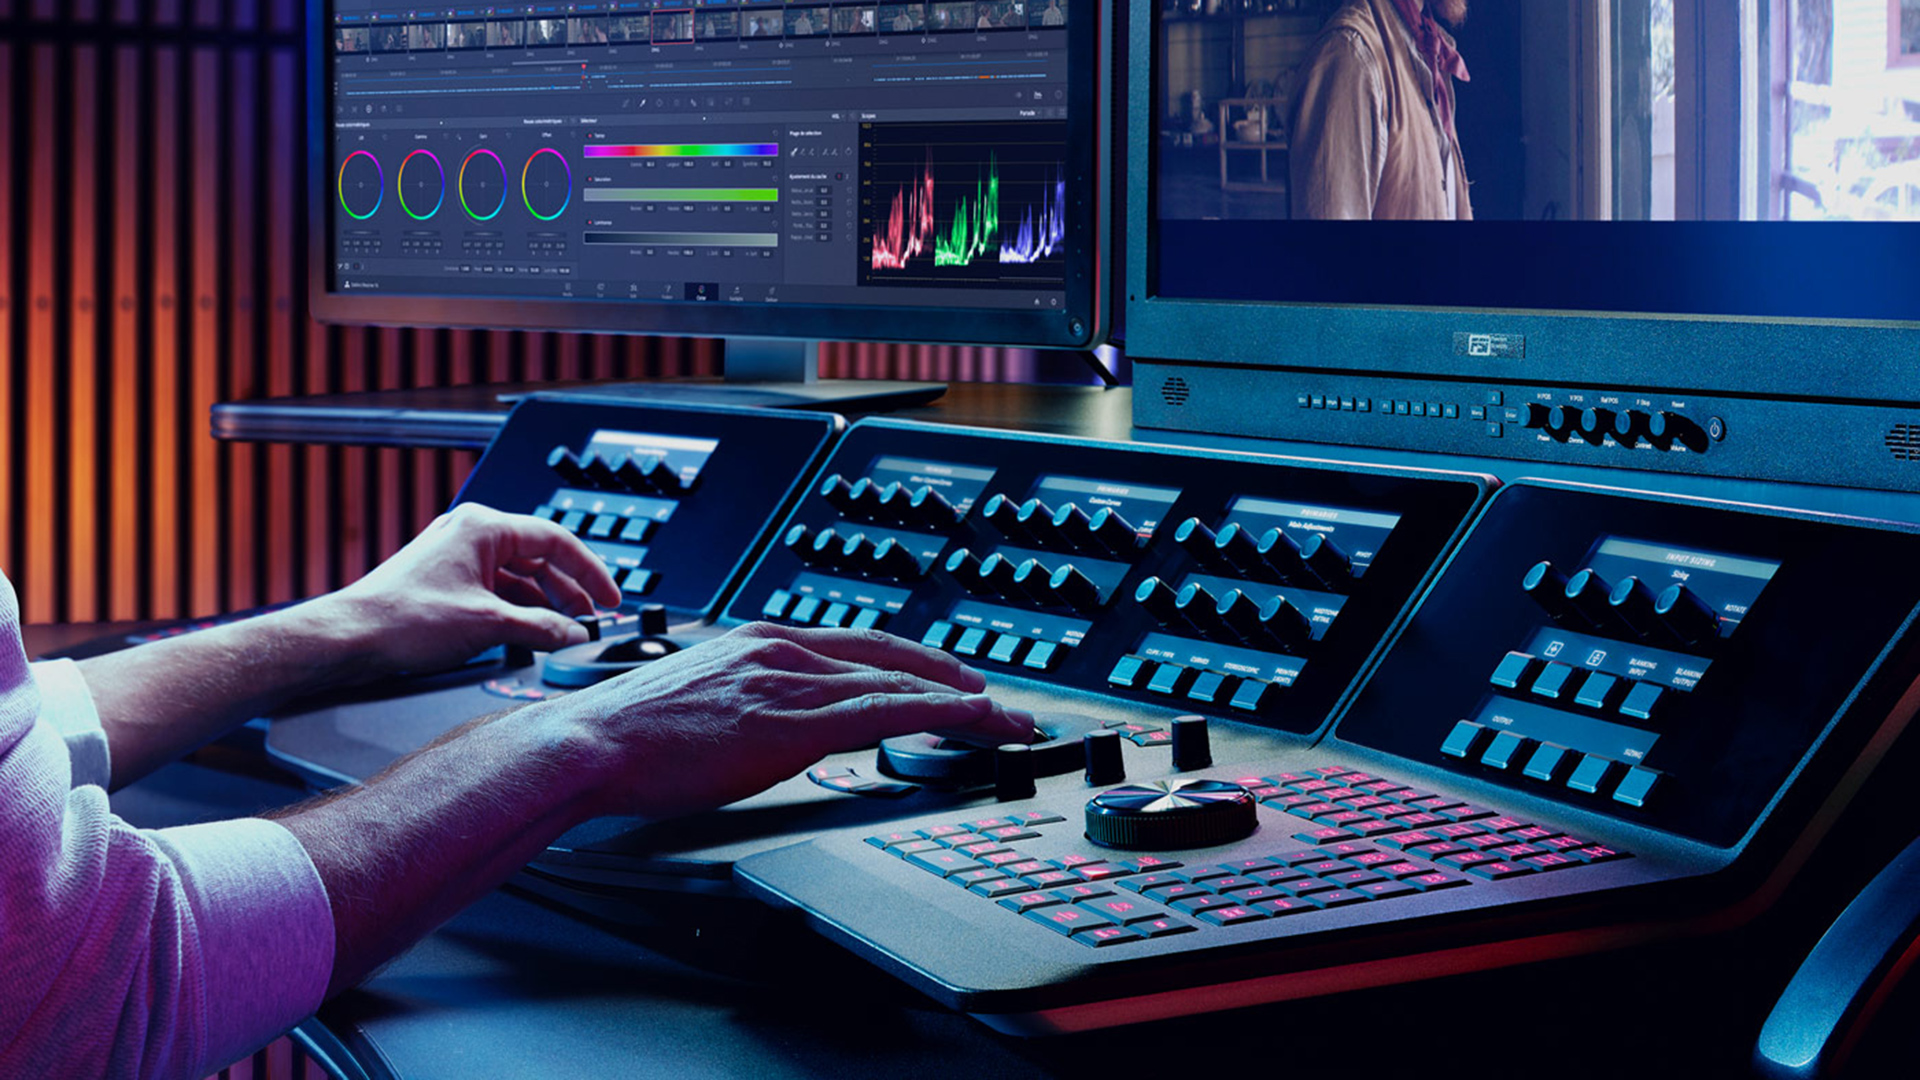
In the first part in this series of Basic Colour Grading, we’re going to start with primary colour correction. All the graphics we’ll show also feature the Parade Display scope so you can see what is actually going on in these corrections.
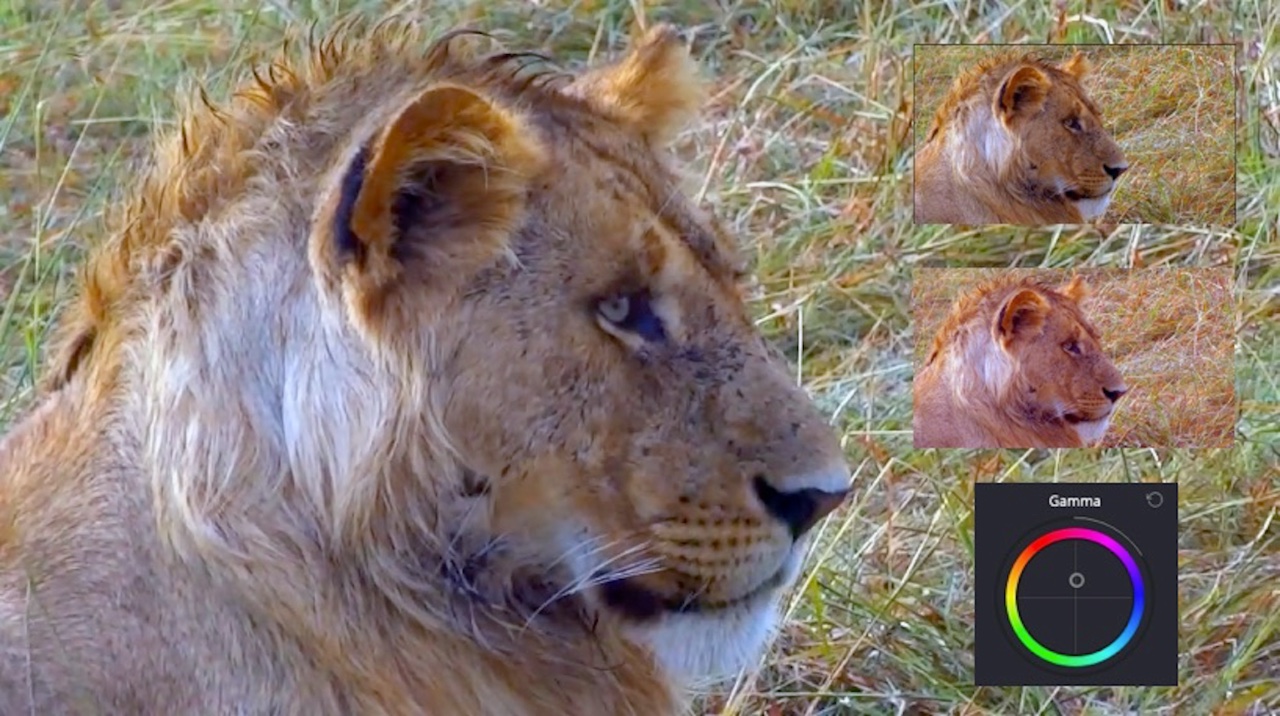
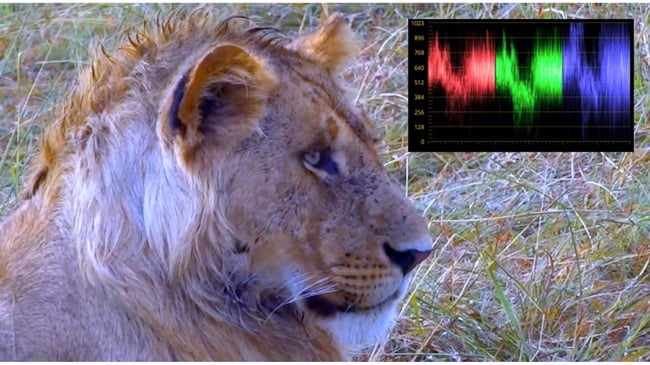
Let’s start out with this log file of the lion. If we compare the image to what we see on the scope, we can see the effects of the log file. The effects of the log file can be compensated by adding a log-to-linear LUT, or we can simply compensate using the primary colour correction controls. What we are seeing here is the lift elevated, luminance compressed and the gamma curve expanded.
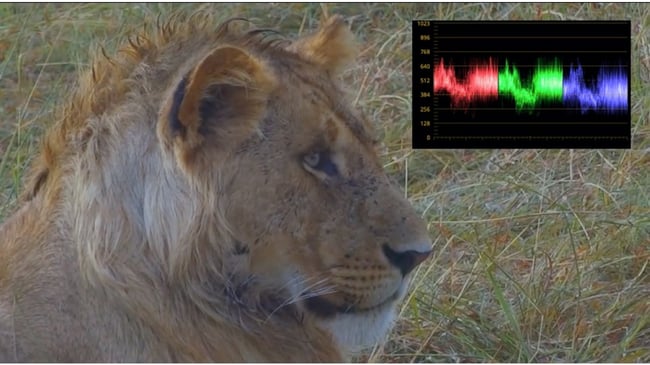
What we need to do first is get the lift back closer to zero on the scope, taking care not to crush the black or lift information. The term crushing refers to lowering the lift to the zero point on the scope so far that information is lost. This is something that we want to avoid. We then need to balance the lift information. It’s very simple to identify this on the scope. For example, the Parade Display scope is showing us Red, Green and Blue information with zero being black and 1023 being peak white. If the lift correction is higher on the red channel, the image will show red information in the dark areas of the image as seen in the picture.
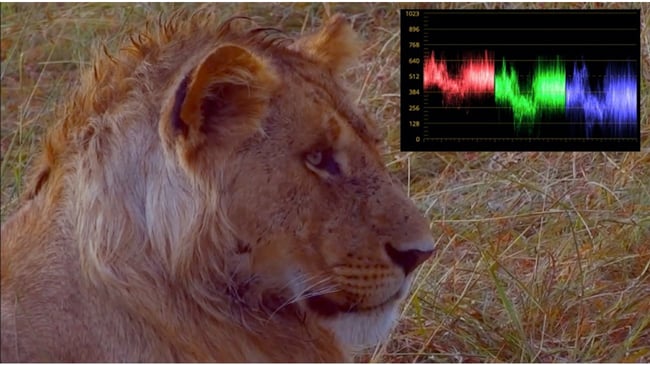
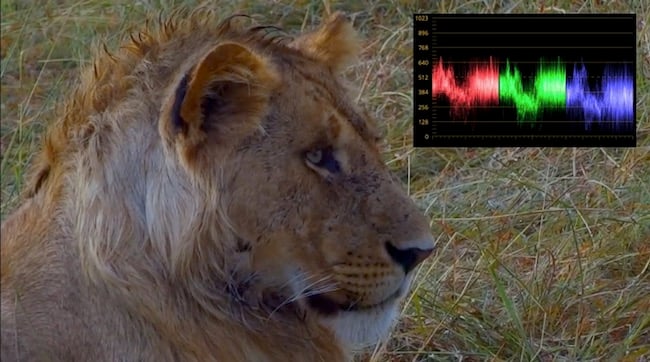
An equal level on all three channels in the lift area will give us neutral lift or black information. Once this has been done we can start adjusting the white or gain control for a neutral correction. As we can see here, pushing the gain blue channel up or higher will give us blue information in the gain or white areas of the picture.
A good equal balance in this area will result in a neutral gain correction with all channels showing similar levels. If we push the gain past or higher than 1023 on the scope, this will result in clipping the signal. As with crushing the lift or blacks, clipping the gain correction will result in loss of details and should be avoided.
At this point, we’ve balanced the lift and gain and we have a good but somewhat lifeless image. We can now go on to adjusting the gamma control. The first step is to turn the gamma level control counter-clockwise. This procedure will result in a linear gamma correction. As there is a certain degree of interaction between the lift, gamma and gain adjustments, the user may have to return to these controls to adjust them to retain a neutral and unclipped correction. Now that we have adjusted the gamma level to our satisfaction by removing the effects of the log correction, we can adjust the colour of the gamma to achieve the desired look. When working with the gamma control, this can be thought of as our paintbrush. The gamma colour adjustment can be used to achieve any look that we desire. We could go for a warm look or even a cool look.

For our initial primary colour correction, we really don’t want to inject an extreme look into the graded image. An initial correction that is too warm or cool could limit what we can do in later nodes or layers. In certain situations, the addition of a small amount of overall saturation can be extremely helpful. This additional amount of saturation can assist in qualifying a colour through its hue, saturation and luminance values. If the desired look should be less saturated, a correction at the end of the procedure can be added to lower the saturation to the desired amount.
So now the big question is why we want to start out with a good and well-balanced primary correction. The simple answer is that a good primary colour correction is the basis for your final correction. In order to further explain this, let’s turn back the clock to when I used to grade the old Technicolour films that were shot during the 1940s and 50s. These film elements had absolutely no correction built into the material. This happened because it was necessary to create a 35mm colour Reversal Intermediate or CRI negative from the yellow, cyan and magenta camera separations.
The reason for this was that Technicolour cameras during this era exposed three rolls of film simultaneously. Each film or strip was sensitive to a different colour. One was used for yellow, one for cyan and one for magenta — hence the term three-strip Technicolour. Once the CRI was created from the three separations, the end-result was each shot being completely uncorrected. My general plan of attack was to make one pass whereby I would do a rough primary grading for each shot. The idea here was to just get the colour looking somewhat normal. I would then view the entire roll and judge which shots required additional attention. Once I was satisfied with the primary grading of each scene, I could then decide if any scenes required secondary colour grading or qualifiers. When grading these projects the result was a primary colour grading so well balanced and powerful, little or no secondary colour correction was required.
The next instalment of this series will be covering the uses for secondary colour correction also known as secondary qualifiers. This will cover when we should use them and what the best qualification techniques are.
Find out more about Blake Jones' work on his website.
Tags: Tutorials

RedShark 2020 @ All rights reserved.

Comments