3 minute read
Replay: Delving deeper into light. Lighting is the single most important aspect of filmmaking of any kind. Without it, film has no shape, no mood, no atmosphere, and no dimension. DP Neil Oseman takes us on a journey to achieving depth through lighting.
Directors of photography are always striving to create images that are “cinematic”. This is a magical and elusive quality, the exact meaning of which is a popular topic for debate in the industry. I believe that a big part of what makes an image cinematic is depth.
Christopher Nolan once said: “95 percent of our depth cues come from occlusion, resolution, colour and so forth, so the idea of calling a 2D movie a ’2D movie’ is a little misleading.” As well as looking more cinematic, a shot with depth will usually make the subject stand out from the background and generally be easier for the viewer’s brain to decode.
Clearly, it is incumbent on a DP to ensure that their images are not “flat”, so how do we do this? There are a number of things we can do with the camera — framing an image with elements on multiple planes, executing a dolly move to create parallax, reducing the depth of field, using wide lenses or low angles to emphasise scale — but a big part of it is lighting.
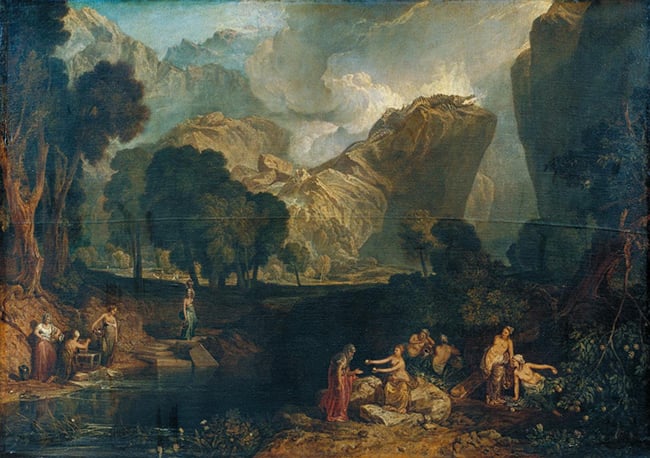
The key is to create layers. Look at a classical landscape painting by Turner, for example, and you will often see multiple planes, alternating in light and shadow. By separating the layers with contrast, the painter has made it easier for the eye to interpret the different planes and understand the perspective. It also makes the image more dramatic, or perhaps even “cinematic”.
A simple example of how a DP could emulate this effect would be a scene in an office with overhead fluorescent lighting. Early on in my career, I was a runner on a corporate video that featured such a scene. To add depth and interest to the image, the DP had every other row of tubes turned off to create layers of light and dark.
Another common pattern of depth is dark foreground, mid-ground at key, bright background. In his seminal 1949 cinematography manual Painting with Light, John Alton explains why this works so well:
“We sit in the dark in the cinema looking at a light screen. This gives a definite feeling of depth. In order to continue this depth on the screen, the progression from dark to light must be followed up. The spot which should appear to be the most distant should be the lightest, and vice versa.”
In the age of colour, we can further enhance depth by using different hues for our different layers. For example, imagine a daylight interior scene. We are shooting over a messy desk to a woman reading a book in an armchair. Behind her is a window with a garden outside. We can flag the desk to give us a crisp, dark foreground. The exterior will be naturally bright. We can add in a practical by the armchair to ensure the woman is at key and being tungsten it will give a warm cast to this plane of the image, contrasting chromatically with the colder daylight outside.
This idea of a cooler background and warmer foreground works particularly well because it mirrors the effect of atmospheric haze. Stand on top of a hill and look at another hill in the distance and that second hill will appear bluer than the one you’re standing on, because of the intervening atmosphere. It will also seem lighter, hazier and lower in contrast, a set of qualities we can create on set using smoke.
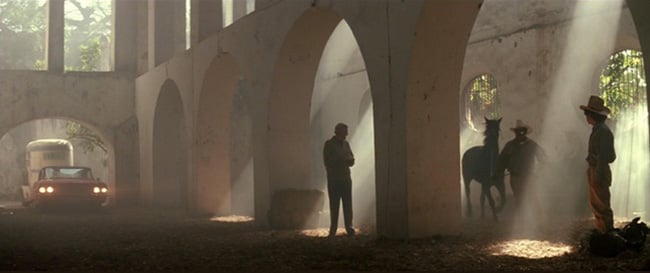
A hazer or smoke machine used judiciously with a careful eye on continuity of levels, can create tremendous depth in your shots. As it spreads evenly throughout the set, there will be more “atmos” between the lens and a background object than between the lens and a foreground object. This helps your foreground and midground elements (including your cast) to stand out against the now slightly hazier, lighter, lower-contrast background. Dark or silhouetted characters in front of bright shafts of smoky light are particularly effective.
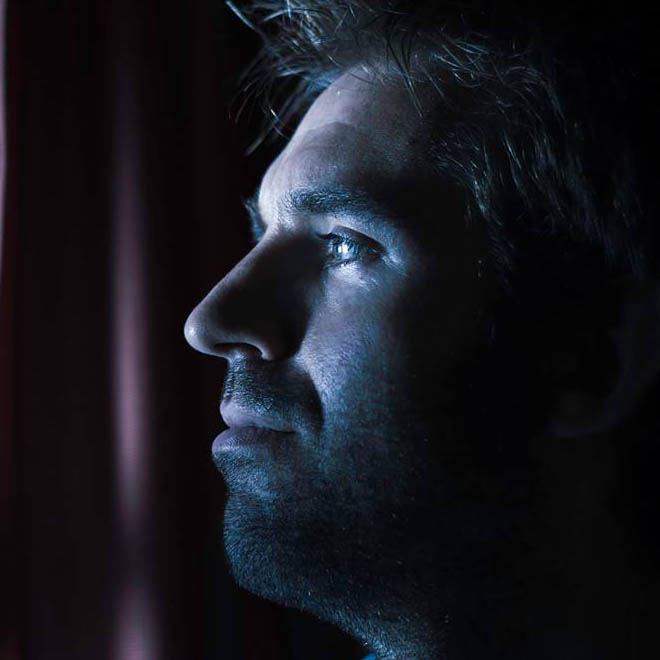
Finally, backlight is a great way to cut out your subject and separate them from the layers behind them. It’s particularly useful if you have an actor whose hair or costume is similar in colour to the background; a line of light around them will stop them blending in.
Many of these techniques are applicable even if you are lighting an interview for a non-fiction production. So next time you’re setting up a shot, ask yourself if there’s plenty of depth in your image and whether you can employ any of the techniques above to make the image that little bit more cinematic.
Title image courtesy of Shutterstock.
Tags: Production

RedShark 2020 @ All rights reserved.
Comments