
4 minute read
One of the surprises of NAB 2018 was the announcement of Apple ProRes RAW. This brought camera raw video to the forefront for many who had previously discounted it. To understand the what and why about raw, we first have to understand camera sensors.
Read part 1 of this series here.
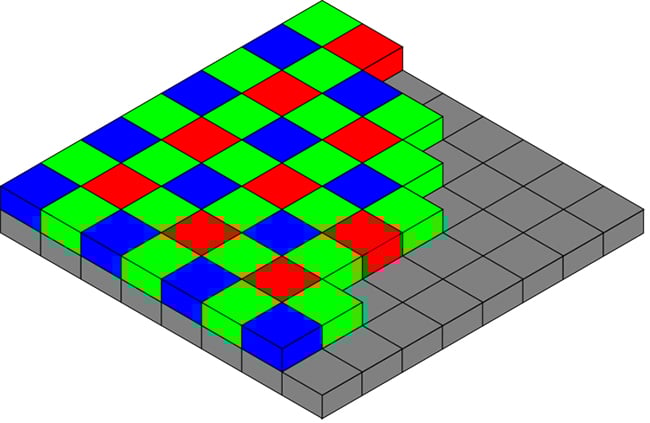
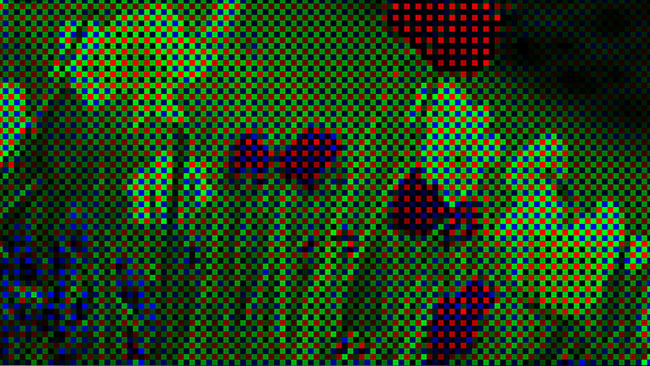
For quite some years now, cameras have been engineering with a single, CMOS sensor. Most of these sensors use a Bayer-pattern array of photosites. Bayer was named after Bryce Bayer, a Kodak colour scientist who developed the system. Photosites are the light-receiving elements of a sensor. The Bayer pattern is a checkerboard filter that separates light according to red/blue/green wavelengths. Each photosite captures light as monochrome data that has been separated according to colour components. By doing so, the camera captures a wide exposure latitude as linear data. This is more than what can be squeezed into standard video in this native form. There is a correlation between physical photosite size and resolution. With smaller photosites, more can fit on the sensor, yielding a higher native resolution. But, with fewer, larger photosites, the sensor has better low-light capabilities. In short, resolution and exposure latitude are a trade-off in sensor design.
Typically, raw data is converted into RGB video by the internal electronics of the camera. It is then subsequently converted into component digital video and recorded using a compressed or uncompressed codec and one of the various colour sampling schemes (4:4:4, 4:2:2, 4:1:1, 4:2:0). In the conversion, sampling, and compression process, some information is lost, so two methods are used to preserve wide-colour gamuts and extended dynamic range: log encoding and camera raw capture.
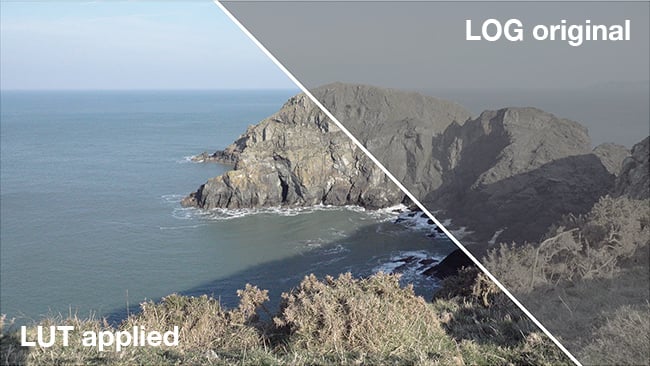
Most camera manufacturers offer some form of logarithmic video encoding, but the best-known is ARRI’s Log-C. Log encoding applies a logarithm to linear sensor data in order to compress that data into a curve, which will fit into the available video signal “bucket”. Log-C video, when left uncorrected and viewed in Rec. 709, will appear to lack contrast and saturation. To correct the image, a LUT (colour look-up table) must be applied, which is the mathematic inverse of the process used to encode the Log-C signal. Once restored, the image can be graded to use and/or discard as much of the data as needed, depending on whether you are working in a SDR or HDR mode.
RAW is not an acronym. It’s simply shorthand for camera raw information. Before video, camera raw was used in photography, typified by Canon raw (.cr2) and Adobe’s Digital Negative (.dng) formats. The latter was released as an open standard and is widely used in video as Cinema DNG.
Camera raw in video cameras made its first practical introduction when RED Digital Cinema introduced their RED ONE cameras equipped with REDCODE RAW. While not the first with raw, RED’s innovation was to record a compressed data stream as a movie file (.r3d), which made post production significantly easier. The key difference between raw workflows and non-raw workflows is that, with raw, the conversion into video no longer takes place in the camera or an external recorder. This conversion happens in post. Since the final colour and dynamic range data is not “baked” into the file, the post production process used can be improved in future years, making an even better result possible with an updated software version.
Camera raw data is usually proprietary to each manufacturer. In order for any photographic or video application to properly decode a camera raw signal, it must have a plug-in from that particular manufacturer. Some of these are included with a host application and some require that you download and install a camera-specific add-on. Such add-ons or plug-ins are considered to be a software “black box”. The decoding process is hidden from the host application, but the camera supplier will enable certain control points that an editor or colourist can adjust. For example, with RED’s raw module, you have access to exposure, the demosaicing (de-Bayering) resolution, RED’s colour science method, and colour temperature/tint. Other camera manufacturers will offer less.
The release of ProRes RAW gives Apple a raw codec that is optimised for multi-stream playback performance in Final Cut Pro X and on the newest Apple hardware. This is an acquisition codec, so don’t expect to see the ability to export a timeline from your NLE and record it into ProRes RAW. Although I wouldn’t count out a transcode from another raw format into ProRes RAW or possibly an export from FCPX when your timeline only consists of ProRes RAW content. In any case, that’s not possible today. In fact, you can only play ProRes RAW files in Final Cut Pro X or Apple Motion, but only FCPX displays the correct colour information at default settings.
Currently, ProRes RAW has only been licensed by Apple to Atomos and DJI. The Atomos Inferno and Sumo19 units are equipped with ProRes RAW. This will only work with certain Canon, Panasonic, and Sony camera models that can send their raw signal out via SDI. Then the Atomos unit will remap the camera’s raw values to ProRes RAW and encode the file. DJI’s Zenmuse X7 gimbal camera has also been updated to support ProRes RAW. With DJI, the acquisition occurs in-camera, rather than via an external recorder.
Like RED’s RECODE, Apple ProRes RAW is a variable bit-rate, compressed codec with different quality settings. ProRes RAW and ProRes RAW HQ fall in line similar to the data rates of ProRes and ProRes HQ. Unlike RED, no controls are exposed within Final Cut Pro X to access specific raw controls. Therefore, Final Cut Pro X’s colour processing controls may or may not take effect prior to the conversion from raw to video. At this point, that’s an unknown.
The main advantage of the shift to using movie file formats for camera raw, instead of image sequence files, is that processing is faster and the formats are conducive to working directly with those files in most editing applications.
It can be argued whether or not there is really much difference in starting with a log-encoded versus a camera raw file. Leading feature films presented at the highest resolutions have originated both ways. Nevertheless, both methods empower you with extensive creative control in post when grading the image. Both accommodate a move into HDR and wider colour gamuts. Clearly log and raw workflows future-proof your productions for little or no additional investment.
Tags: Post & VFX

RedShark 2020 @ All rights reserved.

Comments