5 minute read

Replay: In the first part of a two part series on shooting interviews, Roland Denning tackles preparation, keeping your interviewees at ease, and how to avoid some common pitfalls.
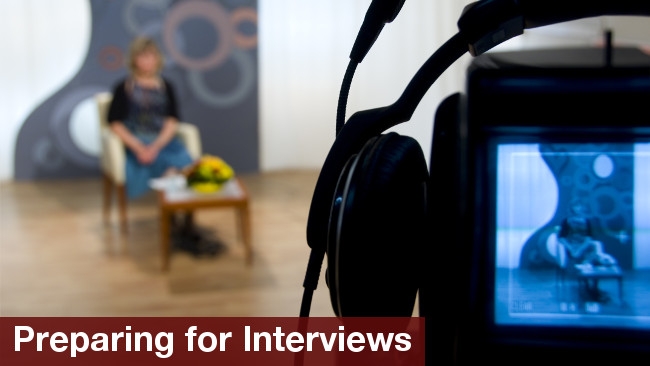
 Interview graphic by www.shutterstock.com
Interviews are not the most exciting part of documentary filmmaking. At their worst, they are a functional but unimaginative way to get information across; at their best, they offer a chance to look into the eyes of another human being and be drawn into his-or-her life. And interviews are not just a way of letting people talk, they are portraits, too, and we should take just as much care over them as we would shooting a portrait.
In the first part of this article, I will discuss preparation and approaches to the interview, leaving the more technical aspects for the second part.
From time-to-time, filmmakers try to reinvent the interview format: eccentric camera angles, weird framing, multi-coloured light, filming subjects on fairground rides or on the top of buses or walking through a zoo. It's great to be inventive (and some films depend on doing things differently), but the inventive interview can very quickly become tiresome or gimmicky if attention on what is being said is lost.
Some take issue with very elaborately staged interviews; filmmaker Adam Curtis claims he actually hates beautifully shot interviews, perhaps because this puts the emphasis on the form rather than the content. Curtis shoots interviews himself, un-beautifully.
My approach is fairly conservative: to be as straightforward as possible with the minimum of distraction and the maximum focus on the story being told.
If we are shooting on location, the setting is part of the story we are telling; it should be a clue to the character, but not distract. Very often, we end up shooting in offices. Unless they belong to someone very important, offices are brutal to shoot in. They are bland, dull and tend to all look the same. Try to get the biggest room you can, giving you more space to light, and get the subject away from the background to limit sound problems from air conditioning or traffic or a voices from adjoining rooms.
People's homes may give some clues to character, but it can be difficult to find a shot that is aesthetically pleasing and not too mundane. It always helps to have some depth in the shot. Don't be afraid to move the furniture around (ask politely first, of course, and put everything back afterwards). The last thing you want is a wall right behind the subject. Try opening doors to see if you can use a room behind as the background.
Alternately, if filming in an institution like a hospital, you can go on a long lens, move the camera back and shoot in a corridor. The background should be out of focus enough not to distract, while giving a sense of place and character. In this circumstance, we would see a busy person in a working environment, rather than an anonymous setting.
Shooting outside, if the weather is fine, is another possibility, but the feel of an exterior interview is very different and it is hard to get the same concentration as you can inside.
It is easy to forget just how scary a film crew is to some people. Getting the subjects' trust is essential; chatting to them as you set up can help people relax. Some directors have curious ideas about how to create a relaxed atmosphere. One I worked with asked the subjects to imagine the crew completely naked. This was intended to disperse any fears, but instead induced blind panic (if you had seen the crew, you would have felt similarly).
The key skill of an interviewer is to be able to listen and respond to a subject's answers and be prepared to let the interview go in unexpected, yet possibly fascinating directions. The thing to avoid is getting so engaged that you forget what you wanted to ask and fail to cover the points of the interview, but that is preferable to sticking to your list so rigidly that you forget to listen to the answers. At times, the best thing is not to say much at all – just pause and allow until the subject to fill the silence with a reply.
It is standard practice these days to leave the interviewer's questions out and let the answers stand on their own. This means you have to ask the interviewee to make his or her answers self-contained by including part of the question in the answer (not just "yes, I am," but "yes, I am an alien from another planet") and not to reference parts of the interview that might be lost in the final cut by saying things like "as I said earlier." Some interviewees get this easily, while others don't. If they don't, let it go; reminding them insistently can make them increasingly nervous. Similarly, ask them to leave a gap between the question and the answer to avoid overlaps, but if they don't, again, let it go rather than continuing to pressure them. Putting the interviewee at ease and drawing out the best answers should always be your primary concern.
Two interviewees together? It can work, but it can also make the edit more difficult. If you keep the two subjects together in a 2-shot, one of them may do all the talking leaving the other looking lost. You can start in a 2-shot, then zoom in and pan between singles as they answer (filming single 'listening shots' afterwards), but this can get you in a mess, too, if they talk together or alternate sentences. It's really a judgement you have to make at the time. Shooting the subjects individually is always easier, but you might miss out on the interaction between the two, which could be an important part of the story.
Eyeline is crucial. I like to get the interviewer as close to the camera axis as possible and make sure both pairs of eyes and the lens are at the same height. The closer the eyeline is to the camera lens, the stronger the emotional impact of the interview. Going on a longer lens can help to do this, but make sure the interviewer is not a hand-flapper and keeps hands and shoulders out of frame. Also, avoid swivel chairs at all costs. If a chair can swivel, it will.
I've worked with a device consisting of a semi-silvered mirror in front of the lens at 45 degrees (I believe Errol Morris came up with it first). The interviewer sits at right angles to the camera, looks into the mirror and makes direct eye-contact with the interviewee. This enables the interviewee to focus on the interviewer and look directly into the lens, something that it is very difficult to get non-professionals to do without such a device. This results in a very intense interview.
Does every interview have to be done with the subject almost looking into the lens? No, every 'rule' here is one that can be broken. I've seen interviews work in semi-profile or even profile in films with a very particular graphic style, but this does mean you are distancing your audience from the interviewee.
Avoid distractions in the eyeline of the interviewee, particularly other crew members. If the interviewee has built up a rapport with the director or another member of the crew (a good thing, of course), they may be tempted to glance at them for support or encouragement, away from the interviewer. This can be particularly crucial at the end of the interview where there is a tendency for interviewees to look away with relief before they have quite finished their sentence.
Moving the camera, whether on tracks or a slider, around the subject might be tempting, but it can cause nightmares in the edit if you want to cut different parts of the interview together, unless it is the sort of interview that is effectively 'staged'. Tracking-in as an alternative to a zoom lens is a possibility.
White walls are the worst unless the space is big enough to be able to light the background separately from the subject. Dark walls are better; you can always throw a splash of light on them to break them up. Strong vertical or horizontal lines can make a mess of your shot. Large chip cameras with longer focal length lenses and larger apertures are very useful in throwing the background out of focus, allowing us to concentrate on the subject.
One approach to the problems of shooting on location is to simply take your own backgrounds with you (fabric or paper rolls, colours or patterned backgrounds or even plain black), effectively turning your location into a studio. This may work if it you do it consistently and it fits the style of the film. It can feel more formal or theatrical, but can work well if the interview locations have little visual relevance to the film you are making.
Read part two of this series here.
Graphic by Shutterstock
Tags: Production

RedShark 2020 @ All rights reserved.

Comments