7 minute read
RedShark Review: The ruggedly built Gnarbox could be the doorway to professional video editing on the iPad. We take a look at what this novel looking backup and storage device has to offer.
It has a been a dream for some time now that the iPad had a serious NLE available for it. But there have been a few stumbling blocks that have prevented such a thing from happening, at least in a way that makes a real impact. For starters some may say that Apple’s closed eco system and the limited on board storage of the iPad itself is quite a restrictive set of factors. And they would be right, but only up to a point.
You will have guessed that I am about to throw out an ‘until now’ moment, and you’d be correct. We might well be on the cusp of truly being able to perform serious edits on the move, on the iPad, and indeed any other iOS device, all thanks to a NLE called LumaFusion, which I will write about in a separate review.
But this software is only part of the picture. One of the main components of the engine that makes this possible is the Gnarbox, a rugged and portable storage device that interfaces directly with LumaFusion and that makes iPad storage woes a thing of the past.
The Gnarbox by MyGnar, is one of those rare things. A crowdsourced electronic gadget project that has actually produced a real working product. Not only that, but one that could help transform ultra-lightweight editing on the move as we know it.
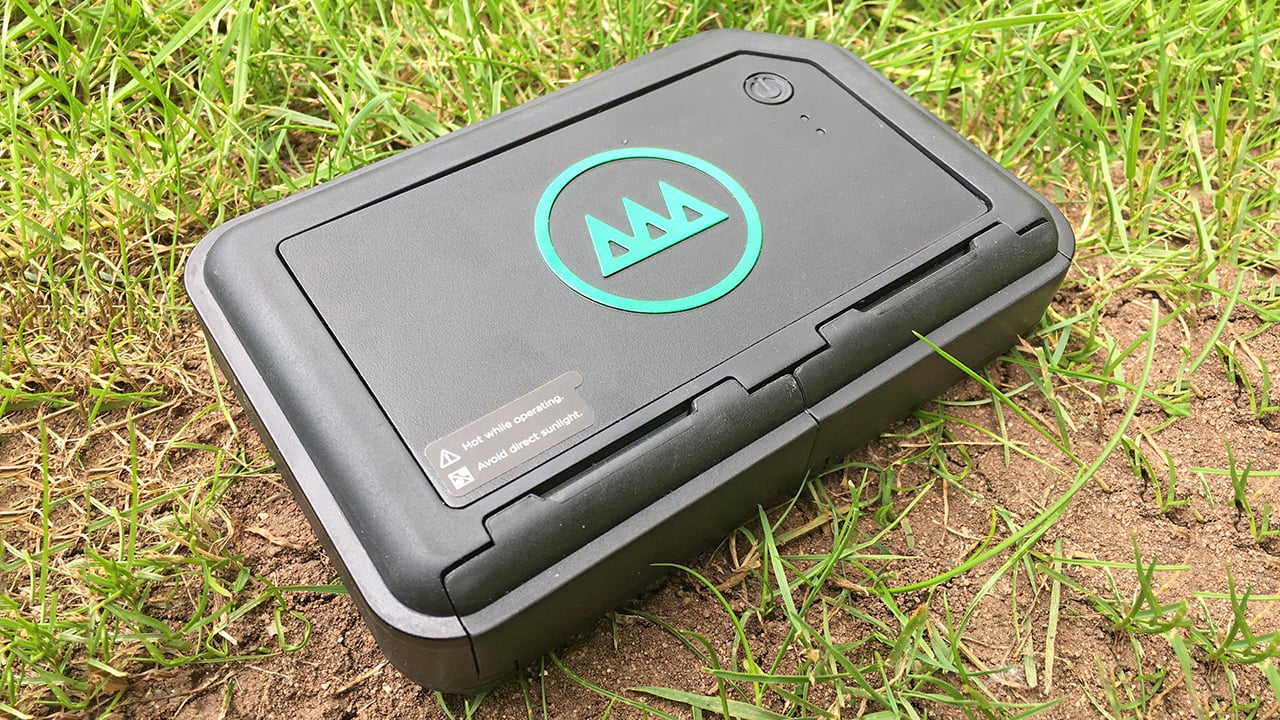
The current Gnarbox, and the subject of this review is the Gnarbox 1.0, 256GB, a flash based drive, which is shock proof, dust proof, and water resistant (but not waterproof). The forthcoming Gnarbox 2.0 SSD will add IP67 waterproofing to this, more codecs such as ProRes, faster transfer speeds, and capacities up to 1TB.
The Gnarbox wasn’t originally designed with LumaFusion specifically in mind. Instead it was conceived as a rugged, go anywhere footage backup and storage device. On the outside, this is exactly what it looks like. But under the hood there’s a bit more going on.
For a start the device contains a quad core 1.92GHZ Intel CPU and a quad core Intel graphics GPU. Along with this it has dual band 300mbps 802.11 a/b/g/n wifi capability, which is the heart of how it works as part of an iOS editing setup.
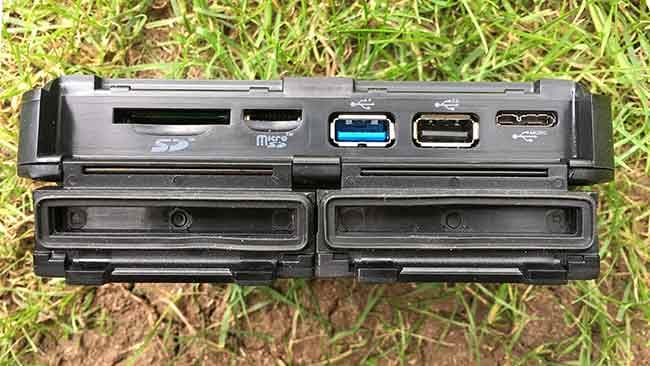
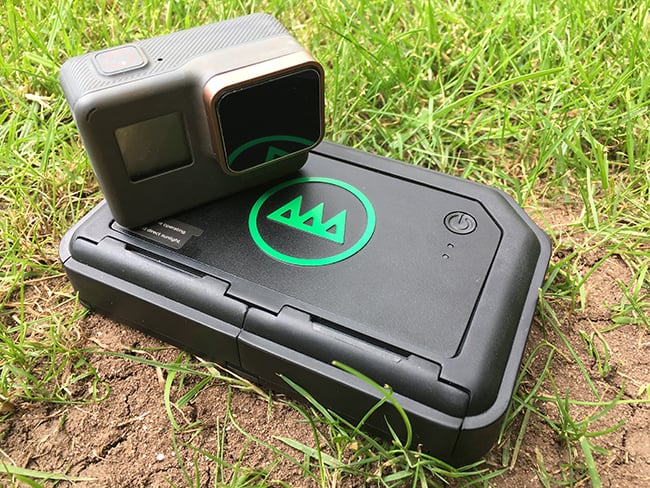
Under two solid flaps the Gnarbox features both a full size and micro SD card slot, two USB 3 sockets and one micro USB 3 port. These ports allow a lot of versatility. For example you can plug your SD card in from your camera straight into the device, and then use the iOS app to transfer and backup the footage. So far so simple. But what if your camera doesn’t use SD cards?
Well this is the beauty of the Gnarbox. It doesn’t restrict you on the type of media you use. It can use those USB ports to connect to card readers, such as CFast 2.0, or you can backup footage from another USB 3 SSD (it can read both Windows and Mac formatted drives). The Gnarbox itself can hook straight up to a computer and be used as an edit drive.
Gnarbox supports quite a few file types natively. Although you can transfer all files for backup, you won’t be able to manipulate or edit unsupported file types.
The files that the Gnarbox natively supports are MP4, MOV, JPG, H.265 from the Hero 6, DSLR RAW files with some exceptions, video resolutions from SD all the way through to 4K, and frame rates up to 240fps, such as the GoPro Hero 6’s 240fps 1080p mode.
It does not unfortunately support ProRes, AVCHD, XAVC, H265 iPhone videos or 10-bit video from the GH5. It does however support XAVC-S.
Powering up the Gnarbox takes a few seconds. The heart of the system is the Gnarbox app, which incidentally works on iOS, with Android operating systems coming up, and in order to use it you need to connect your device to the Gnarbox’s own local wifi network.
Once done you can load up the app and be immediately presented with the ability to browse the device. If you have a card or other storage device plugged into the Gnarbox, you can browse these as well. The Gnarbox app is also used to push firmware updates to the device, enabling new features and bug fixes.
This is one of the first things you will need to do, and in the couple of updates that I have performed so far everything went very smoothly, quickly, and without a hitch.
One thing I would suggest to the developers of the device is to look at the Micro SD slot design. The locking mechanism engages rather deeply and I found it impossible to push my fingers far enough in to get it to engage. So I had to enlist the use of my keys to press it in far enough. This is a minor niggle, but one that should be easy to address in future design iterations.
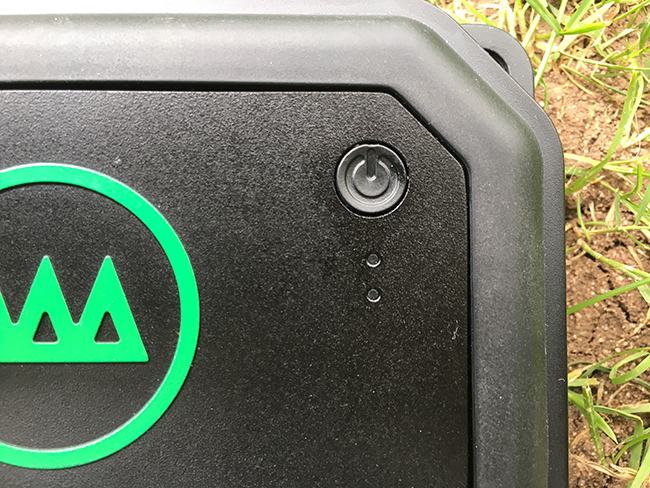
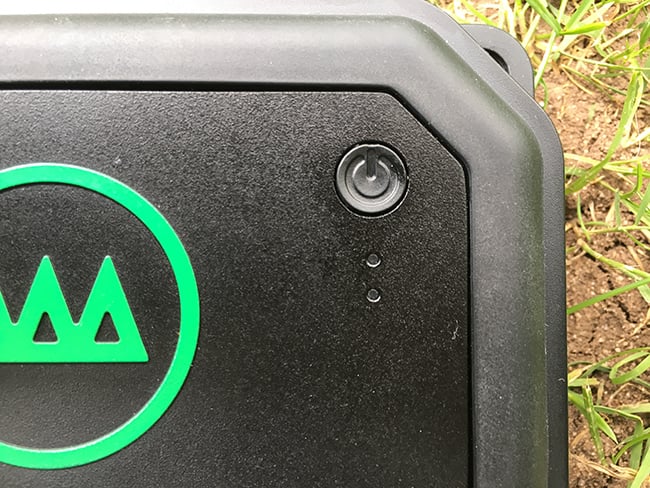
That said the device is very solidly built. Let me put it this way, you don’t need to worry about dropping it. The plastic is thick, and the hinges on the port protection doors are not going to fall off if you abuse your gear. Outside on the edges is a very thick, slightly rubberised, what I can only imagine to be shock absorbent plastic. On one corner there is a lanyard hole to allow the device to be tethered should you be the sort of person who likes to drop things!
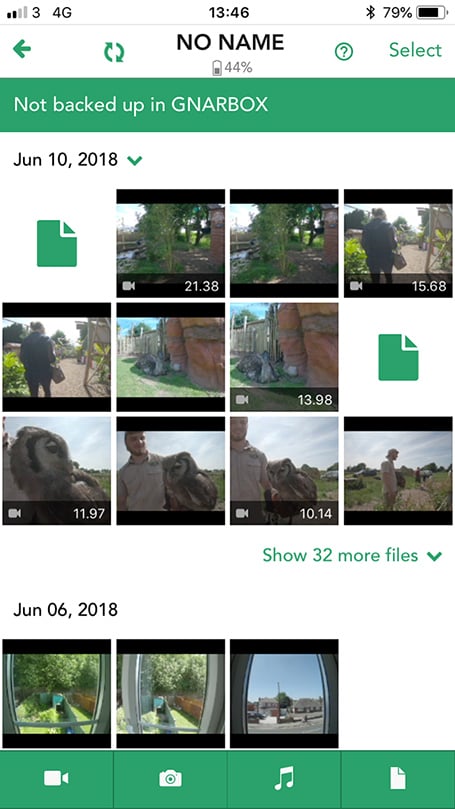
On initial loading of the app you are presented with the front screen, which when you have transferred footage splits it all up organised into dates, with a large clear thumbnail. This makes it very easy to browse through your transferred footage at a glance. At the top of the interface is a percentage indicator for the current battery level of the Gnarbox device itself.
At the bottom of the screen there are icons for Home, Folders, Favourites, and Reel. When you plug in a card or other storage device you will need to head to Folders. From here you can select a connected device (the Gnarbox can only recognise one at a time, so you can’t plug in an SD card and an external SSD at the same time for instance). From here you can browse the footage live from your storage media. Tapping on a footage file once brings it up large. Tapping again plays it. Tapping once more stops it. Plus you can scrub through the footage with the playback time indictor. You can even trim the clip and then export it to the Gnarbox if you really did want to cut things out and save space.
Once you have selected your files you can transfer them to the Gnarbox. And then this is where more of the clever stuff happens. The Gnarbox will transcode in the background to a more edit friendly format for devices such as iPhones and iPads. When you browse the footage which has now been transferred onto the device, the playback bar will turn green, showing the progress of the transcoding. This isn’t the fastest, at around realtime, but it all happens in the background without you needing to do anything.
I have seen some comments saying that it is not possible to select a whole SD card at once, instead needing to select individual files. However this isn’t the case. For example I can select the DCIM folder on a GoPro card, or choose the ‘Select All’ option. The Gnarbox developers are releasing very regular updates to the app in response to user requests. So if you have a request, let them know!
Transfer speeds, again contrary to what I have read in other reviews, are good. For example 3.59GB of files took around two minutes and 45 seconds to transfer to the Gnarbox from a MicroSD card. The same set of files via a USB3 on my MacBook Pro took roughly the same amount of time.
Options can be set enabling you to select the maximum bitrate at which transcodes are done, depending on whether you need to save space or not. The beauty is that you never need to think about these transcoded files. They just get done in the background seamlessly.
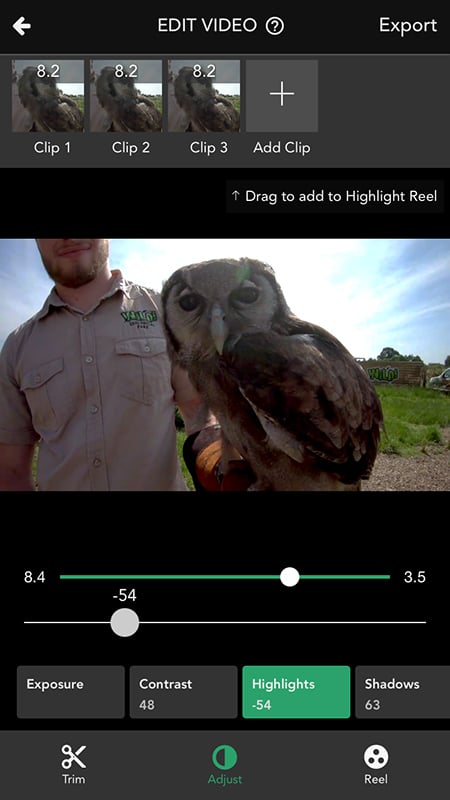
Although the Gnarbox app is not really a NLE, it can perform some basic cut based editing, and allow a soundtrack to be overlaid on top. This could be useful for very basic assemble edits. The way that clips can be edited has a very close resemblance to Luma Fusion in that it uses finger gestures extensively to allow very fine selections of in and out points for clips. For example, dragging the finger up and then across when scrubbing allows very fine movement along the clip timeline.
Swiping down places an edit marker. This solves the issue of accidentally moving the playhead while making such selections. This swiping can be performed while the clip is playing, creating the marker on the fly. Tapping either the beginning or end of the trim bar (depending on whether you want an in or an out point) will make the relevant trim selection jump to the marker.
There’s also the facility for basic colour correction as well, allowing exposure, highlight, shadow, contrast, and saturation adjustments among others for both stills and video. This functionality is not meant as a replacement for a dedicated editor, however, so you aren't going to be creating RAW fine art masterpieces with it.
The Gnarbox is a very handy little device indeed. The Gnarbox 1.0 is available for $299.99 for the 128GB version, and $399.99 for the 256GB. The Gnarbox 2.0 can be pre-ordered from Indiegogo with the 128GB version costing $359 and the 1TB version costing $749 at the current pre-order discount rates, with an estimated delivery time of January 2019.
Clearly if you need lots of storage space, playback of professional codecs such as ProRes, and full waterproofing you might want to wait for version 2.0. However the current version 1.0 is still extremely capable and very neatly put together. The important thing to remember about the Gnarbox is that it isn’t just a simple backup storage device now. It enables full blown non-linear editing on iOS devices via LumaFusion, which I will come to in my next article.
If you travel a lot, need the ability to edit on the move, but would much rather you only had to carry around an iPad rather than a laptop, the Gnarbox could open a lot of doors for you. Is it a full blow solution for professionals yet? Not quite, that remit will be for Gnarbox 2.0. However Gnarbox 1.0 does exactly what it promises, and in my opinion it does it pretty well, and it is incredibly solidly built.
Head on over to the Gnarbox website to find out more.
Tags: Production

RedShark 2020 @ All rights reserved.

Comments