4 minute read
Replay: DP Neil Oseman gives some effective and practical tips on how to light a period drama when finances are tight.
There was a time when all low-budget productions were kitchen sink dramas, but nowadays new filmmakers are much more ambitious. With camera technology so cheap, they’re looking for ways to make their movies stand out. One thing this means for cinematographers is that shooting a period film may not be the far-off, big-budget dream it once was.
I shot my first period piece in 2013: a web series prequel to The Three Musketeers, set of course, in 17th Century Paris. At first, I found it quite restrictive because there were only three possible sources of light: daylight, firelight and moonlight, and, at a push, starlight, but I quickly came to embrace the challenge of simulating natural sources with modern equipment.
I kept colour temperatures simple by deciding that daylight would always appear white, moonlight would be +2,400K (blue) and firelight would be -2,400K (orange). In practice, this meant that daylight scenes were white-balanced at 5,600K, using natural light, HMIs and Kinoflos, with un-gelled tungsten lamps for candlelight. Night scenes were typically white-balanced at 3,200K which turned HMIs and Kinos blue for moonlight/starlight, with tungsten gelled with full CTO to turn it orange on camera. Later on in the shoot, I became confident enough to experiment with other colours of gel like Straw and Steel Blue to give things more variety.
With the sensitivity and dynamic range of today’s cameras, real candlelight and firelight can go a long way towards lighting a scene. Sometimes naked flames will be prohibited though, as they were at many of the historical buildings we filmed The First Musketeer in, or the amount of light output by them is insufficient for a good exposure. Then it becomes the DoP’s job to simulate the light.
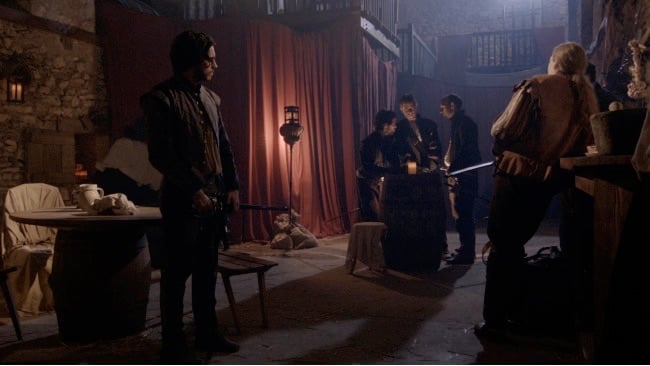
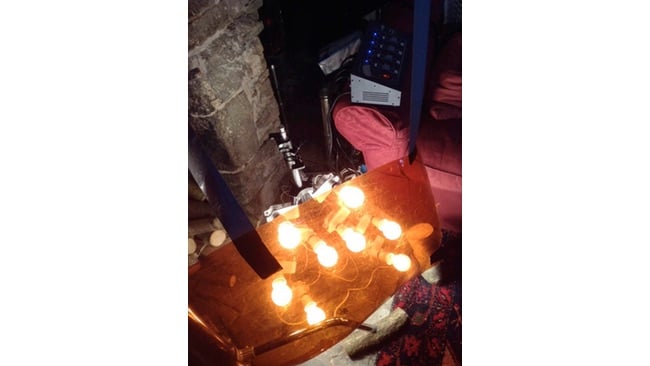
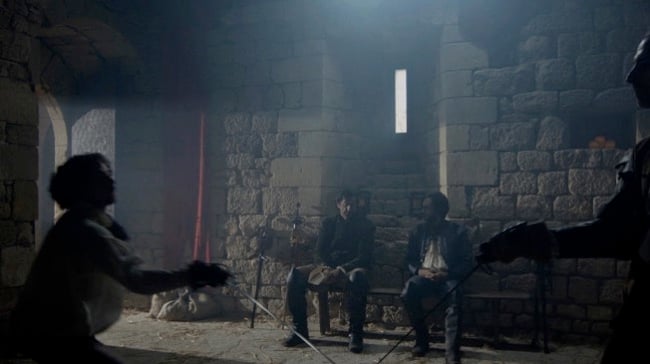
If a candle is placed on a piece of furniture, hiding a bare tungsten bulb behind that furniture is an effective way to throw a pool of light on the surroundings. Use black wrap or kitchen foil to shield the furniture from the heat of the bulb. Here is an example from The First Musketeer where I hid 100W globes behind the barrel the three men are grouped around and behind the candle stand to the left of them:
I have sometimes used Dedos to throw a pool of light around a candle, but it’s not the most convincing technique and is best kept in the background of a shot. If you project too much light onto a candle, you will wash out any real light that it’s throwing, leaving you worse off than when you started. A better option is to aim the Dedo, or another tungsten source, at the person or thing which is supposedly being lit by the candle but keeping the light off the candle itself.
In 2015 when I shot Heretiks, a 17th Century supernatural thriller, I had my gaffer rig 300W and 650W tungsten fresnels above all the candles which lined the walls. We dimmed them down to warm up the colour temperature and diffused them with Tough Spun to get an organic pool of light.
Over the years, cinematographers and gaffers have invented many rigs for simulating the light from an open fire. Typically these involve multiple small tungsten sources - gelled or painted with slightly different shades of yellow/orange/red - hooked up to a dimmer board.
If you don’t have access to a dimmer board, don’t despair. Hang two layers of diffuser in front of a tungsten source, then have someone wave and wiggle their hands between them. It’s surprisingly effective. (Use a bluer light source and it works equally well as an off-camera TV set in a contemporary film.)
Another technique is to use the gold side of a collapsible reflector. Bounce a tungsten lamp off this and wiggle it during takes to create a warm, flickering light.
All these fires would have made rooms quite smokey back in the day, so a smoke machine or hazer is a very important piece of equipment for any period shoot. As well as being realistic, smoke “ages” the image, lowering the contrast and washing it out slightly, which helps the audience to feel they are watching events from long ago.
Once you have smoke in the air, you can create shafts of light with a focused light source (e.g. a Fresnel or par). It is a hallmark of period shows to have these shafts of light coming in through windows, helping to emphasise how dark buildings were in the days before electricity and how bright sunlight was by comparison. To make these beams show up as much as possible, you need a dark background - a room with white walls will never work very well - and the lamps should be pointed towards the camera as much as possible. Smoke is picked up a lot by backlight, a little by sidelight and not at all by front-light.
Smoke also adds texture to the frame and texture is a keyword when it comes to period cinematography. I discovered quite quickly on The First Musketeer that the most amazing historic locations can look like cheap pantomime sets if they are lit flatly from the front. Rake light across from the side, however, and all the imperfections are revealed, and they suddenly look real and old. Remember, before the industrial revolution, there were no smooth, clean surfaces. Everything had imperfections, character, texture. Cross-light brings that all out.
I hope these broad pointers will help you to tackle your own period productions. If you need more inspiration, I highly recommend a visit to an art gallery to look at paintings from the relevant era. The great artists of old worked out what looks good with light a long time ago, and there is always much to learn from them.
Title image courtesy of Shutterstock.
Tags: Production Tutorials

RedShark 2020 @ All rights reserved.
Comments