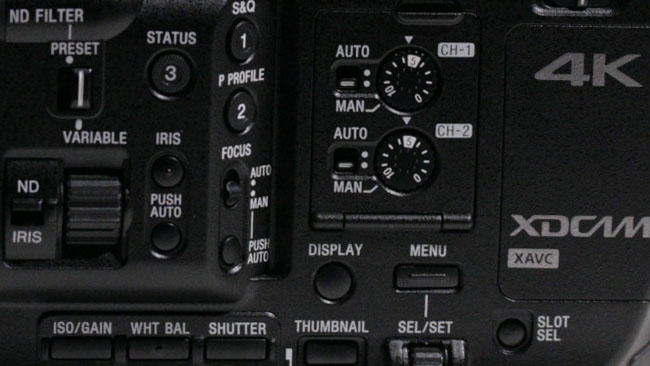
 Every one of these buttons is connected to more technology than went to the moon
Modern cameras have a lot of user-adjustable settings, but which are the ones you should be fiddling with and which are the ones you really should leave alone.
Modern cameras have a lot of internal picture-processing capability. A lot of that is a natural result of single-chip cameras which require significant processing even to form a recognisable colour picture. Still more of it is optional, though; the number of user-adjustable settings has been climbing steadily on most cameras for years, and there's a significant feeling that the defaults are not always, or even that often, the best way to go – that there's some sort of special sauce that will have magical effects on the image and transport us instantly to a world of Hollywood gloss.
That sort of thinking is always highly suspect, of course, and what's more, this is a field where second-guessing the design engineers can be risky. What's the best approach?
Second guessing
Canon DSLRs are perhaps the best example of a generally good piece of equipment with slightly dubious factory settings. Canon's engineers apparently like to ensure that everyone's camera behaves the same and produces punchy, compelling images with minimum effort. This is nice from a matching point of view and avoids the need to Photoshop everything, but it results in quite saturated colours and leads to some minor clipping of peak whites in the mode the cameras call “standard”.
There are tools to design custom picture profiles for many cameras, but in general, it's enough to reach for the “neutral” or “faithful” modes to solve this problem. The small degree of white clip is reduced and colours are softened.
It's possible that normal small manufacturing variances in the sensors will create discontinuities between cameras, but it doesn't seem to be objectionable in practice. Many cameras offer things like this – Sony refers to a collection of settings as a picture profile, and, as with Canon, it's possible to look in more detail at the choices made for each. It would perhaps be nice if Sony didn't just call them PP1 through PP9, though.
Making things sharper
Sharpening is something that's done by practically every camera ever made, simply to offset the effects of low-pass filtering where it's traditionally referred to as aperture correction. Switching off sharpening is a popular target for people who are looking for a more cinematic image, regardless of the existence of an official RedShark swearbox which has just cost me dearly for using such a hackneyed and unspecific term.
Killing sharpening entirely can be a dubious, kneejerk reaction, though, particularly when equipment or circumstance forces us to shoot to a heavily-compressed format which tends to need all the contrast it can get in small details. On the other hand, sharpening algorithms often can't tell noise from detail, and it isn't just the ringing edginess that people dislike about excessive sharpening – it's the fizz.
Reduce, then, but with caution. With a high-bitrate image, it's possible to add some more in post, especially using software such as Resolve to sharpen only midtones for a less edgey, electronic-looking result.
A question of tone
Traditionally, video cameras had a feature called “auto knee” which, basically, turned down the brightness of highlights and stretched the rest of the brightness range to compensate. Many people will recoil in horror at the idea of any automated feature, although this is not always entirely sensible; in a broadcast world of extremely limited dynamic range and no grading, almost any approach to more controllable highlight behaviour was and is worthwhile.
While the broadcast-oriented camera manufacturers seem to retain the old terminology, Canon has a feature it calls “highlight tone priority” which seems to have similar behaviour. For material shot under controlled circumstances that will be graded it can be worth switching off, although Canon's implementation remains useful if only because consistent handling of extreme highlights is something of an advanced topic for many amateur colourists. Some broadcast-oriented cameras offer settings which will create a very extreme rolloff of highlights, however, creating flat, tinted areas that don't look overexposed at first glance but can be ugly if overdone. This, along with consistency and matching problems, are why many people prefer to disengage this sort of feature.
And so to colour
Finally, we need to discuss colour. There was a time when the most advanced tool for colour processing of moving images was the processing amplifier, which more or less duplicated the capability of the three trackballs traditional in a grading application. Modern cameras (and now, even not-so-modern cameras) tend to have enormously more comprehensive colorimetry settings, down to hue and saturation controls for individual chunks of the colour wheel.
It's tempting, in many cases, to shoot charts and observe a vectorscope, and start lining things up such that primary and secondary colours land exactly in the boxes they're supposed to be in, but this can be dangerous: it's easy to make the scopes and charts look like they do in the textbooks, but then to find that real-world images end up looking absolutely revolting. Of all the settings that exist in modern cameras, the most fundamental tweaks to colorimetry are the most dangerous, and it's here that careful testing is most important of all.
If nothing else, all of this emphasises the need for careful testing – not so much of cameras, which are generally fairly competent out of the box, but of the changes we make to them. When testing, include a wide variety of situations – shoot terribly overexposed images, terribly underexposed images, under good and poor-quality light of varying colorimetry. We must establish how things break, as well as how they work.
In general, though, more than ever, it's possible to override or alter enormous amounts of what would once have been considered manufacturer-level options. Approaches such as that of Blackmagic, who have, so far, been cautious about handing over fundamental imaging controls to the user, can start to seem refreshingly straightforward. The camera is what it is; we're encouraged, by this policy, to avoid worrying too much about what are often technical minutiae and concentrate on the photography. Of course, arriving at a setup we like for a particular camera and sticking with it offers similar benefits, but it's probably best to avoid becoming too attached to anything in particular, because in a few months, some other camera will become the new hotness and everything will change again.
While there's something to be gained from tweaking, though, people will tweak. If in doubt, however, especially with regard to colorimetry, the best approach is to move your hands slowly away from the controls. Consider Blackmagic's approach: the only adjustable imaging parameter on the Ursa Mini is resolution and gamma encoding. Some might complain that this is too restrictive, but frankly, I think it's nice to see a manufacturer with the confidence to make a decision about something, so we're left alone to learn how best to shoot with it, without needing to have our heads stuck in a video engineering textbook.
Tags: Production


Comments