
5 minute read
 An example of turning a sunny day into a stormy one. A before and after still grab from Zetematium.
Performing one task well on a movie is tricky enough. But to perform the editing, VFX work, and the sound design all using an inexpensive laptop is impressive to say the least. Here's how VFX artist Bernard Egreteau managed to get his head around it all.
I've always wondered what would happen if I had the opportunity of working full time on a movie project involving editing, VFX and sound-design. As I've multiplied my fields of expertise over the past ten years (musician, author and video), a moment of freedom and my encounter whith director Yulia Nikiforova gave me that opportunity.
The rushes had been waiting for an editor for months, so I decided to take care of everything except the music score already taken care of by Florian Steinebach. Besides editing, I did color grading, 2D VFX in After Effects, cleaning, stabilising, masking, tracking, 3D modeling (in Blender) plus compositing, searching and tweaking additionnal stock shots to enhance narration, titles, sound design, foley editing (half the rushes didn't have any sound) and mixing. The movie was shot in full HD using a panasonic AG-AF101E with an Olympus M.Zuiko PRO 12-40mm 1:2.8 MFT lens.
Yulia wanted the cinematic style border matting. That lead me to make a lot of additional camera movements in order to maintain focus on what was important for the story. Sometimes I'd use it to create a 'crane effect'. The added cinematic borders allow that, and most of the time it has to be done because there is a risk of missing the focus of the shot if an important item gets masked by the borders. Eventually I recut the whole movie at 2490 by 1070 pixel size, cutting off these borders and resampling at the same time. My final is cut is a long string of uncompressed JPEGs ready to be exported with the best bitrate and codec I can find in Blender. Each frame ends up weighing in at 1.5MB with a 2490x1070p pixel dimension.
One of the shots I really enjoyed making was this storm sequence.
It was fimed at the end of the day, light was a bit dimmer, a bit of noise, but it's still an ok looking shot. As you can see in the video, there was a first draft, which I abandoned for a new one. I summed up the steps here, but there were at least 20 folders with different versions of the same shot on my laptop. Working on this movie taught me organisation and rush management.
First, I just watched the rushes in VLC, and made folders for each one as I go, with names such as "goodies", "or close up on man", anything that can help me remember what the shot can be used for, its interest and specificity, and some numbers at the start of the folder's names help maintain story chronology.
Then, I import my video into a VFX editor and convert, as I start processing it, the useful parts of the rushes into uncompressed still images (JPEGs are O.K. and not too heavy, PNG is better but heavier, Cineon even more so) which I put in a "BV1" folder next to the original video file folder. I store each new version into a "BV folder" (stands for B version). Then, I select my JPEG rush folder and import my "useful part of the rush" again if I need to, and tweak it as many times as I think is necessary to best serve the story, creating new versions of the same rush, ready to be edited. Some shots required as much as 25 to 35 BVs in order to satisfy Yulia and I.
I then do my editing in Blender, which I'm familiar with as a video editor and 3D tool. Basic perhaps in terms of pure editing, but the output settings allow a very wide range of possibilities, such as defining your bitrate as high as you wish and deal with mainstream and pro codecs and formats like Cineon. Blender imports image sequences like a charm, and has a few extra colorgrading tools such as color balance, which came in handy for equalising all these shots. You can mix sounds as well, in a basic way, but still.
And it's free.
Working with uncompressed stills sequences from step one to final export is the best way I found to rework my frames without corrupting the images. It's recommended in 3D animation because it allows you to quit a render in progress without messing with the files. You can stop and finish your render later. If I had reworked my shots using videos, my final images would have been filled with artefacts and way blurrier, unless they were AVI RAW files. But still, in Blender, stills read better in the viewport than AVI RAW, so...
I sometimes find it difficult to be accurate in color grading because you need the result from one shot to the next to be consistent. The rushes, even though you apply the same filters, will never look really the same from one take to the next when processed, even if shot a minute after. Too many variables.
I had to re-edit a lot of shots for that reason. My grading seemed right when looking at the rush itself, but not anymore when edited with the other shots. Even when correcting from source, it has to be compensated into the final editing process. The final continuity grading finishes it, so to speak.
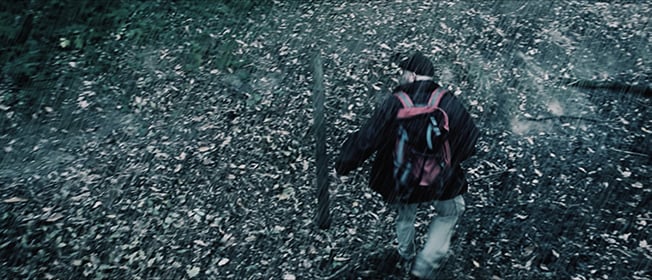
The rain shot shown earlier took me twenty hours in two days if I remember. The hardest part was to make camera motion match the rain motion. I couldn't do this until I finally stabilised the shot and processed it a bit. I added a 3D tree and lightning in the the upper left corner when character comes in at the beginning of the shot, and stabilising helped make that part look like a traveling rotating crane shot. Three to four layers of rain, each one with different setting. A bit of bluriness on one layer helped convey that sense of depth, but I'm sure that more could have been done. Maybe I could have gone further and add a few drops on the camera lens? Another reason why I did that shot a second time was that the color-timing didn't match. It was supposed to happen in the late afternoon, and my first grading was looked too much like night.
The sound is a mix of at least 20 WAV files mixed directly in Blender. This wasn't that easy either, because of the synching with the lightning. Should I audio-synch or should I not ? I finally ended up mixing both ideas. The closest strikes will be heard simultaneously with the light effect, such as the one the actor Kyja Godet looks at at second #2, some others will produce a delayed sound effect in the background.
This shot was important, because it is by making it that I came to realise I was over saturating the footage. I turned everything down a bit from this one onwards.
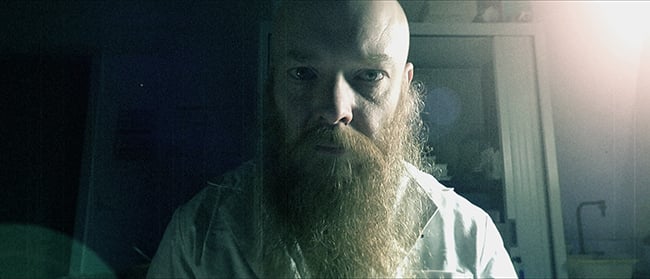
My thinking during editing and arranging the images, was very much influenced by artists like Vilmos Zigmund, Douglas Trumbull, and J. J. Abrams. A John Boorman movie, Esmerald Forest popped into to my mind when color grading the earliest forest shots of ZETEMATIUM. While some others, like the lab sequence, were clearly worked to have a sci fi look, with added light effects.
The Saharan look to the Troglodyte sequence was inspired by Indiana Jones movies. But not all shots were consciously influenced like this. Some of them I had to somehow be more creative in terms of color, with no intention but to make the story more understandable or attractive.
This movie also gave me chance to experiment with a wide variety of visual moods and how to connect them together. The weather and the places were important parts of the story. It had to be as accurate as it could in order to maintain suspension of disbelief in the audience.
Zetematium, produced by Court et 49, has involved quite a few people in its production, but all of its post production was done with a four year-old laptop, the same I used in the making of STUCK, all of it except for its music. My laptop is a 2014 Terra 8GB RAM memory (Windows 7) with a GT Force GT 740M by the way, nothing fancy.
Here is a second link to a VFX reel I did for ZETEMATIUM:
This one also involved rain and a thunderstorm, and was done out of some free stock footage from pixabay. It was meant to show weather progression in the story, so I made three versions with different light settings and skies, and ended using just two.
Tags: Post & VFX

RedShark 2020 @ All rights reserved.

Comments