4 minute read

Adobe has released the updates to the Creative Cloud pro video tools announced back in April at NAB, which include new features and other improvements in Premiere Pro, After Effects, Audition and Media Encoder. We start with Premiere Pro...
We’ll start here with Premiere Pro. The Premiere Pro update is called Premiere Pro 2015.3 and its icon will reflect this nomenclature.
Adobe notes that the new release of Premiere Pro requires updating existing projects and these will not be backward compatible to earlier versions of the application. This is important to note if projects are shared between workstations; all computers working on that project must be updated.
My colleague Oliver Peters also observed that there are changes in the Lumetri LUT structure. After updating a project containing LUTs applied in the Lumetri effect, Premiere Pro will not see the LUT. The answer that Oliver discovered on the Mac is prior to updating right click on the Premiere Pro application icon, open package contents, look for Lumetri and move the LUTs out of that folder. Then update. Open the new version of Premiere Pro and reimport the LUT in the Lumetri effects window. If you have already updated, go to your backup drive and retrieve the LUTs from your backup. What? You don’t back up? Lesson learned.
Let’s look at a few new Premiere Pro features.
Widely publicized at NAB and now available, Premiere Pro can create proxies at ingest, proxies once full-res footage has been imported or link footage to existing proxies. Furthermore, clips are available for editing during ingest.
This latter point isn’t exactly spot on. The proxy creation process is handled in the background by Adobe Media Encoder, which is opened during the proxy transcode process. Proxy transcoding pauses while editing a clip so as not to divide CPU power between editing and transcoding. I did find in initial testing working with 4K clips, that creating ProRes 422 Proxy files was such a quick process that I was not at all slowed down.
Proxies can be created in a couple of ways. The most basic way is when creating a New Project to click the Ingest tab and then click the first check box. That gives the option of copying, transcoding or creating proxies. Then there are options for storage location of copied, transcoded or proxy files and finally about the most important—selection of the proxy format.
Adobe provides several presets (see screen capture) but since this is handled by Adobe Media Encoder, ingest presets can be created in Media Encoder and imported into Premiere Pro.
Alternatively, just create a new project and from the File Menu choose Project Settings -> Ingest Settings and you will come to the same dialog box as above. And as yet another alternative, simply click the file in the file browser and make a proxy.
A significant part of this process is that Premiere Pro recognizes the resolution of the original media and scales the proxy accordingly so that the framing is identical when switching between proxy and original media.
Once those proxy settings have been completed, simply import clips as you normally would do. Proxy creation (or copying or transcoding as specified in ingest settings) begins in the background immediately. A progess bar at the lower right corner of the screen shows the background activity. And you will note that if editing a clip during transcode, the operation will pause.
Toggling between full-res and proxies can be done either through the menu structure or better by adding a button in the viewer window. Click the Plus on the right of the viewer window to bring up the button editor. Locate the Toggle Proxy button and drag to the bottom of the window (where all the other buttons reside). Then just clicking toggles between proxy and full-res.
I personally consider the proxy workflow to be among the most significant new features. Reducing media size enables working over shared media. It allows for full playback of higher resolution clips such as 6K and 8K. I hear far too many complaints that “my computer won’t play back my 4K files.” Well, maybe your CPU, GPU and memory aren’t up to the task or maybe asking your computer to play back 5 layers of 4K, each with effects and color grading is just beyond possibility. Proxy workflows have been around since the beginning of non linear editing. Edit your proxies. Even grade them. Then switch to the original media to finish and export.
Adobe placed more of SpeedGrade functions within Premiere Pro leading many of us to speculate that the products may ultimately be merged. The Lumetri HSL secondary correction is a step in that direction.
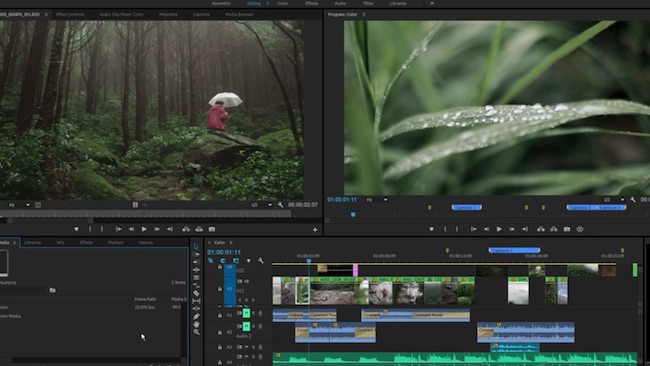
Open the Lumetri window and click on HSL. Using eyedroppers, select a color or range. Refine that mask with the tools and by use of viewing the matte. These are old skills. Once that mask is defined, then make adjustments. In my example, I pulled a color key and turned a brown sweater green.
Secondaries are by no means innovative. But the integration of secondary color correction into the NLE app itself is definitely a productivity boost for editors who now may not need to jump between applications.
Premiere Pro can integrate with Adobe Stock, allowing browsing of Adobe Stock libraries, inclusion of a watermarked version in the project and of course, giving Adobe your money to license the image.
While on the topic of color, improvements to the Lumetri scopes include a greater variety of scopes and adjustment of the intensity of display and graticles.
Open Caption is now supported, a far more web friendly captioning method than conventional Closed Captioning since no decoder is required.
More control panels are supported and in an upcoming article I’ll be talking about the new Tangent Ripple panel.
VR editing is now not just virtual but is a reality with Premiere Pro. While not as robust as Tim Dashwood’s VR Toolbox for FxFactory, VR editing in Premiere Pro allows import from a number of different camera systems, integrates with third party VR plug-ins and exports to all popular formats of VR delivery.
For more on that see: Editing VR in Adobe Premiere Pro 2015.3
We’ll be discovering more about all of the CC updates over the coming days but Adobe has definitely provided a ton of new features and fixes to the production community with the latest Creative Cloud pro video updates.
Tags: Post & VFX

RedShark 2020 @ All rights reserved.

Comments