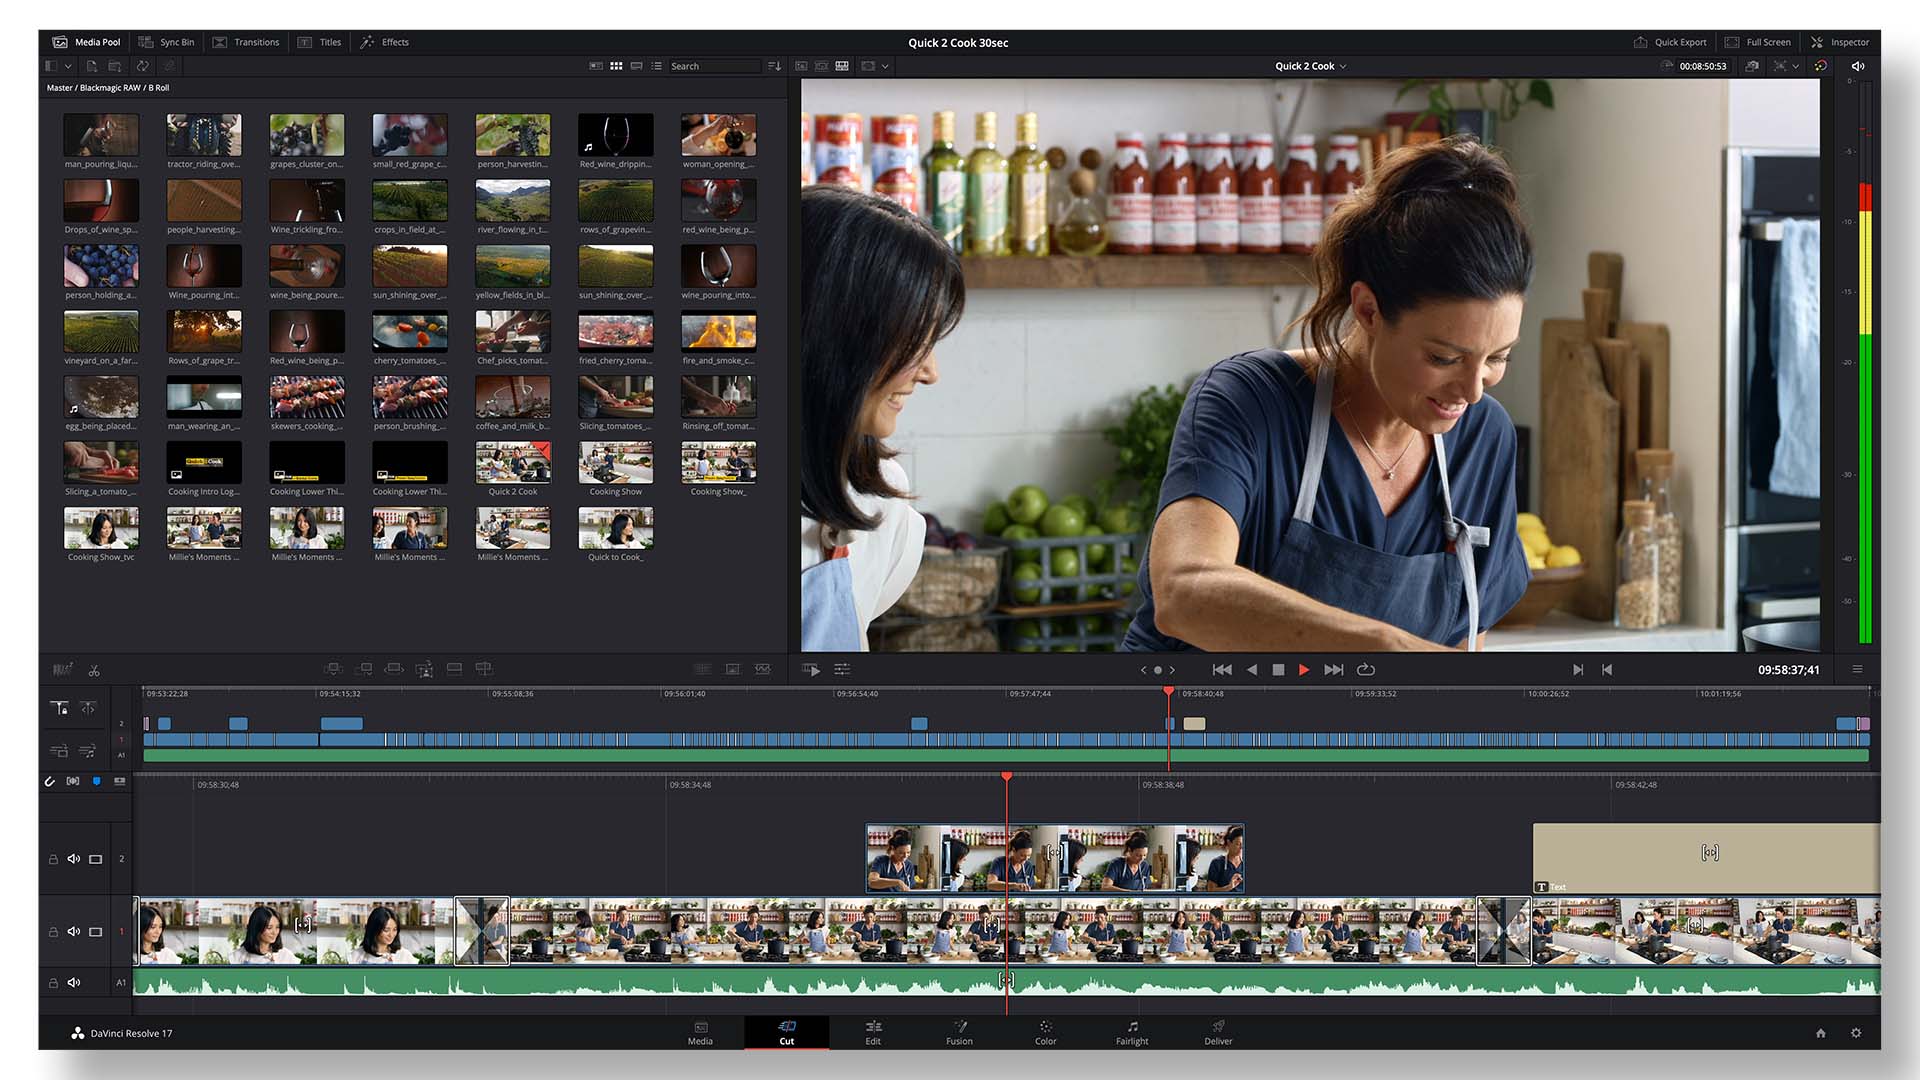
4 minute read
Even the most powerful computer can suffer playback issues when many effects are applied. Here are several methods to make DaVinci Resolve playback as smooth as butter.
Not everybody has a new M1 Pro/Max Mac or a custom-built editing PC that can chew through footage at a rate of knots. Even if you are lucky enough to own one of the fastest computers around, once you start to layer on specific effects, even they can slow down or stutter on playback.
Luckily DaVinci Resolve has quite a few features built into it that have been designed to make your life easier, so here's a breakdown of techniques you can use to make your timeline fly.
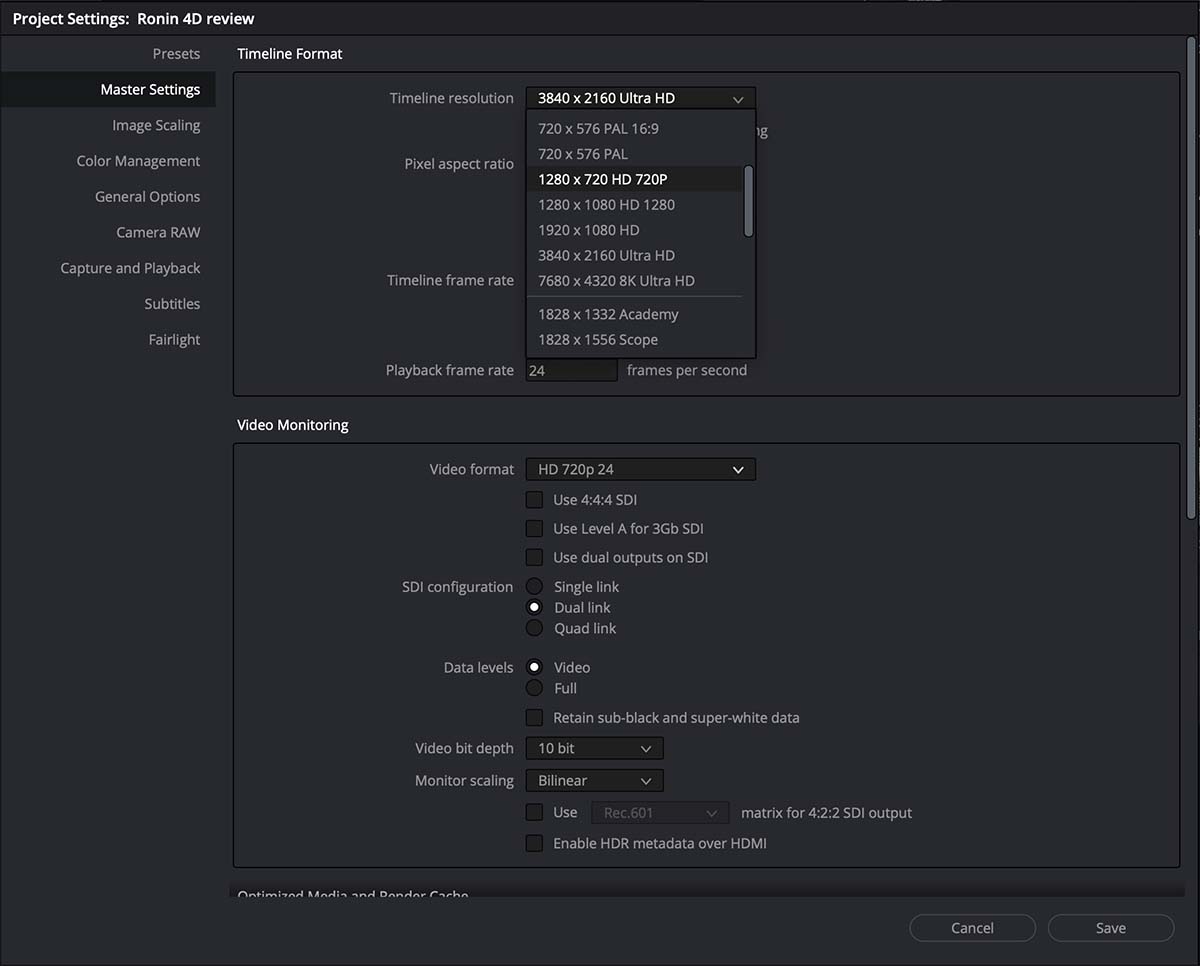
Right now, 4K and higher resolutions are more common than ever before, but actually editing on a 4K or higher timeline isn't the most efficient use of your computer's processing powers. So when it comes to speeding up playback, setting the project to a lower resolution, even on a powerful machine, is an often overlooked step that can make a huge difference.
One of the most important things to understand about DaVinci Resolve is that it is resolution agnostic, so changing the project resolution setting in this way is not baked-in and doesn't affect your footage in any way.
If you want really fast performance you could set your project to 1280x720, for example, ensuring ultra-smooth performance on the vast majority of modern machines. Most general grading and effects can also be carried out at a lower resolution than your intended final output. Then, when you are ready to render your final file or want to perform vital QC checks, you can go back to your project settings to put things back to full HD, 4K, or 8K to view things at full quality.
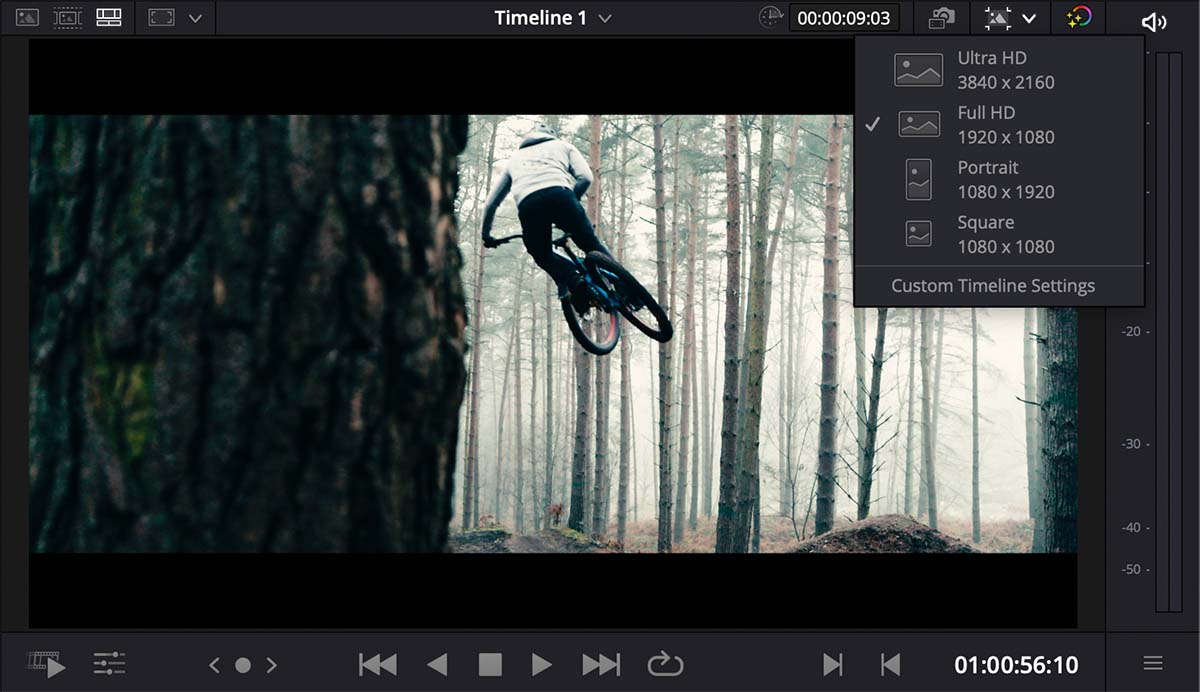
An even faster way to choose the project resolution is to use the quick shortcut in the Cut Page. This can be found in the top right-hand corner of the Viewer, along with some preset resolutions. Of course, you can also opt to choose your own custom settings here as well.
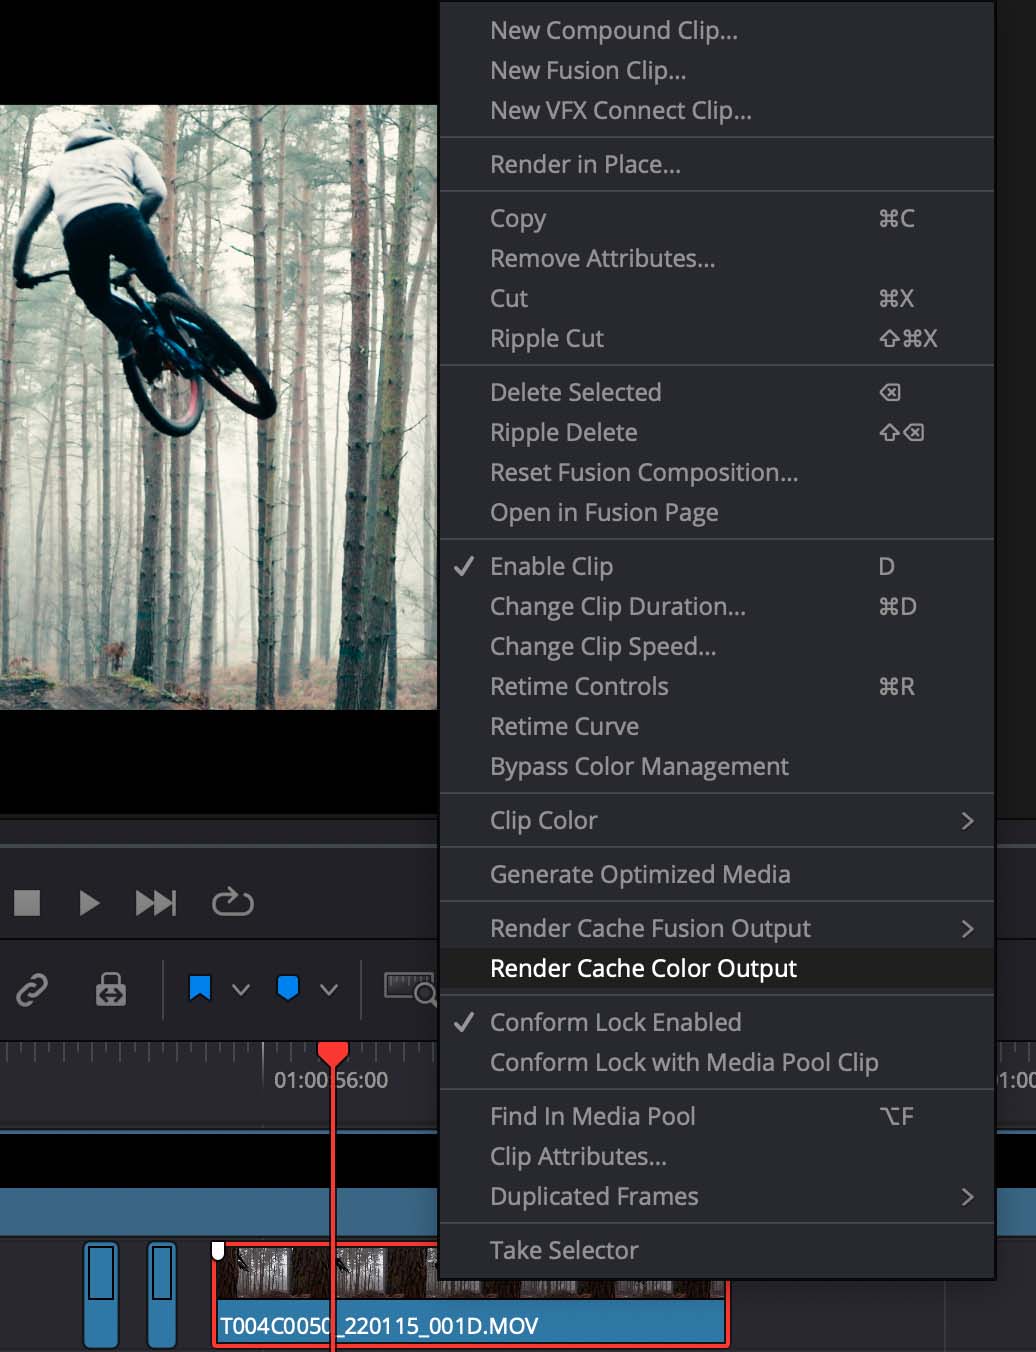
It will often be recommended to use one of the render cache modes to create a playback cache, which we’ll come to later. However, a faster and more targeted method for individual clips that are completed is to use the "Render in Place" function.
If you have a clip causing playback issues or has many effects applied, you can right-click on it and select "Render in Place". This performs a one-off render of the clip, with all the effects applied, to an optimised codec of your choice. Resolve will then replace the clip on the timeline with the newly rendered one, giving you completely smooth playback.
You will have to wait for the clip to render, but it's a lot faster than caching an entire timeline. You can even add frame handles to give you the flexibility to fine-tune editing afterwards.
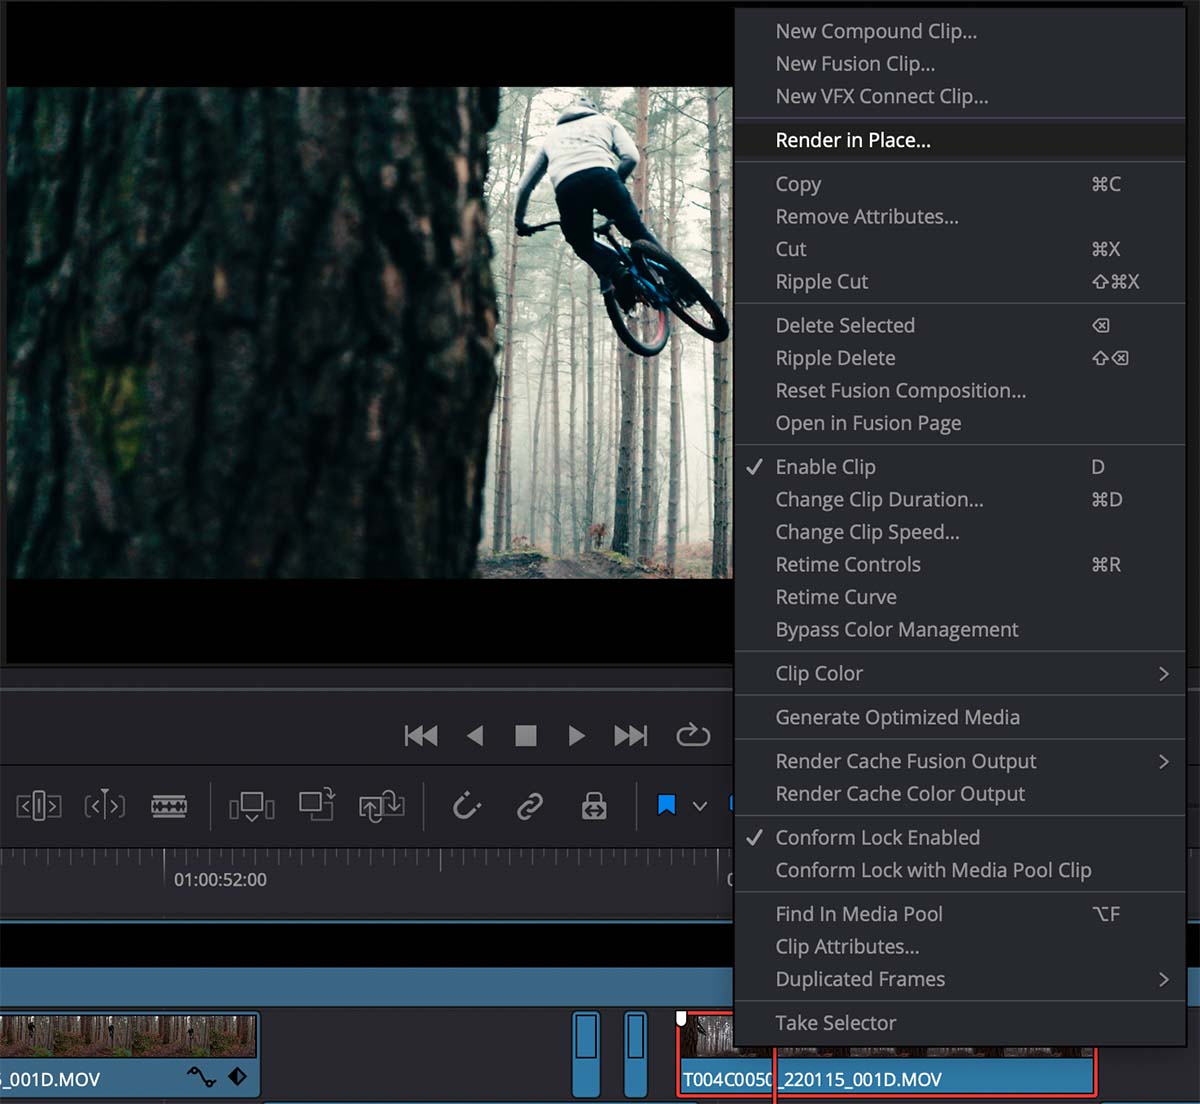
If you need to re-grade the clip or change any of its effects, that's not a problem either. Simply right-click on the clip again and select "Decompose to Original". Resolve will then replace the rendered clip with the original one, with all the effects and plugins you applied to it intact.
Render in Place is particularly useful if you have a complex Fusion composition. Adding handles at either end of the clip means you have the flexibility to fine-tune the editing after the render has been done. Additionally, you can specify that Render in Place ignores any colour grading you may have been experimenting with, allowing you to finish the look of the clip later without the processing overhead of handling the complete Fusion composition as well.
Timeline Proxy Mode is one of the most common methods for helping to speed up playback within Resolve. Timeline Proxy Mode can be an excellent way to speed up playback if you are using a high-resolution timeline. However, it comes into its own on lower-powered machines if you combine it with our suggestion of performing your main edit in 720p. If you still suffer slowdown or stuttering, you can employ the Timeline Proxy Mode to further ease the processing burden on your machine.
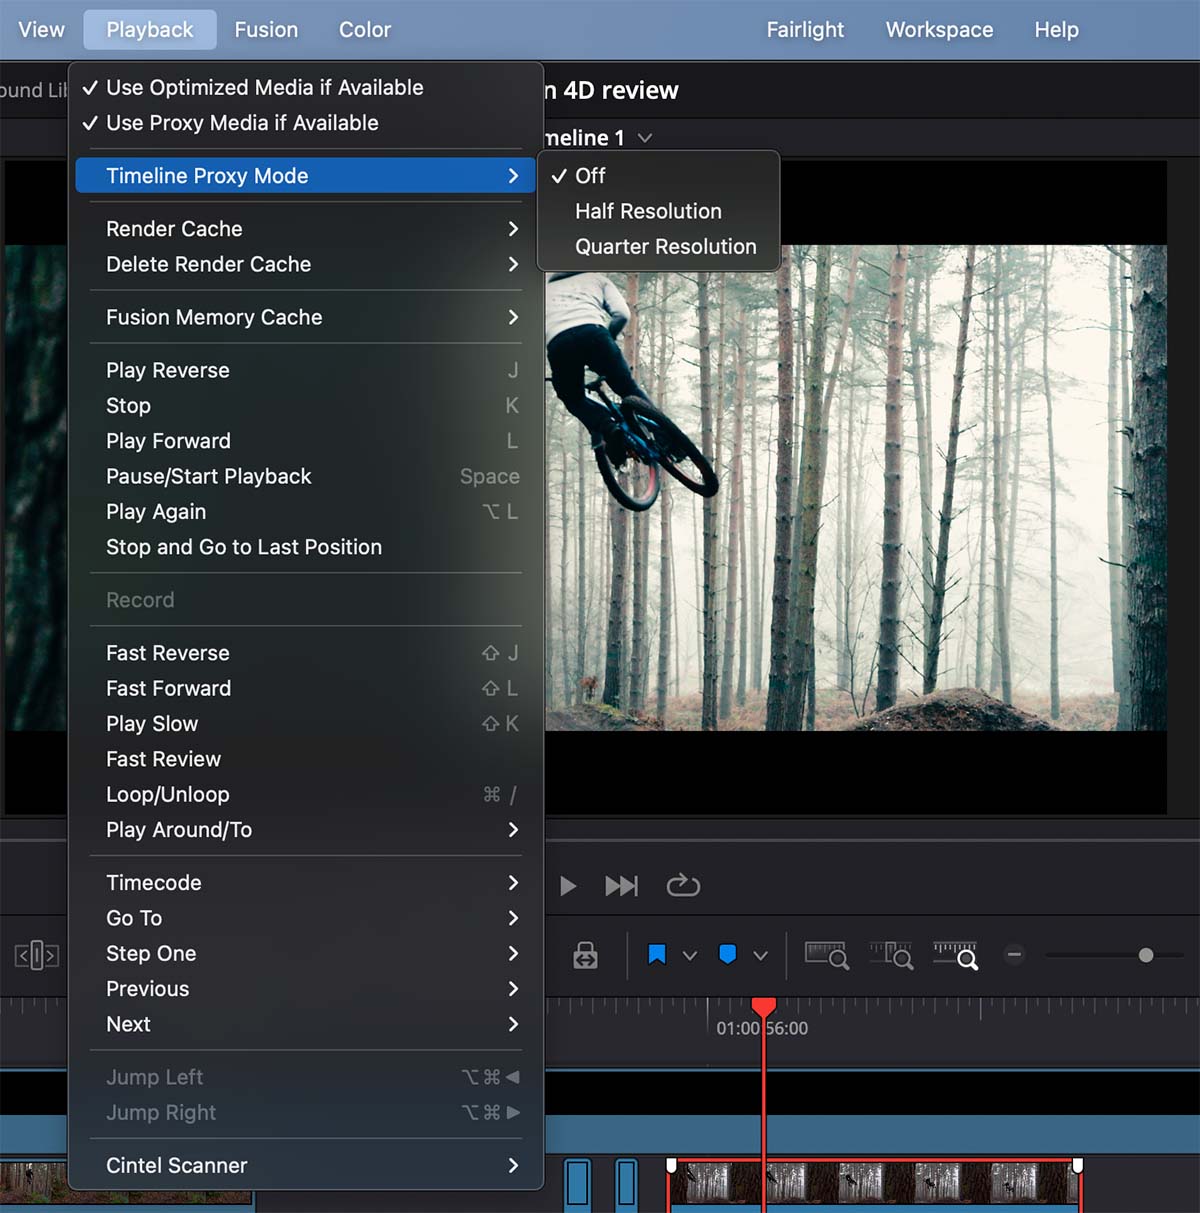
Timeline Proxy mode can be set to reduce playback resolution by half or by a quarter. Still, we would suggest using the other methods above first and then using the Timeline Proxy Mode as an additional weapon.
The render cache can be a helpful way to gain real-time playback of an effects-laden clip that you might still be working on. Although Render in Place is extremely useful for completed clips, the render cache can be helpful for works in progress where constant adjustment is taking place.
The render cache can be set to Smart or User. Smart mode will tell Resolve to automatically render out clips that exceed the real-time playback capabilities of your GPU. However, a much more selective method is to set it to User mode. This will tell Resolve to only render out clips that you have manually marked by right-clicking on a clip and selecting "Render Cache Color Output". Resolve will then only render out that clip for real-time playback. In addition, the quality and resolution of render cache files can be set within the project settings to save storage space.
The methods we've outlined above are the primary means to achieve smoother playback right from the beginning of a project. However, you can use additional techniques, particularly when working with raw files.
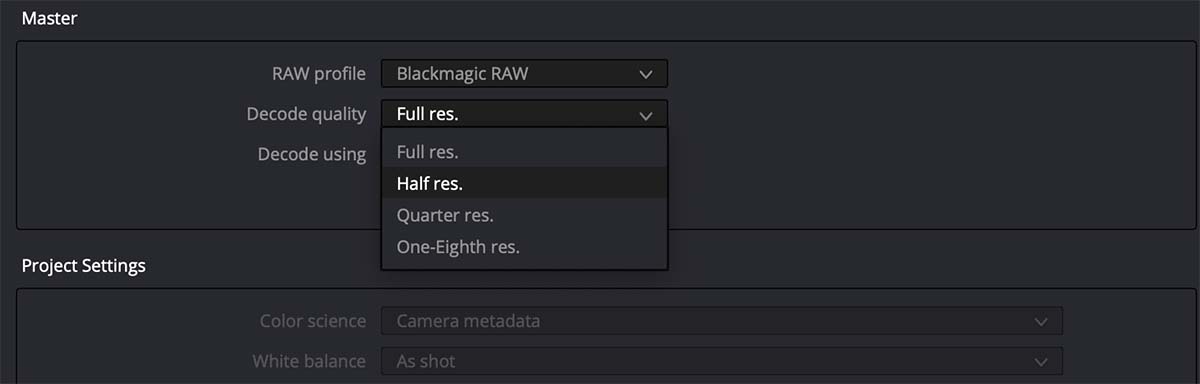
Using the Camera Raw tab in the project settings, you can tell Resolve to decode raw video files at a lower resolution. Setting the raw decoding quality is particularly flexible when working with Blackmagic RAW files, for example, from the URSA Mini Pro 12K. However, even if you are not working with 12K files, you can drastically speed up performance by choosing a decode quality of half, quarter, or one-eighth resolution.
The last method on our list is to render out low-resolution proxy files of your main media. Depending on your machine's power, this can be a time-consuming process, and it uses up additional storage space on your drives. However, you can decide only to render out proxy files for clips you have used in your edit. But for the reasons we've mentioned, we would recommend looking at proxy file generation as the last resort for playback performance. Although proxy files can still benefit collaborative edits over the internet, media needs to be uploaded and shared.
On Wednesday March 2nd 2022, Blackmagic Design is running an online Webinar, going in-depth into how you can maximise performance in DaVinci Resolve. To register, follow the link below.

Tags: Post & VFX Sponsored Editing

RedShark 2020 @ All rights reserved.

Comments