3 minute read
With Resolve 17 in beta we look at some of the considerable improvements and additions to the Edit, Color and Fairlight pages. Part 1 of 2.
To get the most out of the new features you’ll need the Studio version although some of the new features are available in the free version as well.
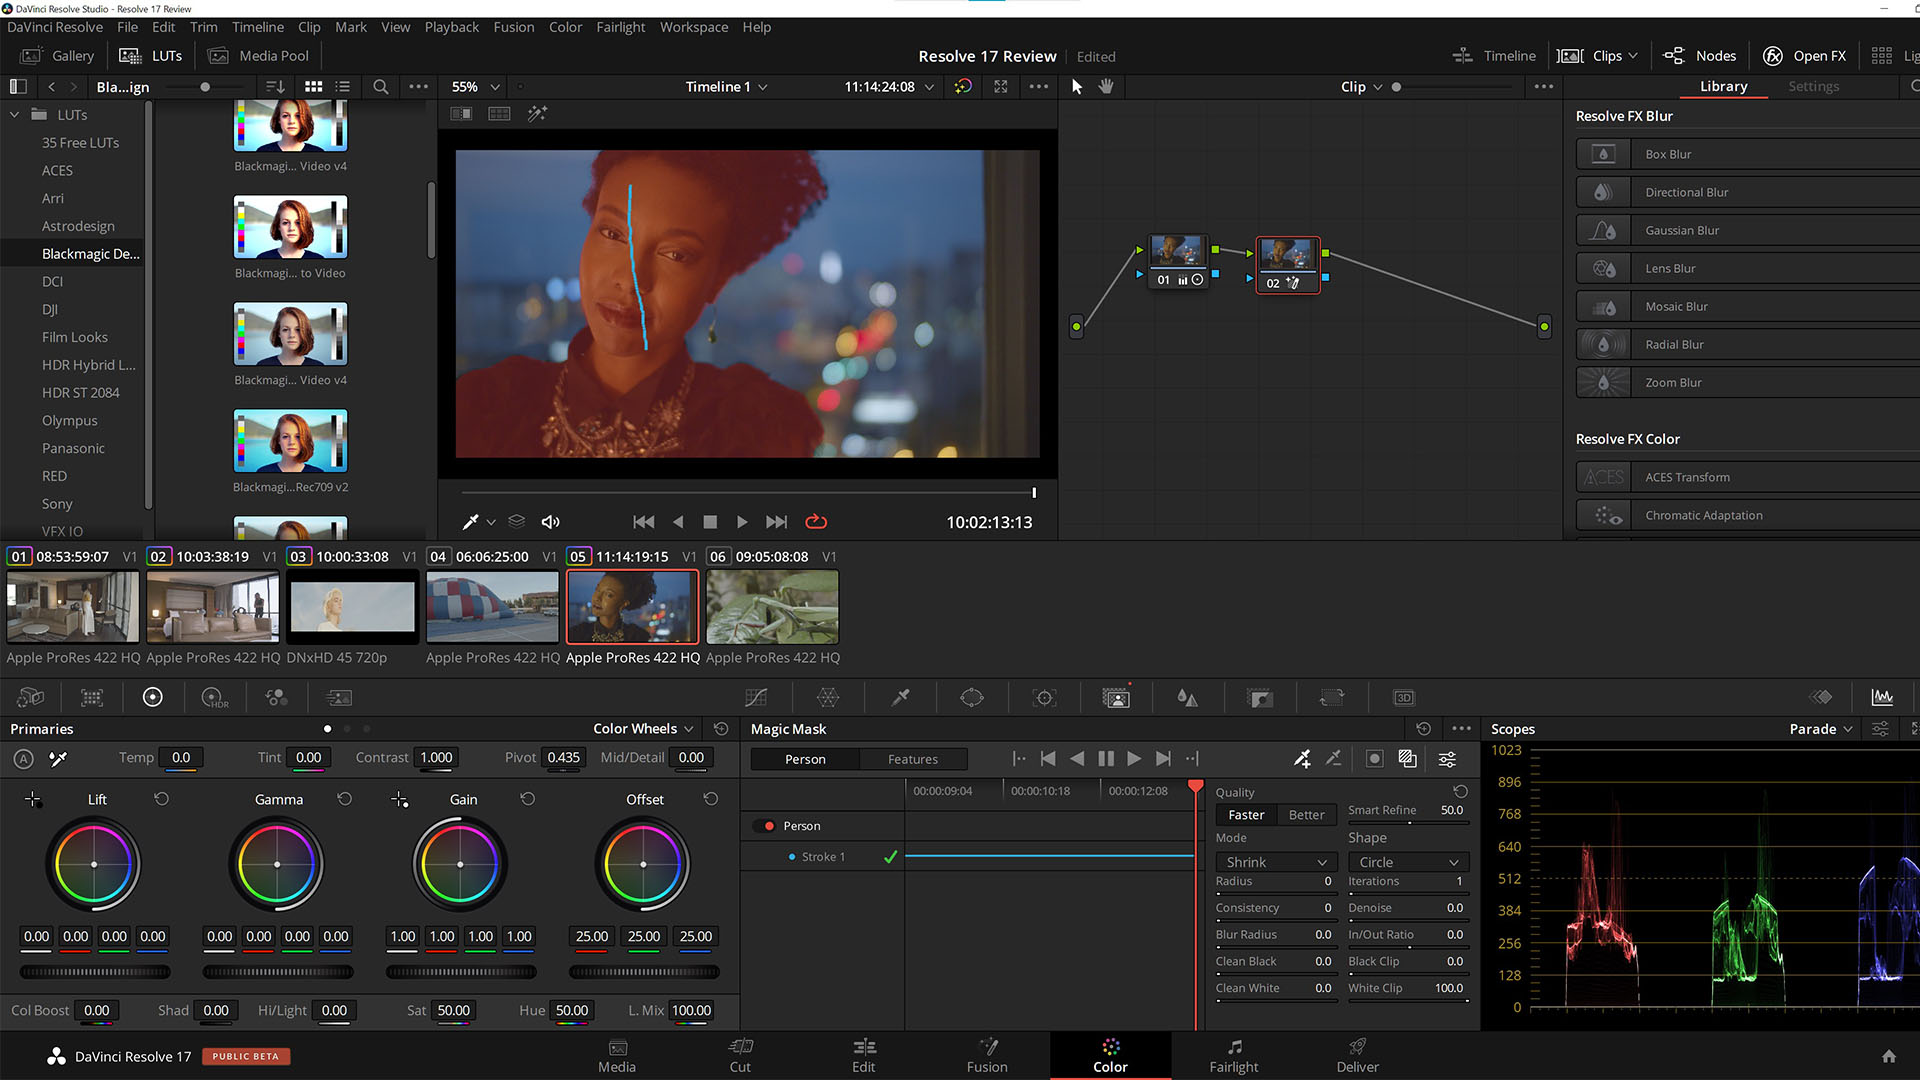
There are a couple of features here which really stand out. Firstly the new Magic Mask tool which is only available in the studio version. This can be used to easily select a person or isolate their hands, face, arms etc. and well...mask them! It’s basically an AI driven power window, it uses the DaVinci Neural Engine so results can take a bit of time when tracking.
It often needs a bit of tweaking but in my limited experience it gets you most of the way to a good mask with just a small swipe of the pen or mouse. It gives even better results if you switch to quality mode at the expense of processing time. Although it can’t work miracles with challenging subjects. It won’t get you the ultimate clean key for roto work but it works very well for grading. There’s a lot of room here for expansion into other areas for commercial work with perhaps additional mask categories in the future.
In addition the new High Dynamic Range grading tools give you some new ways to colour your image The color warper or ‘spider’s web’ manipulation tool allows you to push and pull specific color values without the need to touch the wheels. You can also pin points that you want to exclude from adjustments. Falloff areas can also be set which allow you to adjust how aggressive the adjustment is outside the main area of interest, you can even edit the fall-off regions and add your own ones as well.
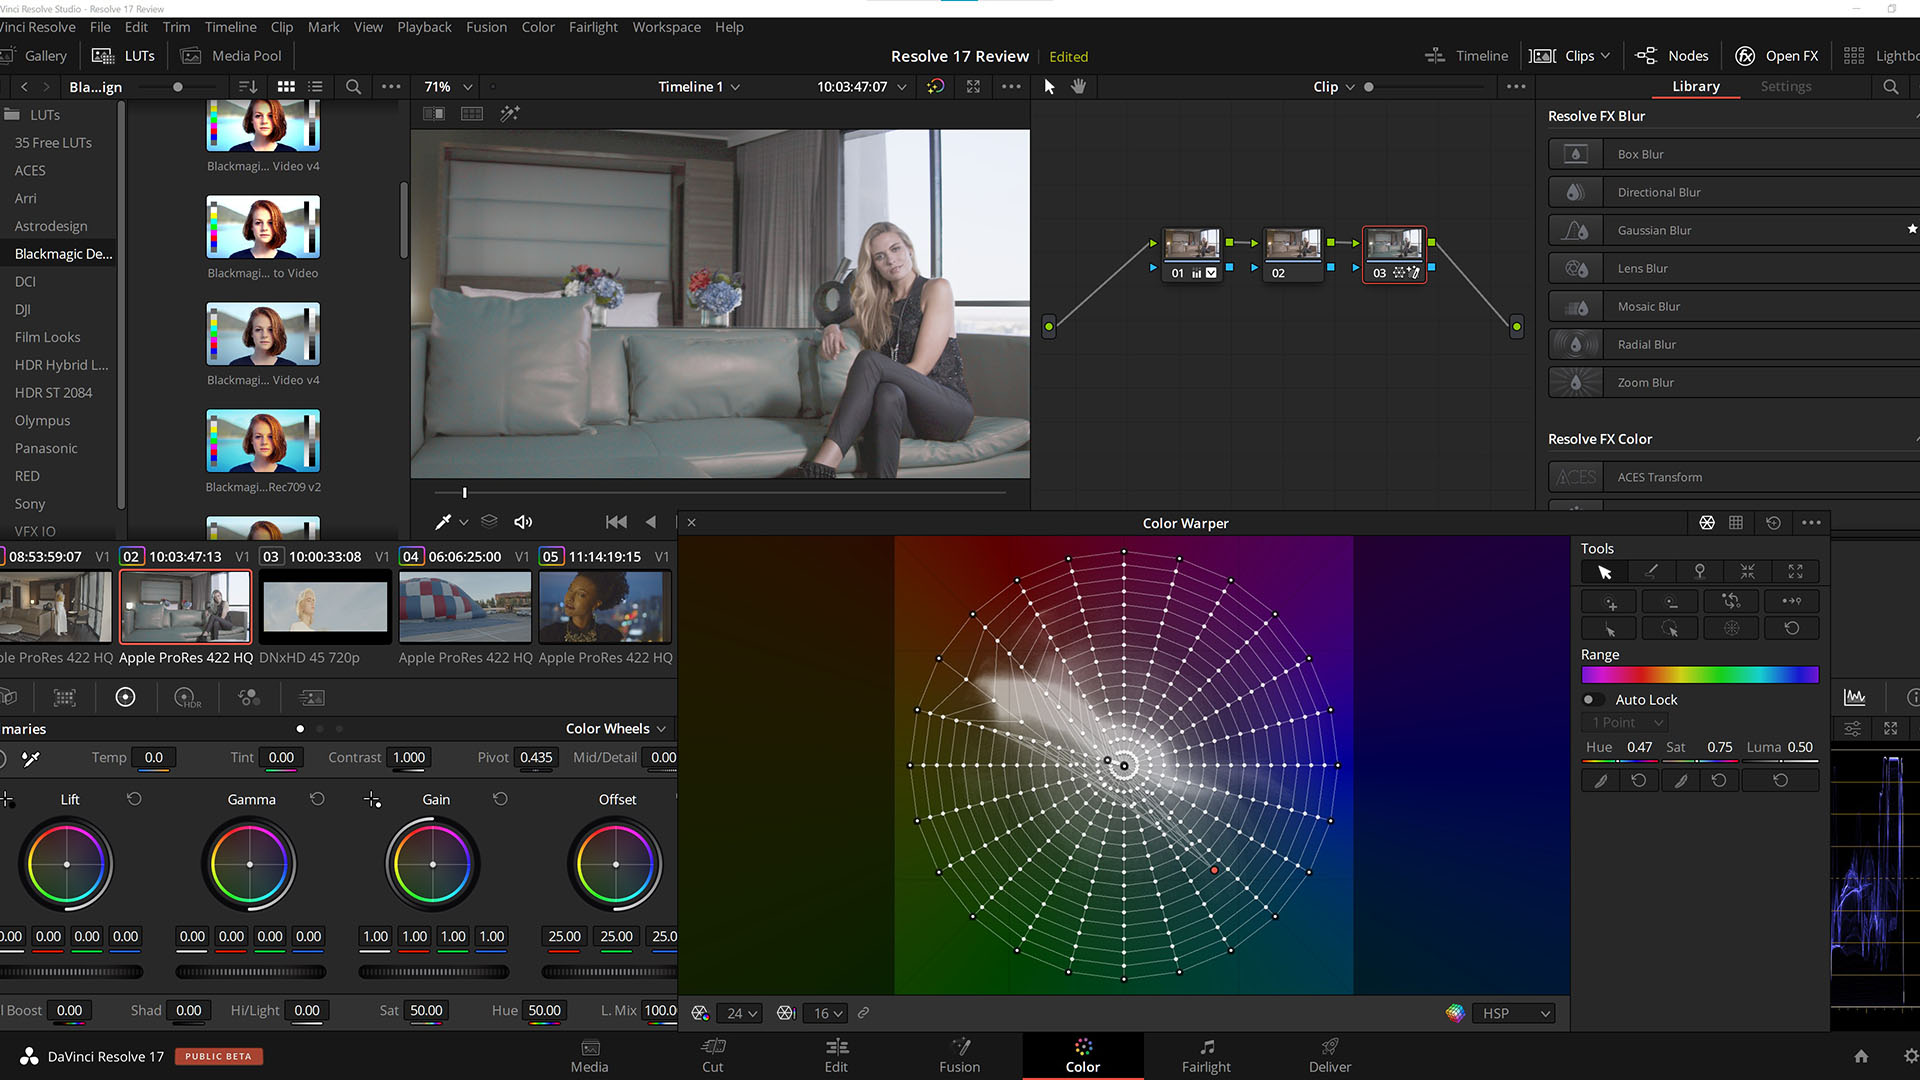
There’s a change to the colour wheels - you no longer have a second page, all those older adjustments have been moved above the main interface. In HDR mode you get access to seven different wheels. Black, dark, shadow, light, highlight, specular and global. The global control now allows you to push the overall colour balance in an image but without effecting the shadows and highlights as much. For example this produces a much more natural look if you’re warming up a shot.
There’s a new Sat Vs Luma curve adjustment and the scopes have also seen some changes. It’s now possible to have a 3x3 layout and to display the area of focus of the qualifier over them. You can also have a second scope window open on another monitor. There’s also a new option with regards to LUTs. Now you can have your LUTs in various different folders and in different locations and point Resolve to them.
Blackmagic Design has also introduced a new colour space for HDR work, termed DaVinci Wide Color Space, which is even larger than BT2020. In colour terms it’s rather like the color equivalent of working with 12K files - more room to move and covert to a smaller color space. The new HDR tools are designed to complement this new space although they can work with any supported gamuts.
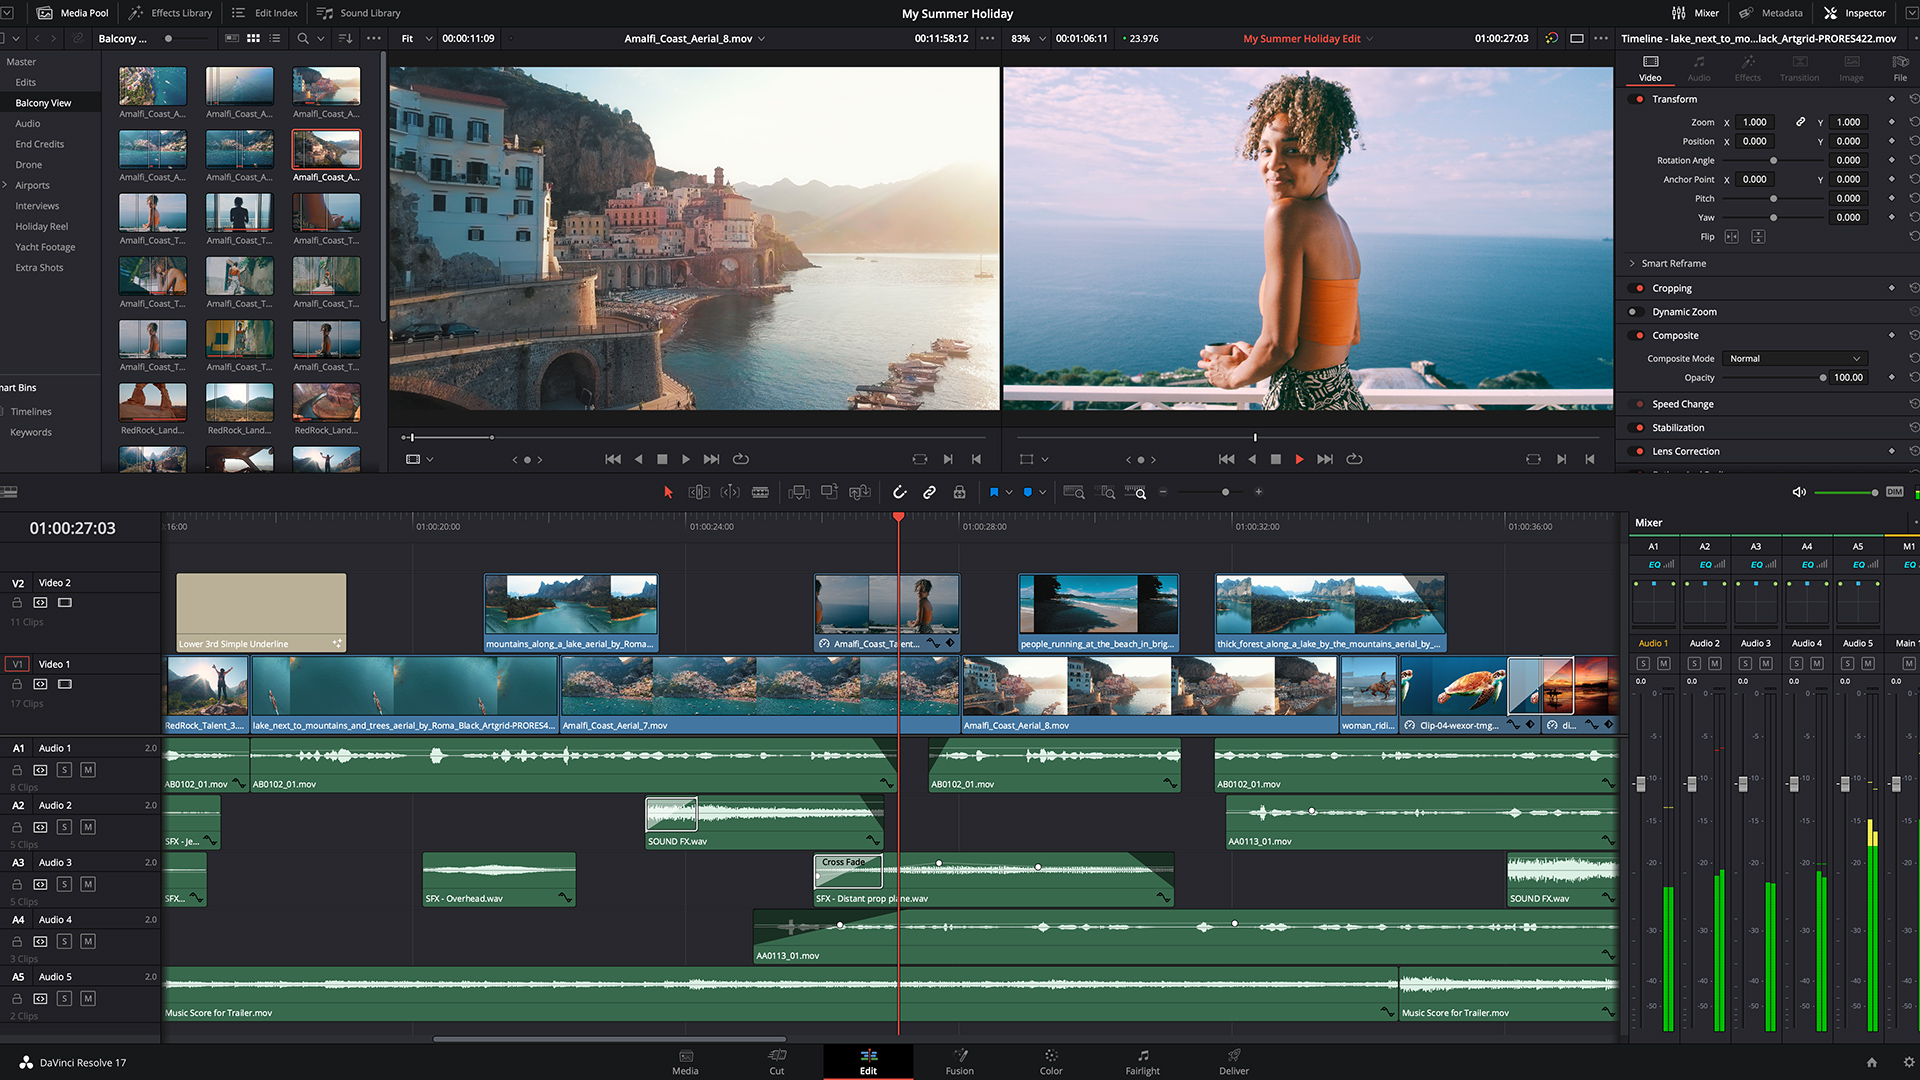
There have been some improvements to the edit page, including a reorganisation of the inspector controls. You can apply and adjust noise reduction and keying without having to switch over to the color page. Also supported is the export of your timeline for collaboration with a .drt file, without having to export the project. You have the ability to disable a timeline so that when collaborating you can make sure you’re not working on an older version.
There’s a new render in place option for areas of your timeline that prove difficult to play back. You can now create proxy media either within the edit page or with via a 3rd party solution and link to them within Resolve. The hover scrub previews for effects and titles are a very welcome feature, which enables you to quickly determine what might work for your edit.
Fusion by comparison has seen less of a jump but one of the new additions is the ability to create compositions in Fusion and use them as templates in the edit and cut pages.
There’s a new animation curves function which when applied allows you to trim your fusion effect and not have the start or the end truncated. It applies the effect relative to the duration not absolutely so any trimming retains the effect but just changes the timing and hence speed.
And finally there’s now support for markers and audio.
There have been some significant updates to Fairlight including the ability to use up to 2000 tracks with dedicated hardware. There’s also a new FlexBus system which, as the name suggests, allows more flexibility with assigning and grouping buses. You also get support for Dolby Atmos - both importing and exporting tracks - and a new transient mode that instantly shows them as vertical lines on the waveform.
There’s a lot of new features included and I’ve only managed to cover just a few of the 300+ additions and changes in Resolve. In Part 2 we’ll have a look at the cut page and the newly released Speed Editor control surface.
Tags: Post & VFX Review

RedShark 2020 @ All rights reserved.

Comments