5 minute read
How well can old video footage be restored? Here's what happens when you apply Topaz Video Enhance AI to high quality SD XDCAM footage.
A short while back I reviewed Topaz Video Enhance AI and I was thoroughly impressed at how it could restore highly compressed and really quite mangled footage. Impressive though that was I had yet to be able to try it on some high quality master footage. I've long since ditched my DV decks and most footage available in SD resolution online is highly compressed due to the inferior settings YouTube uses with 360p and 480p.
I recently dug up some of my XDCAM discs from circa 2005, and with the extremely kind help from the people at Sony Professional Systems Europe they managed to dig up a PDW-U2 XDCAM optical disc drive for me to use to transfer some of my old footage to my current editing machine.
I'd been looking forward to doing this for a while to see what Topaz Video Enhance AI could do with footage that, at the time, was regarded as being very high quality standard definition. Granted, my PDW-510 wasn't producing the 50Mbps 4:2:2 results of the pricier PDW-530, but even still these were generally seen as the pinnacle of standard definition technology outside of Digibeta. Extremely clean images and PsF progressive scan capabilities mean that the cameras were lauded for their image quality.
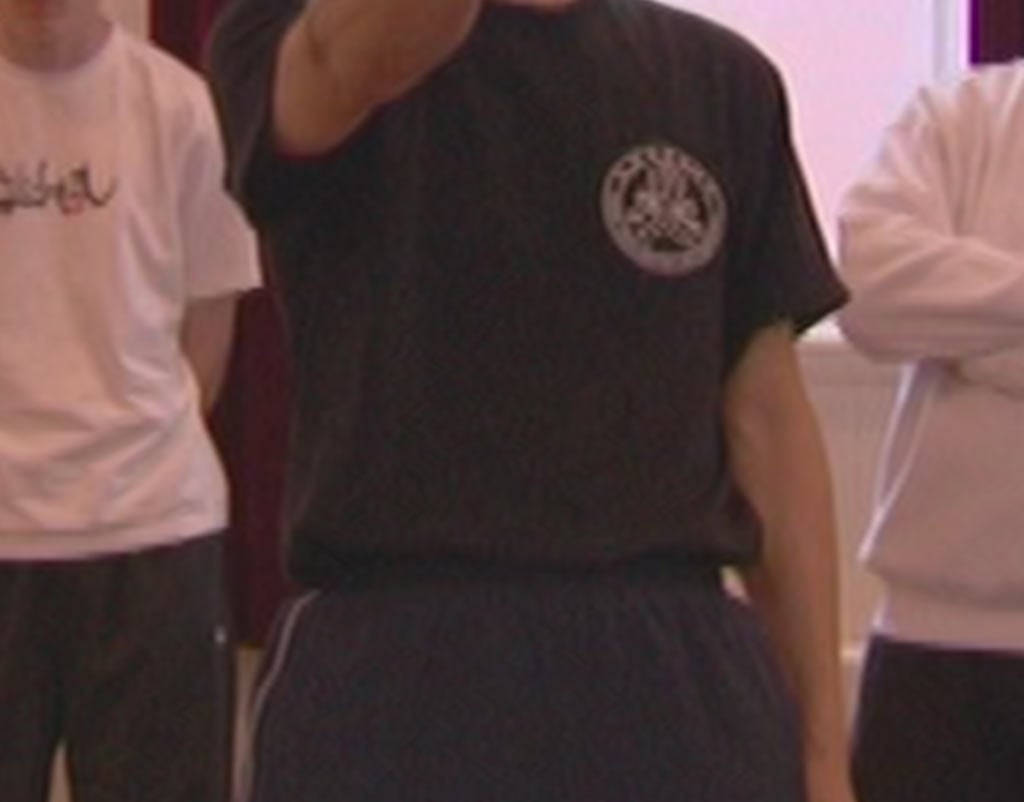
I discovered a number of different projects on the discs, some of which I'd rather forget! But I found everything from footage from my documentary on Matt Coulter, the motorcycle stunt daredevil known as The Kangaroo Kid, martial arts seminars, and a comical fight sequence from a failed indy feature I worked on. More of which you'll get to enjoy in another article.
For now let me focus on what kind of results you can expect. Transferring the footage from the U2 drive wasn't quite as straightforward as I expected. None of the current NLE software would read the camera's MXF files if I copied them directly to my hard drive, despite claims to the opposite. I can only assume that the SD version of XDCAM was forgotten to the passage of time and that current software will only read the more modern solid state recording incarnations such as from the EX1/EX3 and later SxS and SD based cameras. I wasn't prepared to mess around with command line software such as ffmpeg, so I searched for some more user friendly alternatives that could read the MXF files properly.
I tried to use Sony's own Catalyst Browse software, but for some reason it kept greying out the export button once footage was selected, so it fell to Less Pain software's Kyno (now owned by Signiant) to do the work of transferring and transcoding the footage to ProRes.
This took a little bit of experimentation because I usually always shot footage at 25p, which on the PDW-510 used Sony's PsF (Progressive Segmented Frame) system. This was a way of storing progressive scan footage within an interlaced stream, and while it worked and should be treated by software as being true proscan, it sometimes isn't.
In the case of Kyno, it isn't. I found that when I exported the footage by telling the software it was proscan it seemed to line double the image, causing aliasing and of course a reduction in effective resolution. If I told Kyno it was interlaced footage I ended up with the full resolution, although software thinks the resultant footage is 50fps. It plays back at the correct speed though, because each frame is shown twice, so it still goes perfectly well on a 25p timeline. It's something to be mindful of with PsF footage though.

Now for the fun part. Topaz Video Enhance AI has undergone a couple of major updates since I first reviewed it. One of those is the ability to perform AI interpolation of frames to alter playback frame rates, and another is a much more fine tuneable upscale option. Which one best suits your own footage will take some experimentation. What I have discovered is that whilst some shots I have tried have had mixed results, in some cases the results have been remarkable.
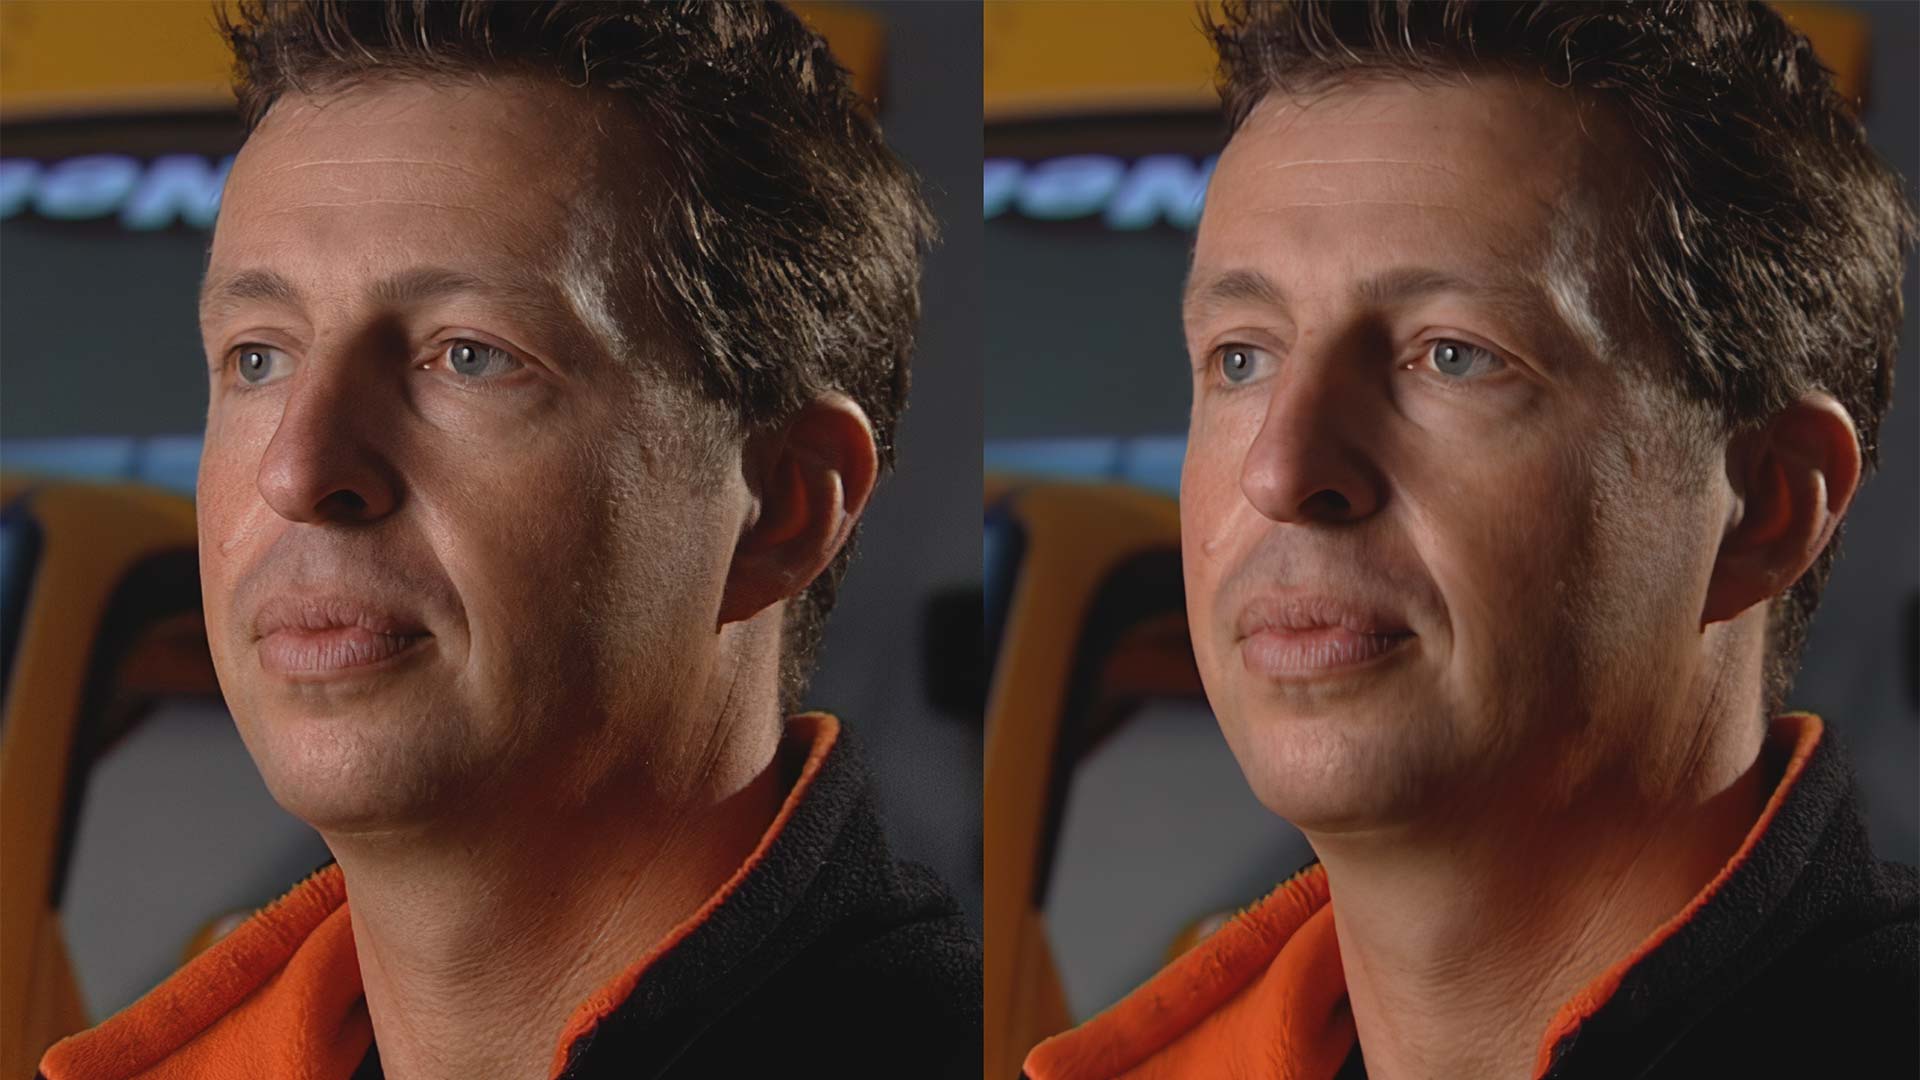
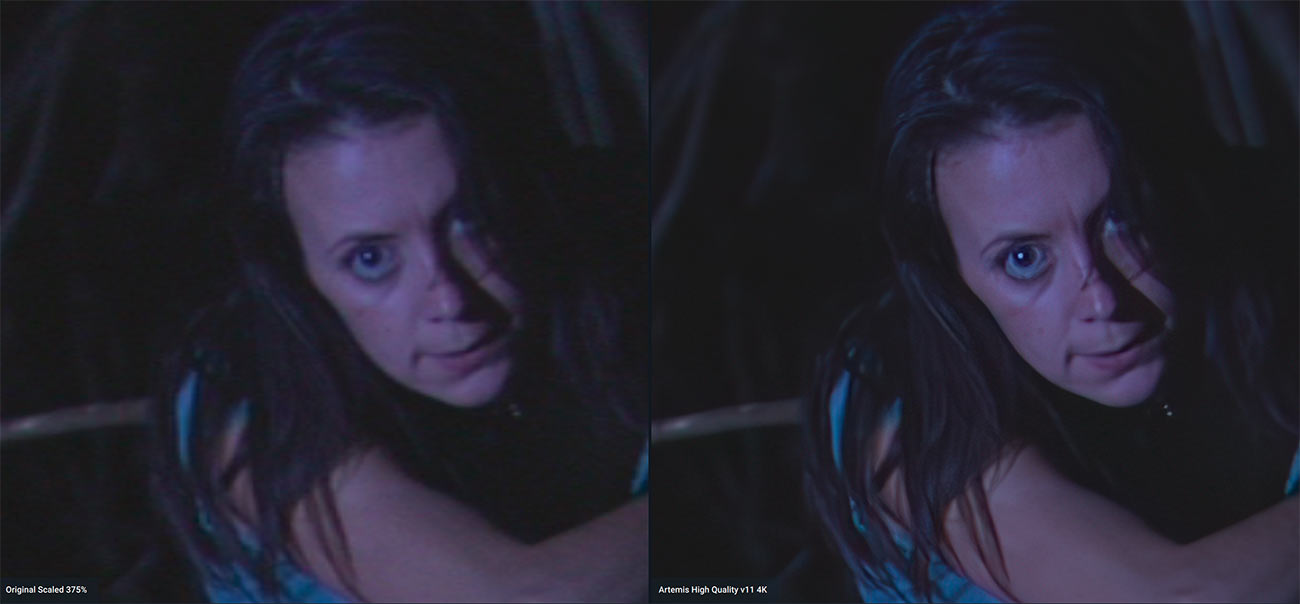
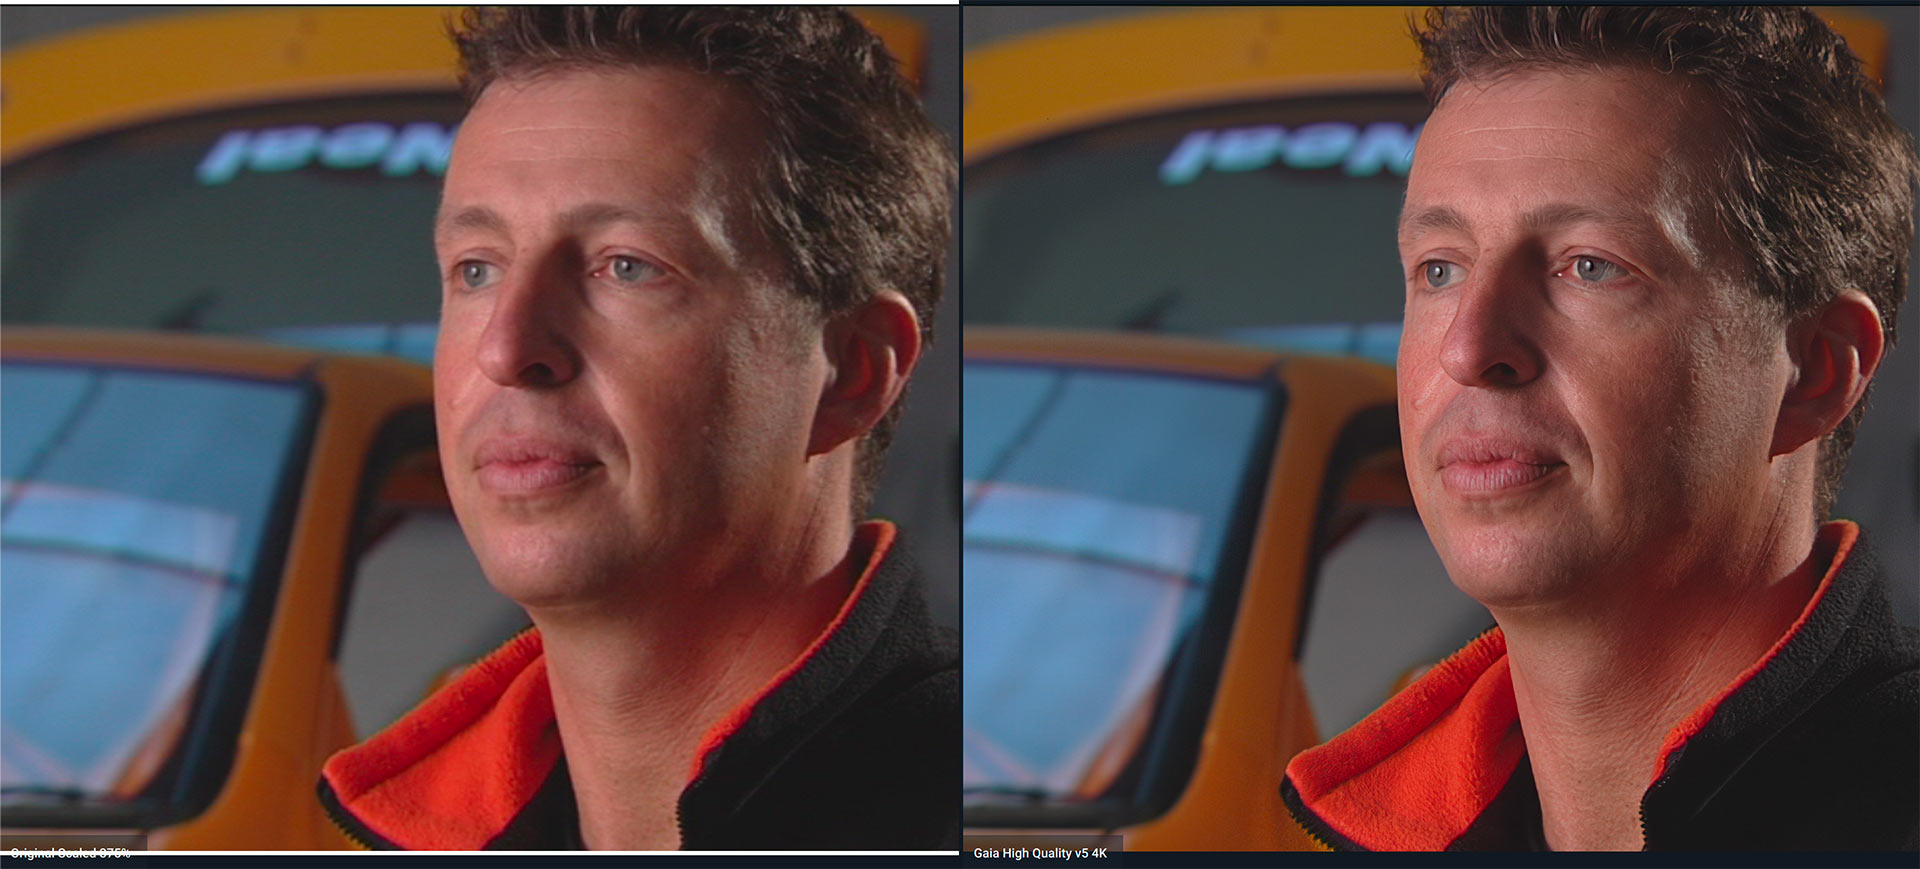
Another thing that has become apparent whilst performing these experimentations is that cameras that we once regarded as being incredibly noise free and quiet, by today's standards are anything but! It is eye opening to go through some of this footage, even from my high definition XDCAM stuff from the PDW-320, to find just how far cameras have advanced today. But let's take a look at a couple of examples. I've captured cropped areas of the images so that you can see the differences close up.
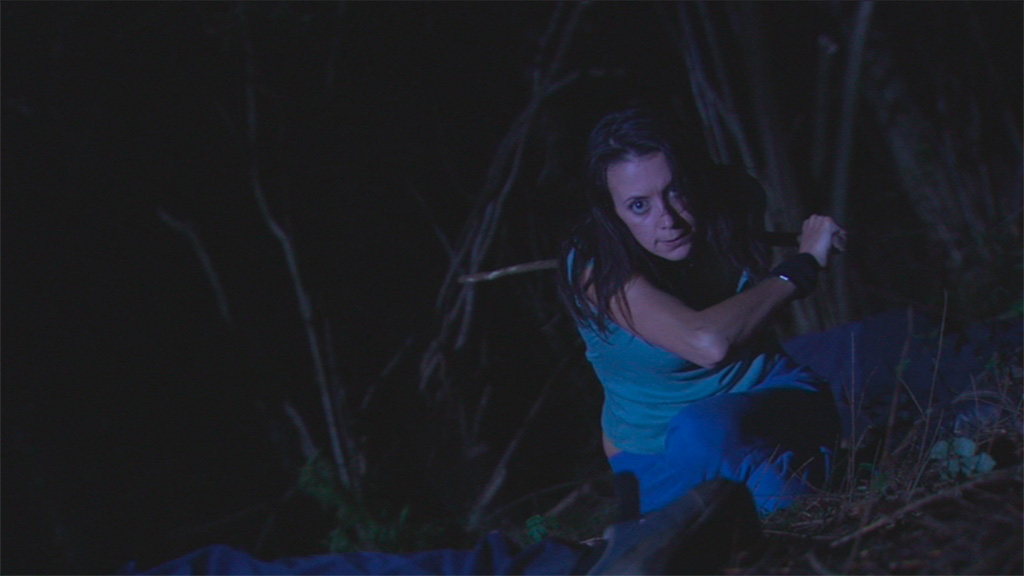
 The 4K conversion.
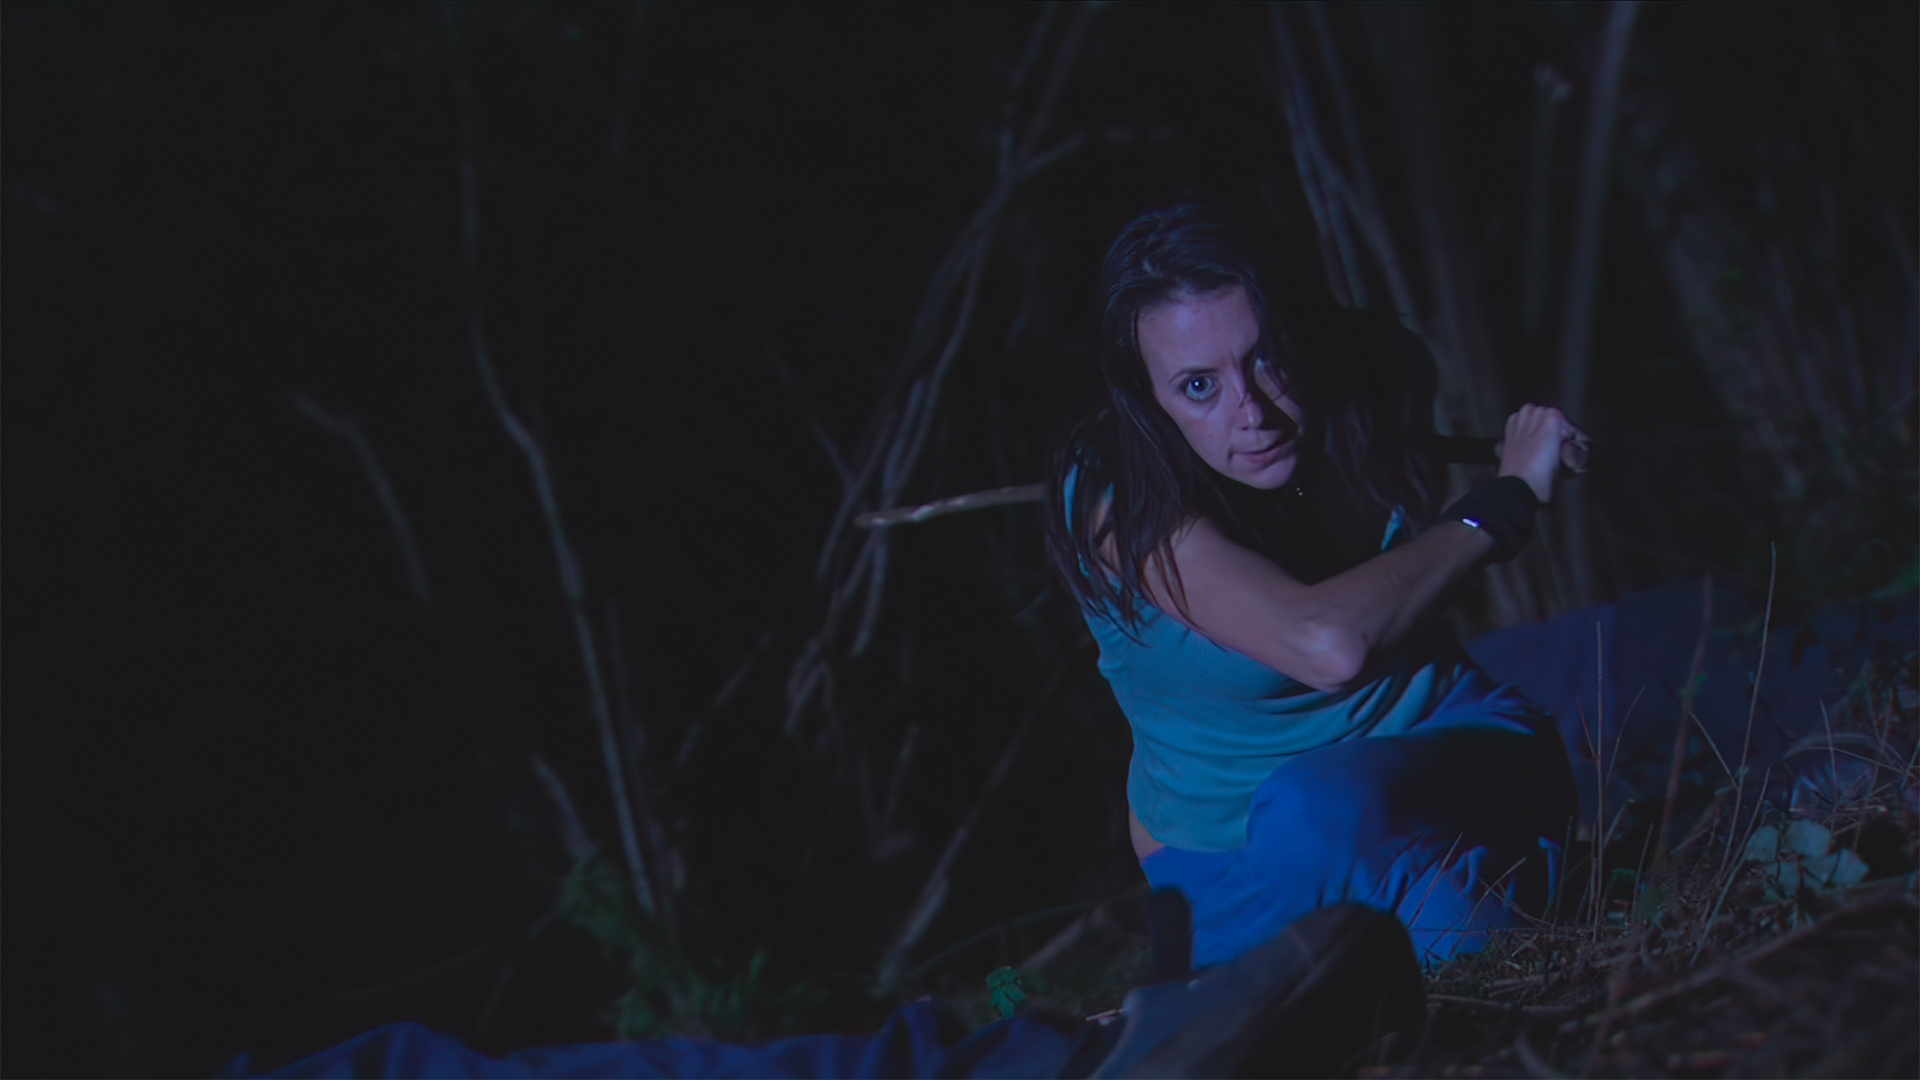
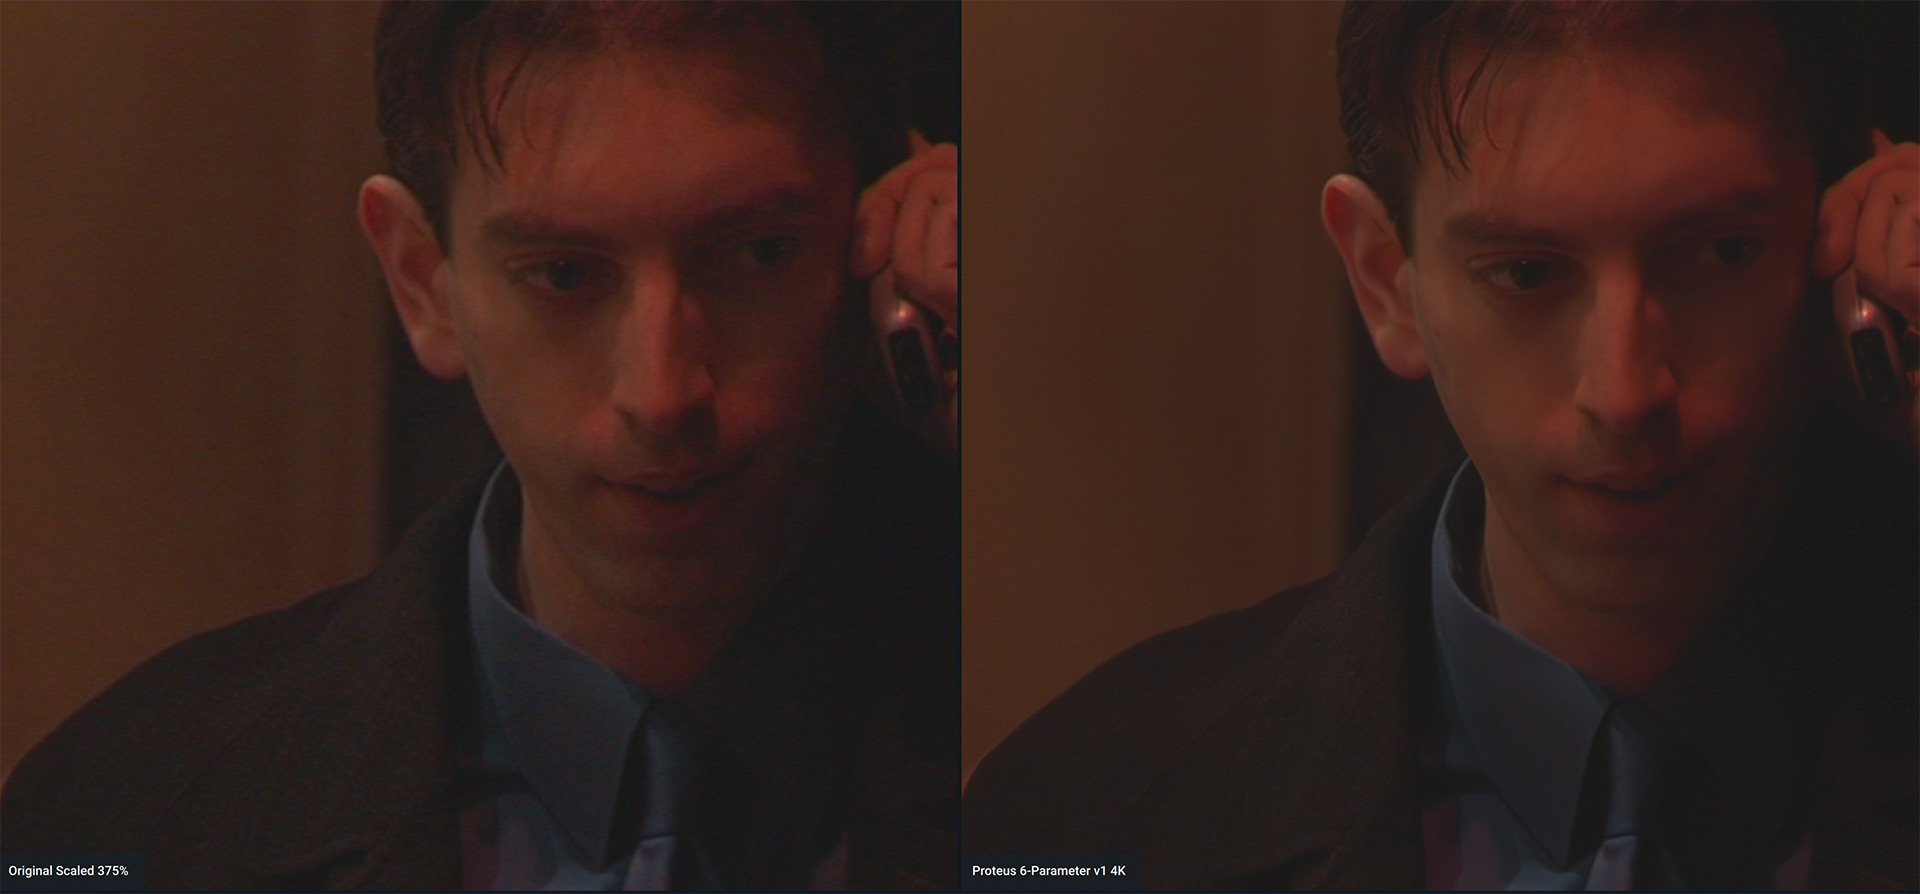
Nothing is perfect, there will always be imperfection in an upscale like this, particularly where the AI struggles to recognise an object or texture properly. Remember we're going from standard definition to 4K. Going into this we need to temper our expectations at least somewhat. Our SD footage is never going to look like it was shot on a 4K native camera, not yet at least. But the footage can be made to look hugely better than it did originally, giving it new life. You might have produced a video or DVD in the past that still contains highly relevant information, or a short film that was made on older SD cameras that would still hold up well should it be given a lick and a polish.
The best settings to use in Video Enhance AI will depend on your final aim. I haven't yet found my perfect settings yet. I am torn between using settings like the Proteus 6 setting option or Artemis High Quality vs Gaia High Quality.
The advantage of using Artemis or Proteus is the noise reduction that they perform. However on the other hand, whilst using Gaia generally tends to produce a more detailed and crisp image, it also 'preserves' the noise more. This isn't necessarily a bad thing because it can give more texture and bite, making people's faces a bit less plastic. Gaia does particularly well with facial details like hair, stubble and eyebrows, particularly in low noise, well lit scenarios. As much as I can I like to tell each AI model to preserve as much detail as possible rather than telling it to focus on noise or compression issues unless I really feel that I need to.
The most troublesome footage to process is that which contains text, whether that's on a car number/license plate or on signage. If it's in the distance then you will mostly see a garbled mess. Unfortunately there's no way around this because standard definition often simply doesn't give anywhere enough information in fine detail like this, so it's just something that we'll have to live with as a limitation. You'll see an example of this on a shot of a vintage Daraq car and on Matt Coulter's baseball cap in the video I've provided at the end of this article.
On some of the examples I gave above it can be difficult to see the true extent of how good the up conversion is due to the scaling needed for the web to keep image sizes manageable. I've provided some clips below using both Gaia and Artemis AI models for comparison so you can view these on a 4K monitor, albeit with the caveat of web compression. No single AI model will suit all footage, and sometimes you might need to use multiple AI models within a single edit to find the one that best suits each individual shot. So using Topaz Video Enhance AI can be a slow process, but one that can be very rewarding once you've hit on the right settings.
In general I have found Gaia to give some of the best results even though the resultant file usually has more noise present. Gaia does particularly well with faces, but it also handles natural environment features such as trees and grass far better than the Artemis or Proteus models. Noise reduction can always be handled in the grading stage anyway. Sometimes the model you choose will be down to which artefacts you're prepared to live with the most. For example while Gaia handles trees and grass better you can also end up with more aliasing effects. I'd be interested to hear your thoughts in the comments.
Tags: Post & VFX

RedShark 2020 @ All rights reserved.

Comments