4 minute read
When you are mixing audio it is easy to end up with a signal that is too hot. How do you keep a track of what is happening so that you can ensure consistency throughout your mix?
When it comes to audio, whether it's for music or for film, there are certain fundamentals that must be understood in order to create a quality product. Whilst composition and arrangement play big roles in the production of audio, concepts such as gain staging play a background role that is just as vital. Today, I want to break down the intricacies of gain staging and talk about how to avoid digital distortion, beat noise floors in recording and editing, and make subjective reference points in your work flow.
For those of you reading that have no idea what I'm talking about, let me break it down. When I refer to gain staging, I am talking about the signal level between any two stages in your recording or editing process. This could be the level of the signal travelling between the microphone and the preamplifier, or the signal travelling between an EQ plugin and a compressor. It's this signal that we’ll be looking at today and how its relativity plays a huge part in quality audio.
The first area that needs addressing is setting levels. This primarily applies to the analogue world but as you will soon see, does have some cross over into the digital realm. For anyone that has done any amount of sound recording before, you will inevitably know about the issues that distortion can cause. If you're recording with too much gain, your signal can and will clip the convertors in your preamplifier and will likely render the audio unusable. Not the result that you want if you've just tracked the perfect take!
Inversely, another thing to worry about is noise floor. Every space (unless you're in an anechoic chamber) has a certain level of ambient noise. The human ear tends to remove a lot of it as they are not sensitive enough to pick up tiny vibrations. However, technology is. The thing to remember here is that if you record too quietly, perhaps to ensure no risk of distortion, the relative level of the signal you want to pick up compared to the ambience around you is very small. If we are to then turn this recording up in post-production, you're going to get lots of nasty noise that you can't do anything about. Obviously, proper sound stages and recording facilities do their work to minimise this issue but even they are not perfect.
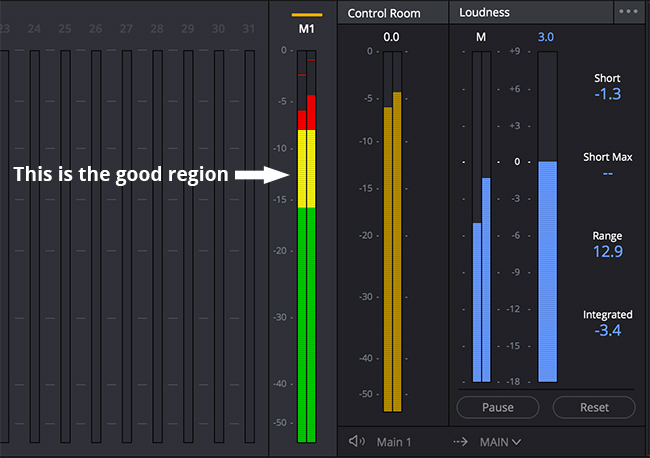
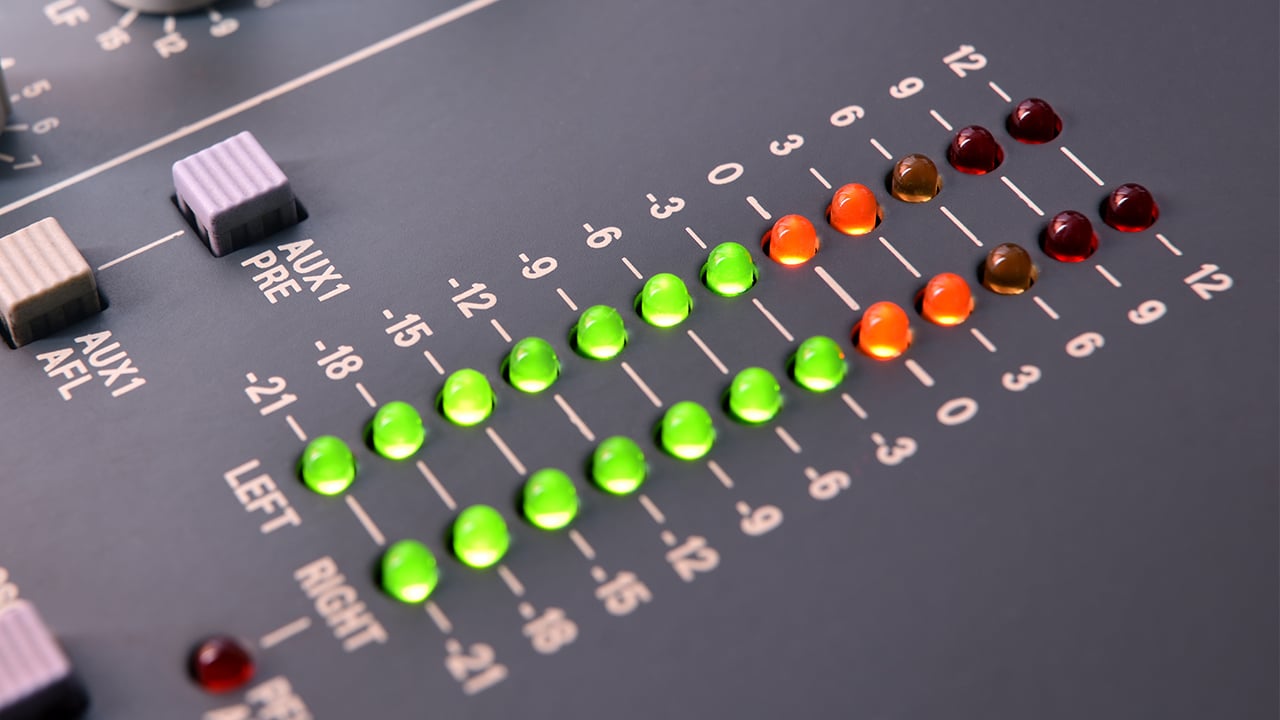
As you can see, setting appropriate levels can be a bit of a minefield. Too hot and you could distort, too low and you introduce too much noise. My simple advice to you is to try to always operate in the yellow. These days, most hardware and software use a traffic light system for metering audio. Green is quiet, yellow is just right, red is too loud. By sticking in the yellow region (usual around -6 to -12dB), you should minimise the effects of distortion and noise floors. This gain staging principal will ensure that you don't run into any issues when moving audio signal from any one device/plugin to another.

As a lecturer of music technology, one of the questions I get asked regularly is “It doesn't matter as long as my master fader isn't clipping, right?”. This is where I shake my head and cry a little inside. For those of you thinking along those lines, remember to think in terms of signal flow. If I add an EQ to a piece of dialogue and my resultant boosts cause the audio to distort, I must use the EQ plugins output level to rectify this. Simply adding another plugin afterwards and using its input level to reduce the signal will not deal with the distortion issues. Equally, turning down the fader does not fix this issue either. All you are doing then is making a distorted signal quieter.
The simplest way to check and make sure you're not introducing any distortion in your DAW/NLE is to turn off every plugin and re-introduce them one at a time, making sure the fader doesn't peak over 0dB. Other options include using VU meters between each plugin to check the relative level between each stage. If none of your VU meters exceed 0dB, you're all good!
Now all of this might seem a little crazy and over the top but it's an essential fundamental of clean audio production. You don't want stunning visuals to be ruined by noisy or distorted audio. However, one of the best reasons for understanding proper gain staging isn't just solving noise problems. It's one of the best ways to make subjective decisions about the processes you under take in editing.
Sometimes it can be tricky to decide if you prefer the effect of a plugin because the signal sounds louder or quieter after you've applied it. Often, loudness plays a big part of what our brains think sounds better when in fact, it's the small adjustments that really bring things to life. Enacting proper gain staging and matching the levels between each step means that when you A/B a process or effect, you can truly listen to what it is doing to the sound, allowing you to decide if it's better or worse. This is a real revelation for a lot of new sound mixers because it provides a great sense of control in what you're doing. You can, without a doubt, confirm that what you have done is in the best interests of the audio you're working on.
Gain staging is a fundamental element of the audio process, whether you're recording or mixing. Signal that is too hot causes nasty distortion. Signal that is too quiet can introduce too much noise which will ruin the clarity of your audio. Stick to working between -6 and -12dB and you should rarely have any problems. Ensuring relativity between every step means you don't have any hidden distortion issues and it provides you with a perfect A/B point between each plugin you enact. You really couldn't ask for more control than that!
Tags: Audio

RedShark 2020 @ All rights reserved.

Comments