8 minute read
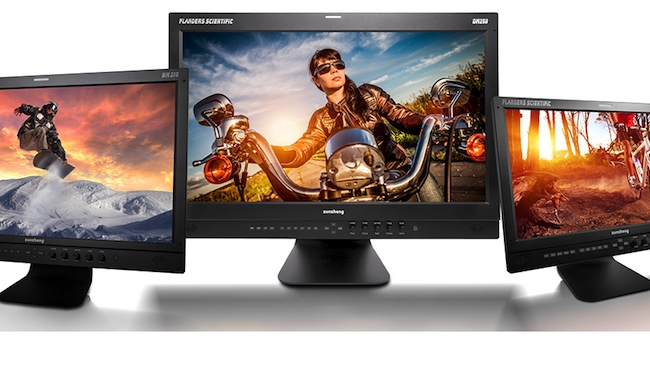
 What price the state of the art? $8k in the case of Flanders Scientific's DM 250
RedShark Replay: What is the single greatest technical dilemma facing today's DIY filmmaker? Which Camera? Which OS? Which NLE? Which Plug-in? Which Colour Grading Software package? According to Craig Marshall, it’s none of the above. Instead, it’s all about the monitor.
I reckon the biggest dilemma we face today is sorting through the mire of technical data that is 'monitoring for video'. Video editors wanting to build up a post production facility today still endure a nightmare of options and technical jargon designed to confound your innermost Geek. I've been down that road over the past few years, so I want to share some of what I've learned. I've over simplified much of this article so you'll find the references at the end essential reading if you want to explore further monitoring options.
If you shoot video today on a modern digital camera, you'll expect to see a pretty good picture, irrespective of whether it's a consumer DSLR with a video option, a miniature Point of View camera or a professional cinema camera costing more than your car. No matter what you shoot, it would be nice to actually see what you've got, unadulterated by any system impediments. That's fair enough but unfortunately, it's not as straightforward as it first appears.
Let's suppose like most of us, you've shot some 1920 x 1080 HD material at 24P and your camera has an HDMI output. Most cameras do, so you plug in a common computer monitor with an HDMI input, hit 'Play' and up comes a pretty picture. So far, so good but are you actually seeing what you've shot? Does your monitor run at native 1920 x 1080 resolution? Is the calibration of your monitor accurate? How can you be sure? If your monitor is not a native HD display, then it could be adding visual artefacts which may detract from the image you shot. Same goes for 4K or UHD material. The result is that you are not really seeing what you shot.
Now, this is an oversimplified scenario but when we take our pictures into the chain of post production hardware and software that many of us will maintain on our desktop, the situation can rapidly degenerate from simple monitor induced artefacts to a complete colour misrepresentation.
Lets talk briefly about bit depth and colour space and how to preserve the colour and detail you shot, right through your production process to your final Delivery format. If today's video cameras shoot great pictures out of the box, then why does so much of the material posted to YouTube (for example) look so poor?
In the late '80s, I transitioned from being a television video camera operator to a post production facility owner. One of the things I discovered when sourcing equipment was that the broadcast videotape 'acquisition' standard of the time, Betacam SP was a component format. To simplify, I discovered that each of the three Red, Green and Blue video components which made up Standard Definition Betacam were effectively recorded onto three separate tracks of video tape. Actually, Luminance or 'Y' channel, the monochrome component was allocated one large track and the Red-Y and Blue-Y 'colour difference' signals were compressed slightly to share separate portions of an adjacent track, but the point is, if those discreet components were kept separate throughout the entire post production process, then the picture quality at the end of the chain could (almost) match that of the camera original.
Back in the day, this was rarely the case and our particular facility was one of the first to achieve this goal. Fortunately, the additional expense to observe the 'component' standard soon generated financial rewards as work flooded in and many clients saw their work for the first time as it was shot. The same applies today in the digital HD and 4K domain where the highest technical standards can be maintained for but a fraction of the investment required back in the early 1990s.
In an ideal world, all video cameras would record a 16-bit RGB 4:4:4 (Red, Green, Blue) signal, uncompressed to cheap removable storage but as of today, we find most consumer video cameras still shooting heavily compressed 8-bit signals internally (to removable cards) in the 4:2:0 colour space. In my Betacam analogy, that's 4 for the Luminance (or monochrome Green) component but only '2' and '0' respectively for the colour difference signal. Many cameras now feature 'clean' HDMI outputs where an 8-bit or, better still, a 10-bit 4:2:2 signal can be output to record on a third party device which usually preserves the signal with less quality sapping compression than the camera's internal option.
An 8-bit signal enjoys only 256 individual steps or gradations for each colour resulting in the common '16.7 million colours' noted in the specs sheets of most cheap 8-bit computer monitors. On the other hand, a 10-bit video signal displays a much finer graduation of 1064 steps per colour to result in the less common '1.07 billion colours' noted in the spec sheets of high end 10-bit PC monitors designed for pre-press, professional photographers and graphic designers. 10-bit is certainly the way to go if you can afford it. Even if you're shooting 8-bit, monitoring at 10-bit offers an excellent future upgrade path.
Backtracking to the 1920 x 1080 24P HD pictures we shot earlier, if we ingest them into our favourite NLE and start work, we'll soon want to look at our pictures on an external monitor and this is where the everything starts to become murky. How can we be sure what we are looking at is what we actually shot? If you visit a professional post production facility, you'll find they all use a 'Reference' monitor. Could you imagine building a recording studio without VU/Peak Meters or Reference audio Monitors? I know many filmmakers who regularly edit without any form of reference waveform display or reference monitoring and this is courting disaster if you plan to submit your work to any format other than Youtube (and perhaps that's why a lot of YT material looks so poor...)
So what makes a good Reference Monitor? I'm not about to insist that you all to go out and buy Sony's latest OLED 4K Reference display or a state of the art SDI display from Flanders Scientific, though these are good options if you have the budget. If you have your heart set on becoming your neighbourhood's go to Colorist, then a lot of money spent on a quality 'reference' display will be money very well spent. However, these high-end monitors are expensive, so a return on your investment could be a long time coming.
So, can you use a computer display to accurately monitor video? Well, yes and no. You can so long as you know what you're doing and you choose wisely. As a generalisation, computer displays are designed for displaying still images, not high quality video at high frame rates. OK, Televisions are designed to display video so why not use a modern LED backlit TV to monitor my video? Well again, you can and you can't. Let's look at this more carefully:
Computer monitors fall into three main display categories TN, VA and IPS displays. IPS displays have the widest viewing angles (about 178 degrees) so they could be considered ideal for viewing video because as you move your head from side to side in the edit suite, the colours displayed on the screen remain largely the same. Try this with your common, garden variety TN display and see how even the slightest offset can effect the accuracy of what you see.
Another thing we need to consider is the accuracy of the computer display. 8bit or 10bit - how many colours will it display? 16 million or 1.07 billion? How uniform is it? Does it cover 100% or Adobe RGB, Rec.709 or just sRGB? Can the monitor be accurately calibrated? Fortunately, during the last few years, a number of 'affordable' 10bit IPS computer displays have become available (sub $1K) with 14-bit or better LUTs (LookUp Tables) built in for accurate calibration — a repeatable process using specialised software and a probe attached to the screen. (See the Reference section below for more detail on this topic.)
Now, let's look again at display inputs: HDMI is common and there's usually Display Port, DVI-D, maybe a legacy VGA input and occasionally Thunderbolt or mini-Display Port. HDMI is familiar and an easy solution because many computers have an HDMI output so let's use it OK? Well, maybe not. There's HDMI and there's HDMI. I consider HDMI a 'consumer' format to be avoided at all costs unless absolutely necessary. My preference is instead for Serial Digital Interface or SDI, but guess what? Most Computer Monitors do not have an SDI input! Nor do most modern LED TVs either. So why use SDI when my NLE PC doesn't even have an SDI output?
SDI uses a simple co-axial cable and can be run very long distances compared with the dozen or more flimsy wires inside an HDMI cable, which generally starts to exhibit picture deterioration after only a few metres of cable run so this brings me right back to my original dilemma: creating an affordable video 'reference' display. Back in those bad old Betacam days, Colour Correction software such as DaVinci Resolve was an $80K turnkey package. Unless you've been cowering under a rock for that last few years, you'll be aware that today, a very full featured DaVinci Resolve software package can be downloaded and installed free on PC or Mac from Blackmagic Design. Now here's the 'gotcha': in order to sit at the table, you need to buy a small piece of hardware called a Decklink (card) or Mini Monitor (card or black box) which will 'guarantee' you a clean, baseline 'reference' video display out of your Mac or PC and into your monitor and completely bypassing any 'graphics' setting you may have mistakenly configured so that your pictures 'looked nice'.
Essentially what I'm saying is, if you want a cheap but reliable video 'reference output', even if you have no great interest in so called 'colour correction', get Resolve. Now, you might be aware of rumours that Resolve requires massive hardware to run efficiently. If you're working on Hollywood features, this holds true but for most of us shooting video for home use, Vimeo, YouTube, cable & television broadcast or even local film festivals, the cost and availability of today's modern home computer hardware means it has never been easier or cheaper to install and configure an efficient DaVinci Resolve system.
Back to SDI vs HDMI. Even the cheapest 'mini-monitor' hardware solution to compliment Resolve features both HDMI and SDI outputs and these are rated at 3Gbps, 10-bit 4:2:2. The trouble is, even today, there are not many computer monitoring options where you can find the combination of accurate calibration, a 10-bit IPS screen and HDMI inputs all in the same affordable package. Several manufacturers make SDI to HDMI converters as well as 10-bit SDI to Display Port converters but many of the lower cost 10-bit IPS computer displays will not accept a 10-bit signal from the HDMI input - only DP or DVI-D.
I currently have a Decklink SDI 4K Pro card installed in my PC. This recent PCIe card requires a full 8x PCIe lanes and runs at 12Gbps to offer a 12-bit 4:4:4 output to view even 4K signals at up to 60p frame rates. This relatively inexpensive SDI capture/display card outputs two simultaneous SDI signals: one at 4K resolution (say, for 'client monitoring' to a 4K TV) and the second, which automatically downscales 4K to HD so I can monitor any 4K material on my current calibrated 10bit 1920 x 1080 HD display via a third party SDI to Display Port converter.
The retail cost of various monitor brands is not always a reliable indication of 'quality' as labour costs vary greatly in many countries. Although the Eizo 'Color Edge' monitors come very highly recommended, they are made in Japan where labours costs are high compared with neighbouring Taiwan and China where some alternative displays can be sought for around half the cost. I use the Tiawanese BenQ PG2401PT, a 24" 10-bit IPS display designed as a Colour Certified photographic reference monitor but pressed into video service via an SDI to DP converter. The PG2401PT features inbuilt 14-bit LUTs for accurate colour calibration so covers 99% of AdobeRGB with a dedicated Rec.709 preset. Hardly an FSI 'Reference Display' quality but the sub $1K BenQ offers me a cost effective solution for the sort of work I do.
If all this sounds just too complicated, you're not alone. However, there was a small announcement at NAB 2016 from Blackmagic Design which may prove to be a solution. BMD released details of a new $495 Terenex black box which will convert SDI video signals (@12Gbps) to HDMI 2.0a, so has the potential to display 4K at up to 60p. This means it is now possible to install even the simple, entry level Mini-Monitor solution into a home computer (Thunderbolt for Mac or PCIe for PC) along with DaVinci Resolve and use an affordable, big screen 4K TV as your 'reference' monitor.
As the Terenex converter includes onboard LUTs, you may be able to accurately calibrate your 'consumer' TV for the first time, thereby offering an accurate and affordable large screen, 4K video monitoring and colour grading solution. An SDI cable runs from your PC's mini-monitor or Decklink card to the Terenex converter (best placed right at the set) then a short, high quality HDMI cable connects to the TV. I currently use BMD's earlier 6G SDI to HDMI 4K converter with our 55" Sony 4K X9005B Bravia 'client' monitor and this setup has worked very well for the past 18 months.
Let us know in the Reader's Comments section below what system you use or what solutions you have found to solve this often vexed and misunderstood topic.
https://davidtorcivia.com/spring-2016-entry-level-monitors-roundup/
http://jonnyelwyn.co.uk/film-and-video-editing/affordable-colour-grading-monitors-2/
http://www.redsharknews.com/post/item/2265-how-to-build-a-system-to-run-resolve-on-a-shoestring
Tags: Post & VFX

RedShark 2020 @ All rights reserved.

Comments