
4 minute read
Natural light with its infinite variations can be one of the hardest things to work with consistently in cinematography. So why not improve your chances of a beautiful shot with these fantastic, and practical tips from Neil Oseman.
"People talk about lighting as being an art thing, but the hardest thing to do is to shoot a day exterior over an extended period… especially in England.” - Roger Deakins, CBE, ASC, BSC.
Lighting on the blank canvas of a night exterior or the partially-blank canvas of a day interior may be the fun side of cinematography, but sooner or later we all have to shoot outdoors in broad daylight. When I started out, I felt that I was completely at the mercy of the weather with day exteriors and there was nothing I could do to change the look. Sure, Hollywood productions might suspend a huge silk from cranes to soften harsh sun or wheel out big HMIs to create sun on a cloudy day, but such things were far beyond my resources.
However, there are things that can be done to mould natural light on any budget, particularly in tighter shots. For wider shots, there may be nothing you can do to change the light, but you can make decisions in pre-production that will help you to get the best from it.
The first step is to consider the sun-path. There are apps like Helios and Sun Tracker which will show you whereabouts the sun will be in the sky at any time of day and any day of the year, though sometimes a simple compass is enough. Broadly speaking, in the northern hemisphere the sun will be in the east in the morning, the south at midday and the west in the afternoon. It moves left to right across the sky.
Usually DoPs shoot towards the sun, something amateur photographers and videographers are often told not to do. Amateurs will be using auto-exposure, which will close the iris right up as soon as the sun flares into the lens, resulting in a silhouetted image. As a professional, exposing manually, you can open up to see into the shadows and let the backlight from the sun over-expose beautifully.
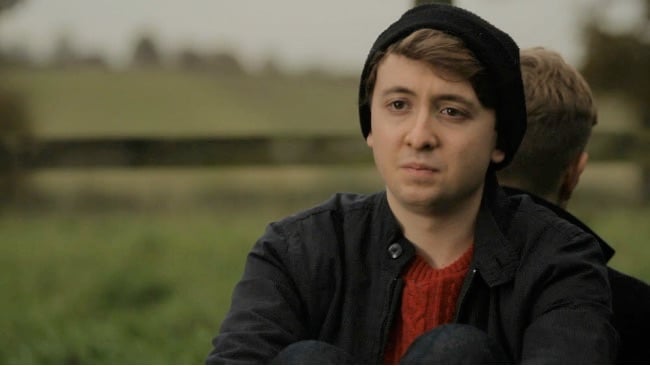
Here's an example from a short film called Crossing Paths which I shot for director Ben Bloore. Ben picked a bench which faces west, so I asked to shoot the scene in the morning so that it would be backlit from the east. Backlight was particularly important for the serene and beautiful look the story required. We used an 8x4' poly-board next to the camera to bounce some soft fill back on to the talent.
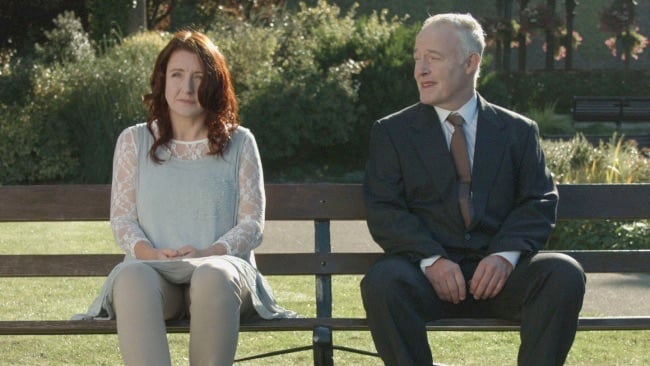
There were a few shots in the scene that looked south, so I asked to leave those until the middle of the day, to maintain the backlight.
At one point in the morning, a tall tree shadowed the bench. To get around this, I used a hard reflector, sometimes known as a mirror board, to redirect the sunlight around the tree. These, unfortunately, are hard to find, but you could try making one by carefully clamping an ordinary mirror to a C-stand.
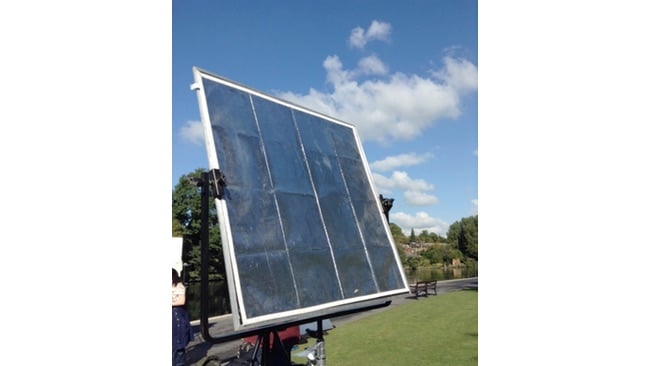
But the most useful tool you can have on a day exterior shoot is a collapsible five-in-one reflector. Lastolite is the best-known brand, but there are many cheap alternatives which work just as well. They consist of a translucent white disc with a reversible zip-off cover that has black, white, gold and silver sides.
To see just how effective these reflectors can be, let’s look at an example from the rushes of another short film, Stop/Eject.
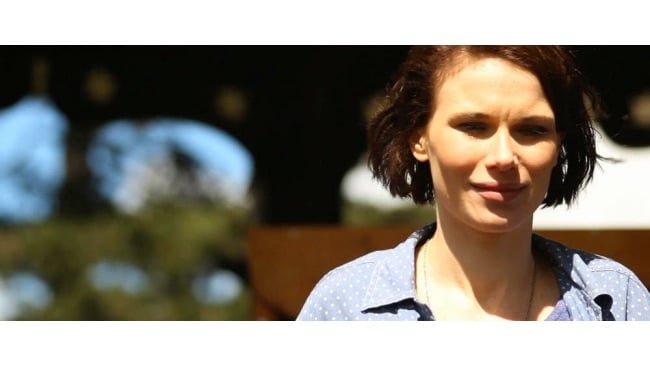
This was a situation where the location's geography and the schedule meant that it wasn't possible to use the sun as a backlight. Instead, the sun was above and behind the camera, with the actress facing directly towards it. The light was incredibly harsh and the shadows were so dark that you couldn’t see her eyes – an effect that would only have gotten worse had I stopped down to prevent the highlights from blowing out.
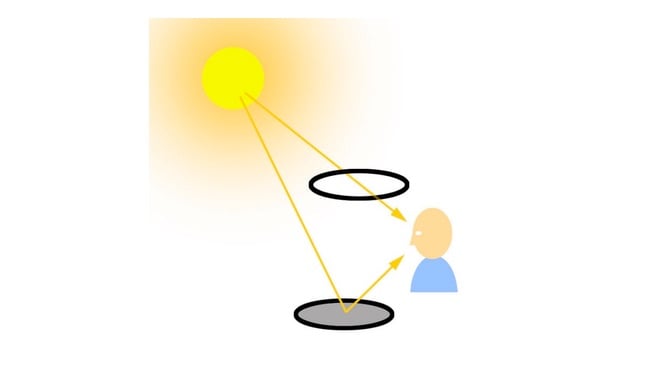
Here is the same shot after the application of two five-in-one reflectors.
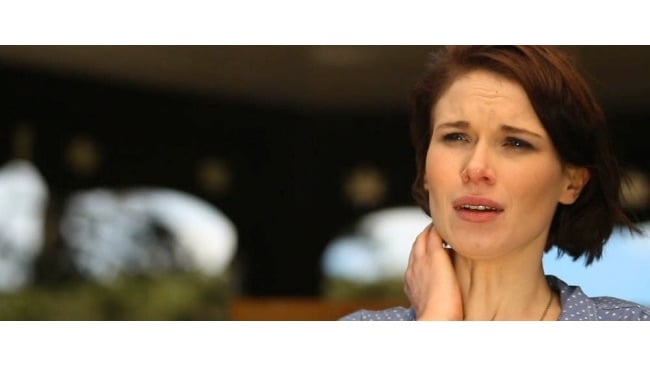
The first reflector, with its cover removed, was held over her head so that the sunlight hitting her face would be reduced and diffused as it passed through the translucent white material. A second reflector was held beneath the frame, bouncing sunlight back into the shadows on her face and putting a sparkle in her eyes.
If you find yourself caught without reflectors, there is a DIY alternative. Use a white bed sheet to interrupt the direct sunlight, and a sheet of kitchen foil to fill in the shadows. If the foil is too reflective (or too noisy!) use another sheet or a white card.
Silver reflectors are very useful on cloudy days when the light is soft but – often – doesn't reach into people's eye sockets very much, leaving their eyes looking dull and lifeless. A reflector can put back that sparkle. There are also myriad LED units on the market which can be used for the same purpose if a reflector isn't enough. It's important not to go overboard with the brightness, though, or the scene will end up looking artificial.
The other thing that helps a lot with flat, shapeless natural light is negative fill. This means blocking light, using a black poly-board, drape or flag, to increase the contrast of the image. In accordance with the principle of short-key lighting, negative fill is normally used on the talent's camera side, to get the best modelling of their face.
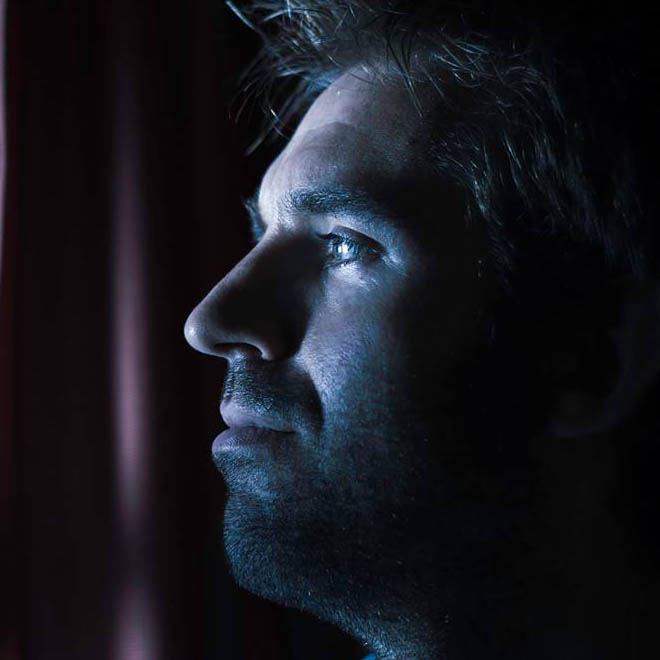
Here is an example from Three Blind Mice, directed by K.T. Roberts, where a black drape to the right of the frame was used as negative fill.
In summary, try to shoot towards the sun, at least for your wide shots. Closer shots are easier to manipulate. Sunlight can be redirected with a hard reflector or mirror. Harsh sun can be softened with a stripped-down five-in-one reflector or a bed sheet, while dark eye sockets can be lightened with the white or silver side of a reflector, tin foil, or an LED unit. If the talent's face is lit evenly from all sides, introduce a black solid (negative fill) on the camera side to improve contrast and modelling.
Next time you shoot a day exterior, why not try out some of these simple techniques? You'll be amazed how much you can improve the quality of your images.
Title image courtesy of Shutterstock.
Tags: Production Tutorials

RedShark 2020 @ All rights reserved.
Comments