8 minute read
It’s one of the most talked about camera releases of the year. We’ve got our hands on one and we’ve been using it. So grab a drink, sit back and read part 1 of our comprehensive BMPCC4K review!
Blackmagic Design has come on leaps and bounds when it comes to both camera design and production. From a starting point 7 years or so ago, a time when users were very suspicious as to whether it could really take on the big boys of the industry, the company has learned a lot.
The beauty of Blackmagic Design’s cameras, right from the beginning, has always been that it has been creating products from a clean slate. Sometimes its decisions have caused a few grumbles amongst traditionalists, but it is realistic to say that Blackmagic Design has opened doors to professional camera equipment that would otherwise have remained closed.
No product highlights this as much as the original Pocket Cinema Camera. This was a device that looked like a compact stills camera that had been designed by Braun. It was tiny and had its little foibles, such as fragile connectors, and a battery life that was so poor it was impossible to use seriously without some sort of external power pack system. Many of these additions meant that the camera was no longer ‘pocket’ in size. But that picture, oh that picture!
It was often called a mini Alexa, and for good reason. DP Rodney Charters is a big fan of the camera and has said quite directly that he uses it precisely because it will intercut with the Alexa so seamlessly well. But we now live in a 4K world, and despite the BMPCC still producing a wonderful picture it is time to move on. Enter the very long awaited BMPCC4K.
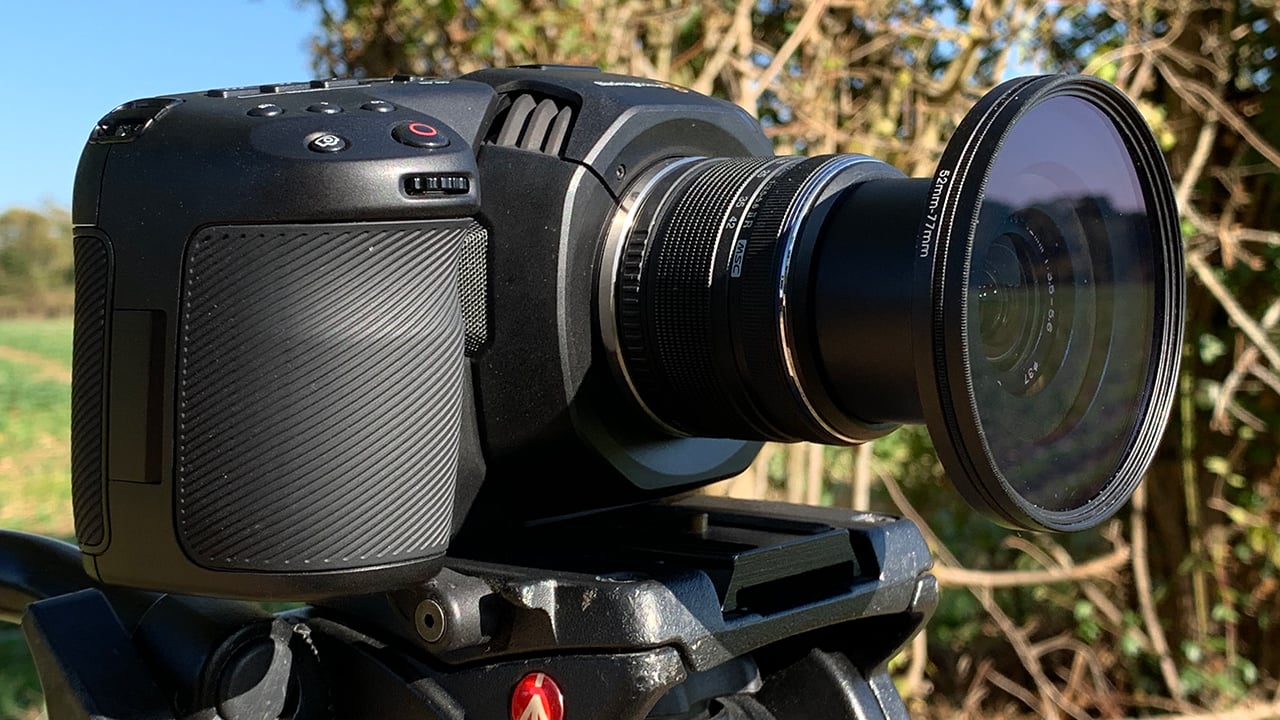
It appears to be a DSLR on first inspection. It is similar in size to a DSLR or large mirrorless camera, and even has a button where most stills cameras shutter release is placed. The fact that the new camera has a similar sensor to the one in the GH5S appears in many instances to have steered a lot of people’s initial judgement of it. However take a few steps back so that you can see the wider picture, and all is not what it seems as you will discover further down.
Lift the Pocket Cinema Camera 4K out of the box and there is one single thing that strikes you immediately. It is light. And this is no accident of design. Most of Blackmagic’s previous cameras have been made of metal, which was very sturdy, made for great heat dissipation, and looked wonderful. But the BMPCC4K is designed with portability in mind, and it is physically much larger than the original Pocket camera. So the company took a new tactic, designed a new manufacturing process, and made the body for the BMPCC4K out of a polycarbonate/carbon fibre composite.
Does it feel cheap and plasticky? No. It feels a lot different from previous BMD cameras, that much is true. But it still retains the high quality feel that we’re used to. The fact that it is much lighter than alternative crossover cameras is an important distinction, as I found during use.
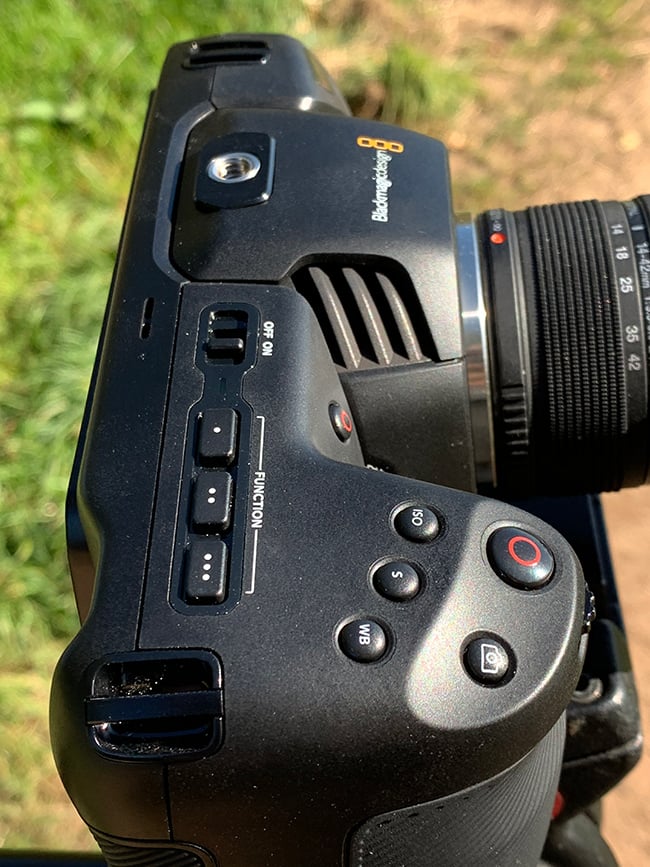
Another thing that strikes you, or at least should do, is the button layout. It is uncluttered and very focussed. And this is another incredibly important aspect of the design versus a camera that is designed to do double duty as a stills camera and a video camera. The BMPCC4K has none of that baggage to carry, and so every single button on it, bar one, is designed to make the operation of video functionality as straightforward as possible.

Pick the camera up and immediately you realise that everything is to hand. The big button usually reserved for photos on any other camera starts and stops video recording, while the much smaller button next to it is for taking a still. There is one simple rotary dial on the front of the body that by default controls the aperture, but will also adjust specific settings that you click on using the touch screen display if you do not want to drag on screen sliders. There’s a dedicated ISO button near to the record trigger, and as you’ll see this is also important given how it can be used as an exposure tool.
There’s a dedicated shutter and white balance button, too. And a little further back there are three assignable function buttons. One to turn false colour on and off for easy exposure judgement, one to toggle a display LUT, and one to toggle guide mattes (such as 2.35:1 etc). All of these are within fast, uncluttered access of your primary operation digit.
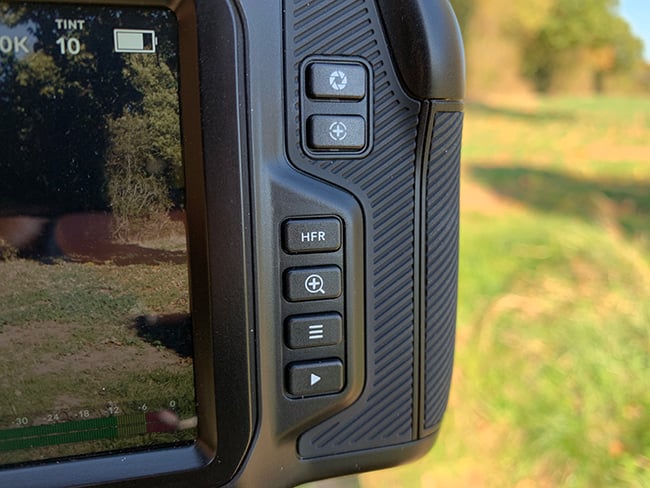
On the rear of the camera next to the big LCD screen, and within easy reach of your thumb during handheld work, are buttons to trigger off-speed recording, focus assist, the setup menus, and clip playback. And that’s it, apart from a big solid physical on/off switch. No fussiness, no confusing myriad of iconography or multiple dials and mode settings. Just all the controls you need for fast video operation right there at your fingertips.
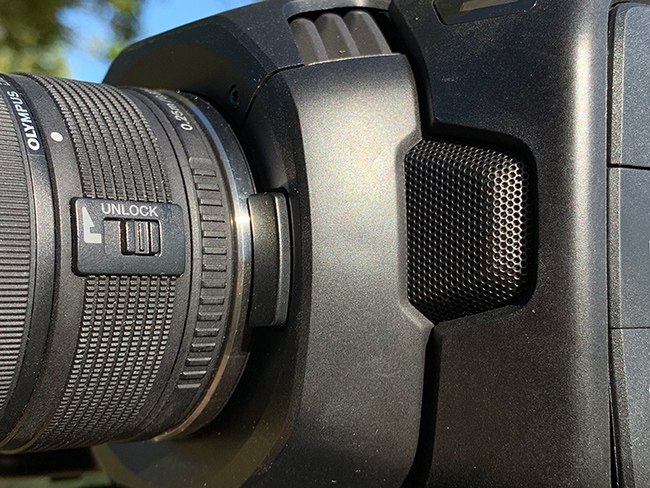
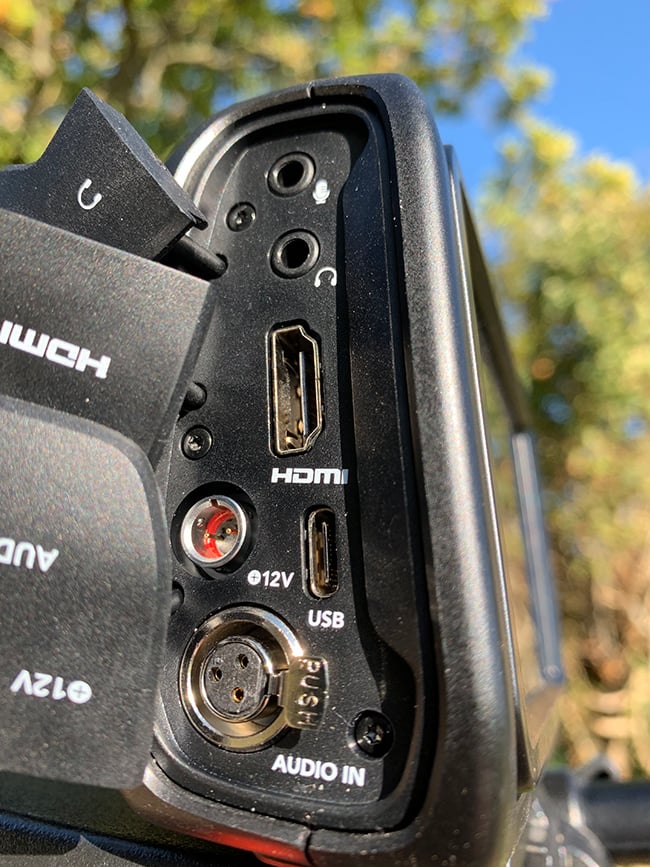
On the left hand side of the camera’s body are various rubber dust covers that, when unplugged, reveal a 3.5mm mic in, 3.5mm headphone, full size HDMI, a 2-pin 12v DC in, USB-C, and one single Mini-XLR audio in.
These are all pretty self explanatory, but once again a few of them are important to highlight when comparing the BMPCC4K to crossover cameras that appear superficially similar. The most obvious of these is the Mini-XLR input. It’s a small camera, and two would be nice, but I’m not complaining. Why? Because you simply do not get XLR audio in on any other similar video camera. It’s a small point, but an incredibly important one, and even more so when taking into account the work BMD has done to make sure that the audio circuits are as quiet as can be.
This was a constant criticism of the original BMPCC. It simply wasn’t feasible to record high quality audio onto the camera recording, hence the plethora of Zoom H4N’s making their way into the video making lexicon. Now though, theoretically you can. And that’s a big step forward for a camera like this.
The locking 12V DC input is vastly beefed up from the extremely fragile pin that was used on the first camera, while the USB-C port is not only used for plugging in external SSDs for edit ready recordings, but can also be used to plug in a power pack to charge the current battery. Note that you cannot power the camera itself using a USB power source, but you can charge it between takes or during breaks.

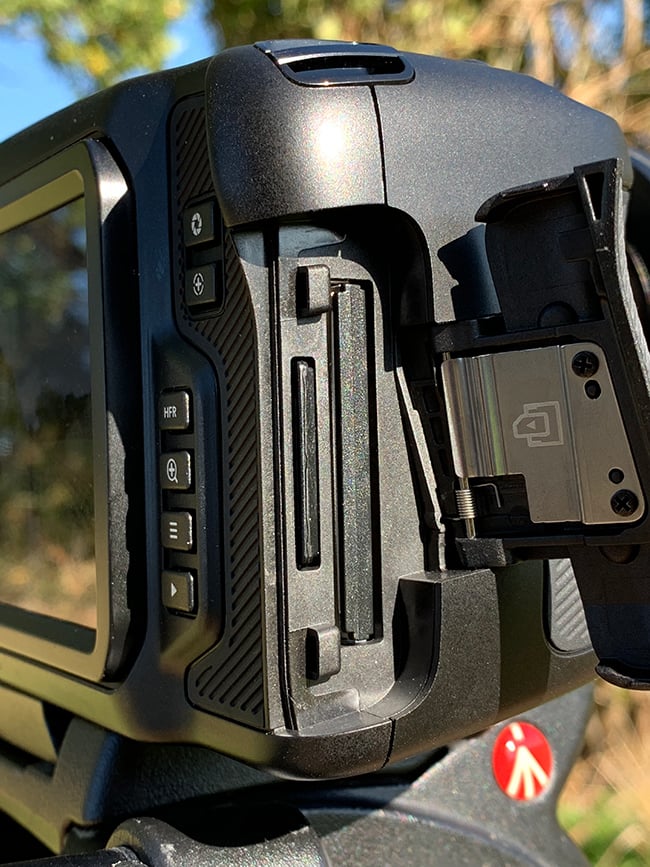
The recording options on the BMPCC4K are very versatile. On the right side of the camera underneath a protective cover you can plug in either a single CFast2.0 card or an SD card. The USB-C port, as mentioned, allows the use of external SSDs such as the incredibly tiny Angelbird SSD 2GO.
A couple of things to note here, though. You can record lossless raw, just, onto a very fast SDXC card, but only up to 30fps. To go above 30fps for raw you will need to use a CFast2.0 card or an SSD. Note that DCI lossless raw at 60fps also cannot be recorded to even the fastest USB-C media due to it exceeding 500MB/s. These abilities are likely to change if/when BMD update the camera software with the new Blackmagic RAW codec.
The camera can only cope with two types of media at a time. So let’s say you had an SD card and a CFast card plugged into their respective slots and then you plugged in an external SSD to the USB-port. The camera will always place the SSD into the alternative media slot on the LCD display, replacing the SD card.
From the initial use of the power switch to the display appearing was a smidgen under 4 seconds, which while not incredibly quick, is still pretty fast and will be good fast type of shooting that this camera may well get used for a lot.
I used the camera with a lightweight MFT lens. Many users will opt for a Metabones Speedbooster in order to have more lens choice (note that the original Speedbooster for the BMPCC will not work due to the sensor size differences). However I want to keep the BMPCC4K as lightweight as possible, and MFT lenses allow this. As a result the camera is much lighter and less fatiguing to use handheld than a lot of similarly sized devices. The textured grip areas give a good feel in the hand, and all the controls fall intuitively right where you need them.
The LCD screen is very bright. It has no tilt or rotational ability, which some may find limiting. However I did not find this to be an issue other than when I was getting really low down shots. There is a very wide angle of view on it, which means that even at very acute angles it is easily viewable for composition. Even in very bright outdoor sunshine you can still see what you are shooting quite easily.
The touch screen is very responsive. Focus can be performed using the lens, or by pressing on the screen where you want the camera to focus. There is currently no continuous tracking autofocus ability. Much like the lack of built in sensor stabilisation this may put some users off. But a sense of perspective is required here. If good continuous autofocus and facial tracking and stabilisation is essential to your work, you may need to look elsewhere. But the addition of such functions brings with it extra cost and complexity. Personally I rarely ever use such functions on a day-to-day basis, and if I need stability I would prefer a gimbal, so the lack of those features does not really bother me.
Cameras that do not have an ND wheel can be a bit of a pain to use in mixed lighting conditions. Quickly switching out ND filters is fiddly, and personally I’m not a fan of the quality of screw on vari-NDs. But the BMPCC4K has an ace up its sleeve.
On one of my tests I went out to film by the river Dee. This is a good test because white water rivers are usually in some sort of ‘canyon’, with harsh sunlight often on one side, while the rest is in stark shadow. I screwed on one ND that would be useful for the sunlit areas, but how would I cope with the shadows?
Usually you would have no choice but to take off the ND filter, but with the BMPCC4K I could simply bump it up to the next gain circuit, which kicks in at ISO1250. What you will discover quite quickly is how low noise it is, even when maxing things out. Put simply, bumping up the ISO is no longer going to cause you many issues of noise. Yes, there is more noise as you increase things on each of the respective gain circuit modes, but it is never objectionable. To the point where you can use ISO as an integral part of your exposure toolset rather than something you adjust or change on pain of death.
ISO can be adjusted in quarter-stop increments, making fine tuning easy to do. It is therefore possible to choose what aperture you want, and then fine tune with the ISO. Are there any drawbacks? Aside from subtle noise differences, dynamic range changes as well, but again not to the point where you notice huge limitations in practice. The sweet spots between S/N ratio and dynamic range are ISO400 and ISO3200. You can go down to a minimum of ISO100, which can be useful at times, particularly if you want a shallow depth of field in very bright sunlight, all the way up to ISO25600, which remarkably is still incredibly usable!
Using the false colour exposure tool you can see any noise issues in the shadows that could be troublesome. But the dual ISO ability allows you flexibility. Let’s say you went to ISO1000 and you really wanted to make sure it was as quiet as possible. The solution is simple, just adjust it up to the next gain circuit at ISO1250 and hey presto your noise levels are effectively reset.
ND filters are still an integral tool. But the dual ISO abilities of this camera give you flexibility overexposure that mitigates the lack of an ND wheel. I realise some may disagree, but so far I have found nothing objectionable while filming in this way.
Stay tuned for part two of this review on Monday where I will take a look at the setup interface, audio, using LUTs, off-speed shooting, and more. (And see Simon, the author of this review, talking about the BMPCC4K to RedShark Editor David Shapton, in this recording of RedShark Live, from Wednesday.)
Tags: Production

RedShark 2020 @ All rights reserved.

Comments