3 minute read

Mark Job shows how the video capabilities of Sony's popular RX100-V can be used for much more than just Vlogging.
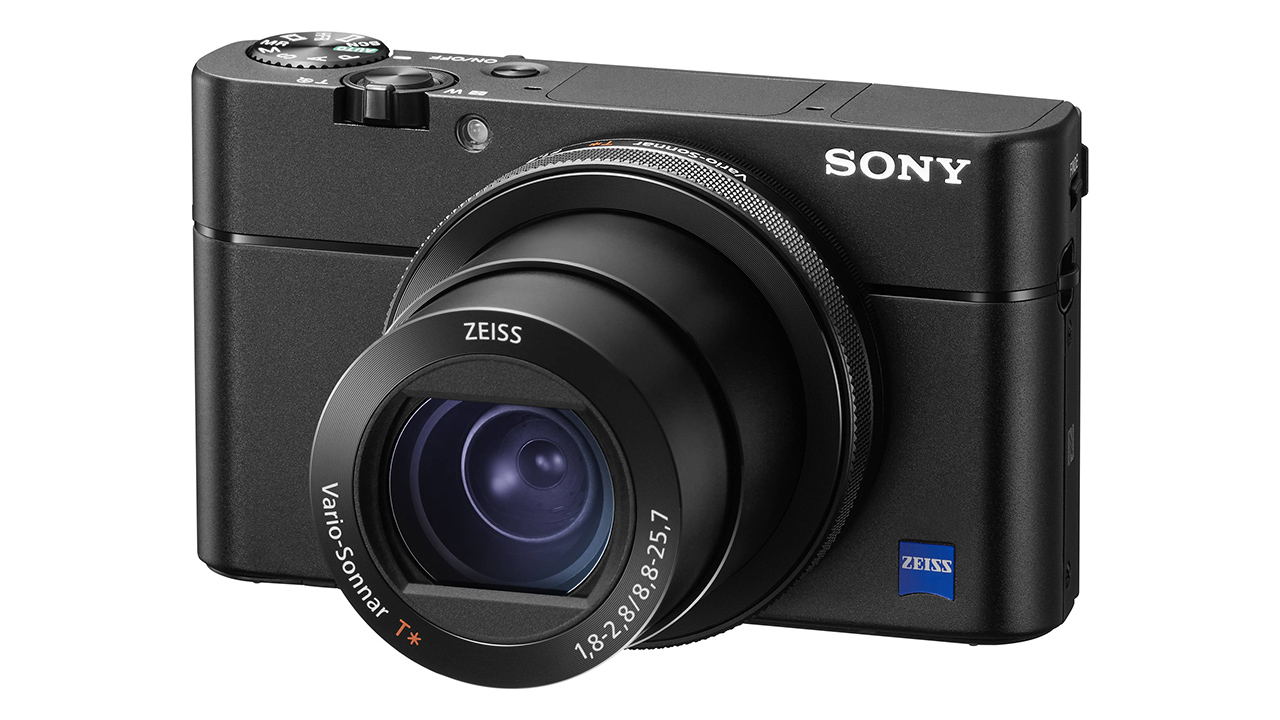
The Sony DSC RX100 series of cameras are, perhaps, the most reviewed digital hybrid mirrorless pocket cameras out there since it was first announced by Sony on June 6th, 2012. The latest iteration of the RX100, the MK V, was introduced on Oct 6, 2016, and has emerged as the top video blogging camera on the internet. The MK V lends itself directly to this application because its rear viewing screen flips straight up vertically above the top of the camera, thus allowing you to hold the device out with one hand and see a clear image of yourself as you address the lens.
However, the RX100 V is way more than a mere consumer point and shoot pocket camera, since it has some rather surprising technical capabilities which have not been reflected on in any YouTube or Vimeo camera review. Some have sited the camera's inability to accept an external microphone input as a disqualification for any commercial, or professional use. Let us put the MK V to the test once more. Frankly, the answers may surprise you!
There are two very interesting technical aspects of this camera which go unnoticed. Firstly, the camera can feed an uncompressed 1080p 60, 24 and 4K 24p video signal from its micro HDMI output, (This is an 8.3 megapixel video image, in an aspect ratio 16:9). Secondly, the conspicuous ability of the RX100 V to shoot in digital cinema style HDR S-Log 2 gamma stands out among point and shoot pocket cameras. Why would Sony put to market such a camera with professional, high end, decidedly “non-consumer” level features into a product clearly aimed at video bloggers and vacationers? Also ask yourself the question, what happens to the abilities of the RX100 V if one connects an external video/audio recorder to it?
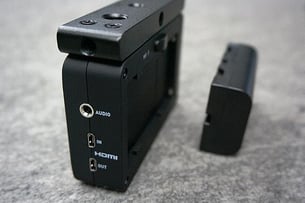
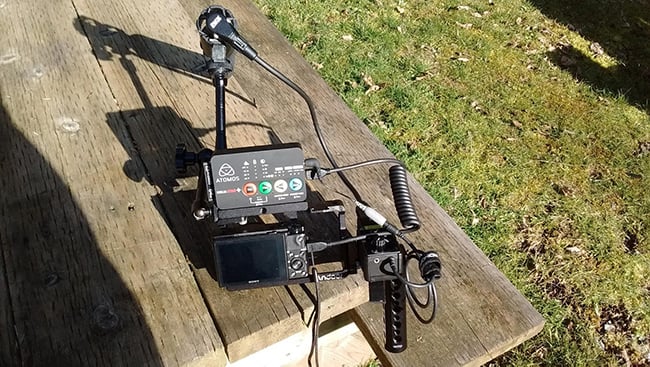
If necessity is the Mother of invention, then it certainly is the Father of adaption as well. The author of this article is writing and directing a new anthology suspense-thriller TV series scheduled to go to principal photography in October of this year called Please Stand By. The new series will be shot on location in small towns throughout North Vancouver Island, British Columbia, Canada. We needed a production camera with optional 4K image resolution, a very small footprint useable in run & gun shooting situations, and mounted in a custom designed cheese cage. We want the rig to be as light as possible, with an external video recorder with audio input.
A small mic preamp, which is capable of 48 volt phantom power feeds the line in receptacle on the external video recorder. An external audio receiver with an accessory shoe mount can be added for scenarios where we need no cabling between the boom operator and the camera. Since weight is a consideration, we decided to go with a 5-inch monitor instead of a heavier 7-inch one. Most monitors have a headphone jack along with meter display, thus fulfilling our requirement to monitor live audio during recording.
We also intend to edit in a 10 bit based 4:2:2 intraframe codec so post can be facilitated with broadcast quality on any Avid Media Composer, or Final Cut Pro 10.x machine. The best solution is to use an Atomos Ninja Star external audio/video recorder. The Ninja Star allows us to circumvent the RX 100 MK V's lack of external mic input and audio monitoring capability. Also, the 29:59 minute recording limit of the MK V can be overcome by using this solution.
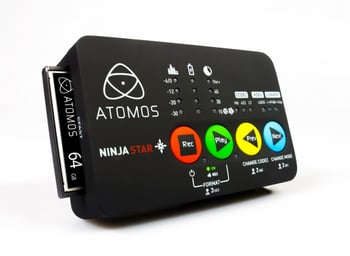
Here are five reasons we chose to use the Atomos Ninja Star.
For Microphone Preamplifier, we are using the Saramonic Smartrig II. The Saramonic was chosen for its small size and weight. The Smartrig II is the successor to the original Smartrig. This mic adaptor has some impressive online reviews clearly indicating a relatively low back ground noise and surprisingly high quality audio capability for such a relatively inexpensive $45.00 CAD device.
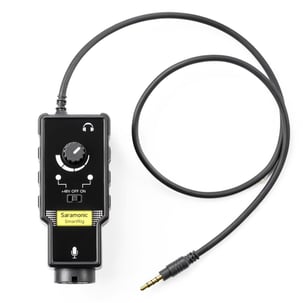
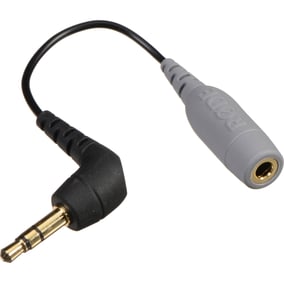
The Smartrig II uses a TRRS connection which is incompatible with the standard TRS input on the Ninja Star. We have overcome this mini-plug incompatibility by using a Rhode SC3 3.5 mm TRRS to TRS plug line adapter cable.
We intend to modify the Saramonic mic adaptor so that it has three new mounting points on the unit. We will add 1 x standard hot shoe adaptor using epoxy or sino-acrylic glue to the left side of the body, 1 x standard hot shoe receptacle to the right side, and 1 x 1/20 threaded female tap cube to the rear of the adaptor.
Most of the parts we are using are off the shelf, after market add ons purchased from on line retailer Amazon. It is important to emphasize this rig is a build in progress. We are obviously not satisfied as to how our wire runs are placed at this time, and we plan to further engineer this aluminium cheese cage to allow us to run Micro HDMI and 1/8 inch (3.5 mm) audio mic connector wires through metal clamps to keep the connections as secure and strain relieved as possible. We will move the actual location of the Saramonic mic adaptor from where it is currently placed, as well as change the Right side handle to a wood handle. We will also be adding a wood handle on the left hand side of our rig.
Tags: Production

RedShark 2020 @ All rights reserved.

Comments