3 minute read
 All shot old school in-camera: just like the original
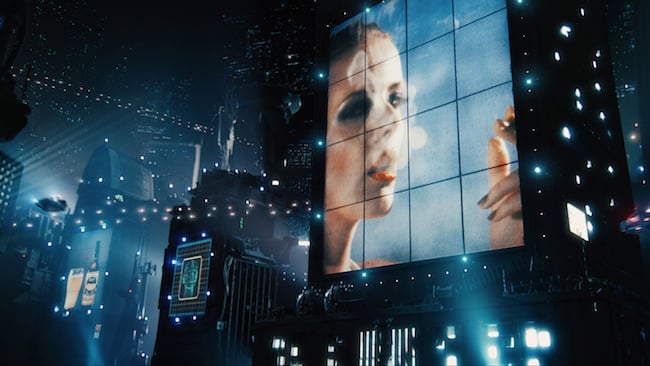
With the new film, Blade Runner 2046 on the way later this year, Ridley Scott’s original Blade Runner is a rich source of inspiration for many young filmmakers. Recently we highlighted the one-man CGI approach, but here Luka Hrgović and Dino Julius show how they took the optical, in-camera approach with their short, Slice of Life.
It all began when Dino and I started talking about how, as massive film fans, we always preferred the look of features like Blade Runner or Lord of the Rings, where a lot of practical in-camera effects were used, compared to films like The Hobbit, which relied more heavily on CGI. We both agreed that when you have everything in 3D you lose a bit of the magic of a film. You suddenly have no restrictions on things like how you can move your camera and props, or what your sets look like, which can quickly make footage feel much more unrealistic.
Of course, despite our strong opinions on the subject, avoiding CG effects on Slice of Life wasn’t easy. Our day job involves running our own studio in Croatia, where we work on commercials and constantly use 3D to complete them. For Slice of Life, Dino and I needed to learn how to do things like build entire miniature sets from scratch during any free time we had after work and all on a very tight budget.
[Have a look at the video explaining how they did it all using Blackmagic kit here, while below the two detail some of the most important tips and tricks about shooting such material in-camera they learned along the way. Oh, and don’t forget to watch the trailer for Slice of Life right at the end: it really is a stunning piece of work - Ed.]
Always begin by doing research, this is crucial. As we were inspired by the 80s, we began by watching the behind-the-scenes featurettes for films like Blade Runner, The Terminator, and Aliens to see how the crew achieved their amazing practical effects work.
Next, just go to all your friends and even a few local stores, and ask for their trash! Broken plastic toys have lots of great pieces, and old TVs and computers are extremely valuable. Motherboards, for instance, look like complicated electronic textures, which are perfect for a sci-fi. Plus, if it’s trash it’s all free!
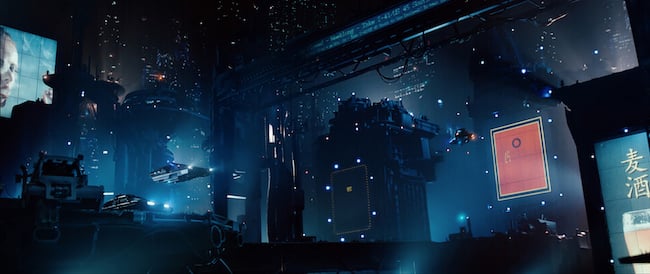
You need to remember that the ultimate goal here is to cheat. The thing with miniatures is you always have to go as wide as possible, you need 11 to 12 stops as the last thing you want is a shallow depth of field, or the final result will look way too much like a macro image. To handle this, we used Blackmagic’s Production Camera 4K with 11-16 mm Tokina f/2.8 and the Canon 16-35 mm f/2.8L which were perfect for shooting wide sci-fi miniature cityscape scenes in ultra HD.
Other great ways of cheating are to experiment with different types of lighting or use flattering cinematography. Low camera angles, for instance, would make our miniature buildings look much bigger and more impressive.
Shooting in passes allows you to have as much creative control as possible. Say you have a shot where one miniature building is 10-15 centimeters away from the camera and in the same shot you have a spaceship that’s 3-4 meters away from the camera and you need to have both things in focus at exactly the same time, because that’s how you would film a real city.
To handle this while allowing both elements to have the same degree of sharpness, we controlled our camera motion using homemade rigs. We would shoot each shot several times. For one pass, you focus on the thing that’s close to the camera and for the other pass you focus on the background and then just combine these two in post.
Never underestimate the difference light will make to an in-camera effect. We would normally shoot a beauty pass, where these really small 150 watt lights would be used to enhance only the most interesting areas of each building to draw the audience’s attention in the final shot.
We would then also have several searchlights and a cheap fog machine that we would use for a fog pass. Finally, we also had these little LED lights in the miniature buildings themselves, which would have holes in them to look like lit up windows. For any sets which involved real actors, we’d move lights around in the background to give the impression that there was a living, breathing city outside our set. The final step were projections, which were essentially short commercials we had made especially for the movie and physically projected onto our miniature buildings to look like futuristic ads.
As well as lighting, textures are also a great way to add interest to your scene. Always remember to use lots of textures and do test shots to ensure they work correctly. We used water a lot, wetting everything from actors to floors to make our sets appear more cinematic. To add a quick rain effect, simply take a water bottle, put some holes in the top and pour it over your actors' heads - it will look awesome!
Smoke is another really great effect. We had a fog machine, but for some shots - like one in a restaurant kitchen - we simply used a coffee machine, waited for water to boil, and had some beautiful smoke that way.
Have a look at the trailer for Slice of Life below...
Tags: Production

RedShark 2020 @ All rights reserved.

Comments