
5 minute read
 Editing 8K on the move isn't as hard as you might think
8K takes huge amounts of resources to edit you say? Not if you edit using Lightworks it doesn't. Rakesh Malik tells all.
Editing 8K footage sounds a bit daunting, especially given how much computer power some people are throwing at the task. In light of that, one might reasonably expect that the only way to edit 8K footage on an ultrabook like an HP Spectre x360 (Kaby Lake-R) would be via DIs.
I’ve been doing some editing in LightWorks using my Spectre x360, with 8K footage. I didn’t expect this to work well, but I was in for quite a surprise.
First off, LightWorks has remarkably efficient engine, and it’s largely CPU based rather than GPU based. It does use the GPU for effects, via pixel shaders, much like a game engine does.
EditShare added a new fixed UI layout to LightWorks in v14. It’s based around a series of task-specific workspaces for logging, editing, effects, and audio mixing. These interfaces resemble comparable interfaces in other editing applications, in order to facilitate the transition to working with LightWorks.
The flexible layout is pretty much whatever you want it to be. There is functionality available in the flexible layout that isn’t available in the fixed layout, like editing from one timeline into another.
As in most NLEs, LightWorks provides a bin-based interface for organizing clips and editing clip metadata. Syncing happens in bins also, and although LightWorks doesn’t provide a waveform based sync option, it handles timecode based syncing very smoothly. Syncing by slate is also quite easy. Start by setting a mark at the clapper point in each clip whether it’s audio or video. If the audio and video clips have metadata that LightWorks can use to match them up, it can automatically sync a whole bin at once using the metadata combined with the marks.
Alternatively, select each audio-video pair and manually sync using the marks.
LightWorks also allows you to re-order clips in a bin to form a storyboard, and if you also mark in and out points in the bin, you can create a first rough cut from the storyboard with a single command.
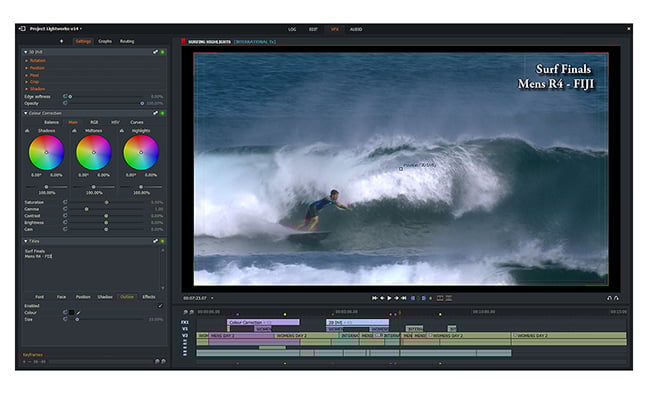
People familiar with LightWorks are probably aware of its extremely flexible user interface. In v14, EditShare added a fixed layout that simplifies the learning curve for newcomers to LightWorks, by providing task-specific layouts for ingest and logging, editing, effects, and audio mixing.
The flexible layout, which I prefer, is pretty much whatever you want it to be. I generally set up my editing interface with a timeline and record window. Double clicking on a clip in a bin opens it in its own timeline, which I use both for marking in points and as a source window. LightWorks uses the current playhead location as an out point, so quite often it’s enough to mark an in point and then locate an appropriate out point, and simply press the insert or replace button.
It’s also possible to mark in and out point on clips in bins, and then arrange the clips within a bin as a storyboard, and then create a timeline from that storyboard. I’m using a similar technique, where I’m working from a series of interviews. I select clips from the interviews, and add them to bins as subclips, and once in the bin I can work with the subclips the same way that I work with other clips.
LightWorks’ trimming interface is contextual, rather than using modes like most NLEs do. It takes a while to get used to working this way, but it requires fewer clicks and keystrokes, so it ends up overall being smoother in the long run. Adding either a Contour Shuttle or one of EditShare’s own custom designed LightWorks consoles is worth considering if you plan on doing a lot of editing in LightWorks.
LightWorks’ flexible layout also makes it very easy to edit from one timeline into another, though it’s just as easy and sometimes more appropriate to simply add one sequence to another as if it were a clip.
LightWorks has a pretty impressive effects engine with a node based interface. Like most nodal interfaces, the learning curve for this is fairly steep, but the payoff is tremendous flexibility. There is also an effects stack for the times when you don’t need all that power. The LightWorks color corrector is quite good compared to other very basic color correctors like Adobe’s Lumetri panel, but it similarly doesn’t compare to the color correctors you would find in a dedicated color grading suite like Nucoda, Scratch, or Resolve.
The audio side doesn’t have all that many effects, but the mixer is quite robust.
Given LightWorks’ pedigree, you’d expect it to handle interchange well, and in this LightWorks lives up toexpectation. The AAF import and export are quite nearly flawless; so far I’ve tried conforming projects in Resolve and Scratch, and the imports were nearly flawless. I also used AAF to transfer a synced timeline from Resolve to LightWorks for editing, which also imported flawlessly, enabling me to start making subclips from the synced interviews easily.
While Resolve has most of the functionality I need for the editing that I’m doing, it isn’t as quick without the more powerful external GPU as Lightworks is, so while I’m traveling an hour each way on the train to a consulting gig, it’s nice to be able to pull out my laptop and a mobile drive and edit some 8K footage.
I’ve used a few different workflows, depending on the project. All of these were for projects filmed on my Red Epic-W in 8K, at 10:1 compression. When working on my older Razer Blade Stealth with only two cores and no dedicated GPU, I had to generate proxies to work with 8K Redcode, but on my HP Spectre x360 equipped with a Pascal GPU and 4 cores I get smooth playback with the deBayer resolution set to ⅛ using a fast disk. The lower end mobile drives generally can’t keep up, leading to stuttery playback unless I generate proxies to work with.
I can raise the playback resolution to ⅛, but generally leave it at 1/16 until I’m ready to render in order to keep the editing workflow smoother. At 1/16th I can work with two video tracks smoothly with the footage hosted on a 7200 RPM disk connected via USB 3.
For rendering, I raise the de-Bayer resolution to ¼, although if I have my eGPU connected I can raise it all the way to full. If the final output is going to be HD, then full ¼ resolution de-Bayer is enough; there’s no visible difference in sharpness and detail except in clips that are significantly zoomed in post.
For small projects like the promo for this crowdfunding campaign, shot with a single camera and on-camera audio via a shotgun mic on a boom pole, the workflow was very simple, since I can do it almost all in LightWorks. The only aspect that I didn’t do in Lightworks was some audio cleanup, since the traffic on the normally quiet back road we were next to naturally picked up as soon as we started rolling.
For a project where the footage and production audio are separate and do not have synced timecodes, I sync in Scratch and render DIs with synced production audio for editing. White it’s possible to sync visually in Lightworks, it’s far easier in Scratch. When I’m finished editing, I export the timeline as an AAF and import the result into Scratch or Resolve for color grading and rendering. This process has been nearly flawless; Lightworks’ interchange exports are very clean, so the conforms I’ve attempted have been quite straightforward, requiring hardly any online editing before getting into the color grade.
Lightworks offers the option of syncing by timecode as well. Just add both the audio and video clips to the same bin, and use the ‘sync by timecode” bin command, and everything in that bin that has matched timecodes gets synced up and placed in its own bin. I take the footage from the “syncs” bin and organize it, then go on to edit. I have only done this with small projects that I’ve rendered out from Lightworks, so I haven’t tested to find out whether the interchange transfer includes synced audio yet.
EditShare offers a free version of LightWorks, as well as various paid options. It's well worth a look for anyone who's interested in a Hollywood calibre editing system and doesn't have the money to spend on an Avid solution or a computer powerful enough to run Resolve comfortably.
Tags: Post & VFX

RedShark 2020 @ All rights reserved.

Comments