17 minute read
We got our hands on an Insta360 ONE R Twin Edition for review and tested it out doing what it was designed for. Will you ever shoot flat video again?
Okay, first of all a caveat. We know that the Insta360 ONE R is not new to market. We had intended to review it much earlier, but world events got the better of us. Not just in terms of getting hold of a unit, but also for actual testing. With lockdown restrictions, right or wrongly, being lifted in the UK I finally got to take the camera out for some proper testing.
This won't be a blow by blow technical review. There's enough of those out there. Instead I'll be looking at the camera from the practical perspective of the sorts of people it was designed for. I'm not talking about easily filming the dog being taken for a walk, or taking a drive to the shops in your car. The Insta360 is at heart an action camera, and that's how I have been testing it. In short, the ONE R was designed to do one thing. Film cool stuff. So before I go on, here's a little montage I made with the camera. Bear in mind that online compression really doesn't like moving water!
I was sent the Insta360 ONE R Twin Edition to test out, along with a number of accessories including the sports kit, lens protectors, and the selfie stick.
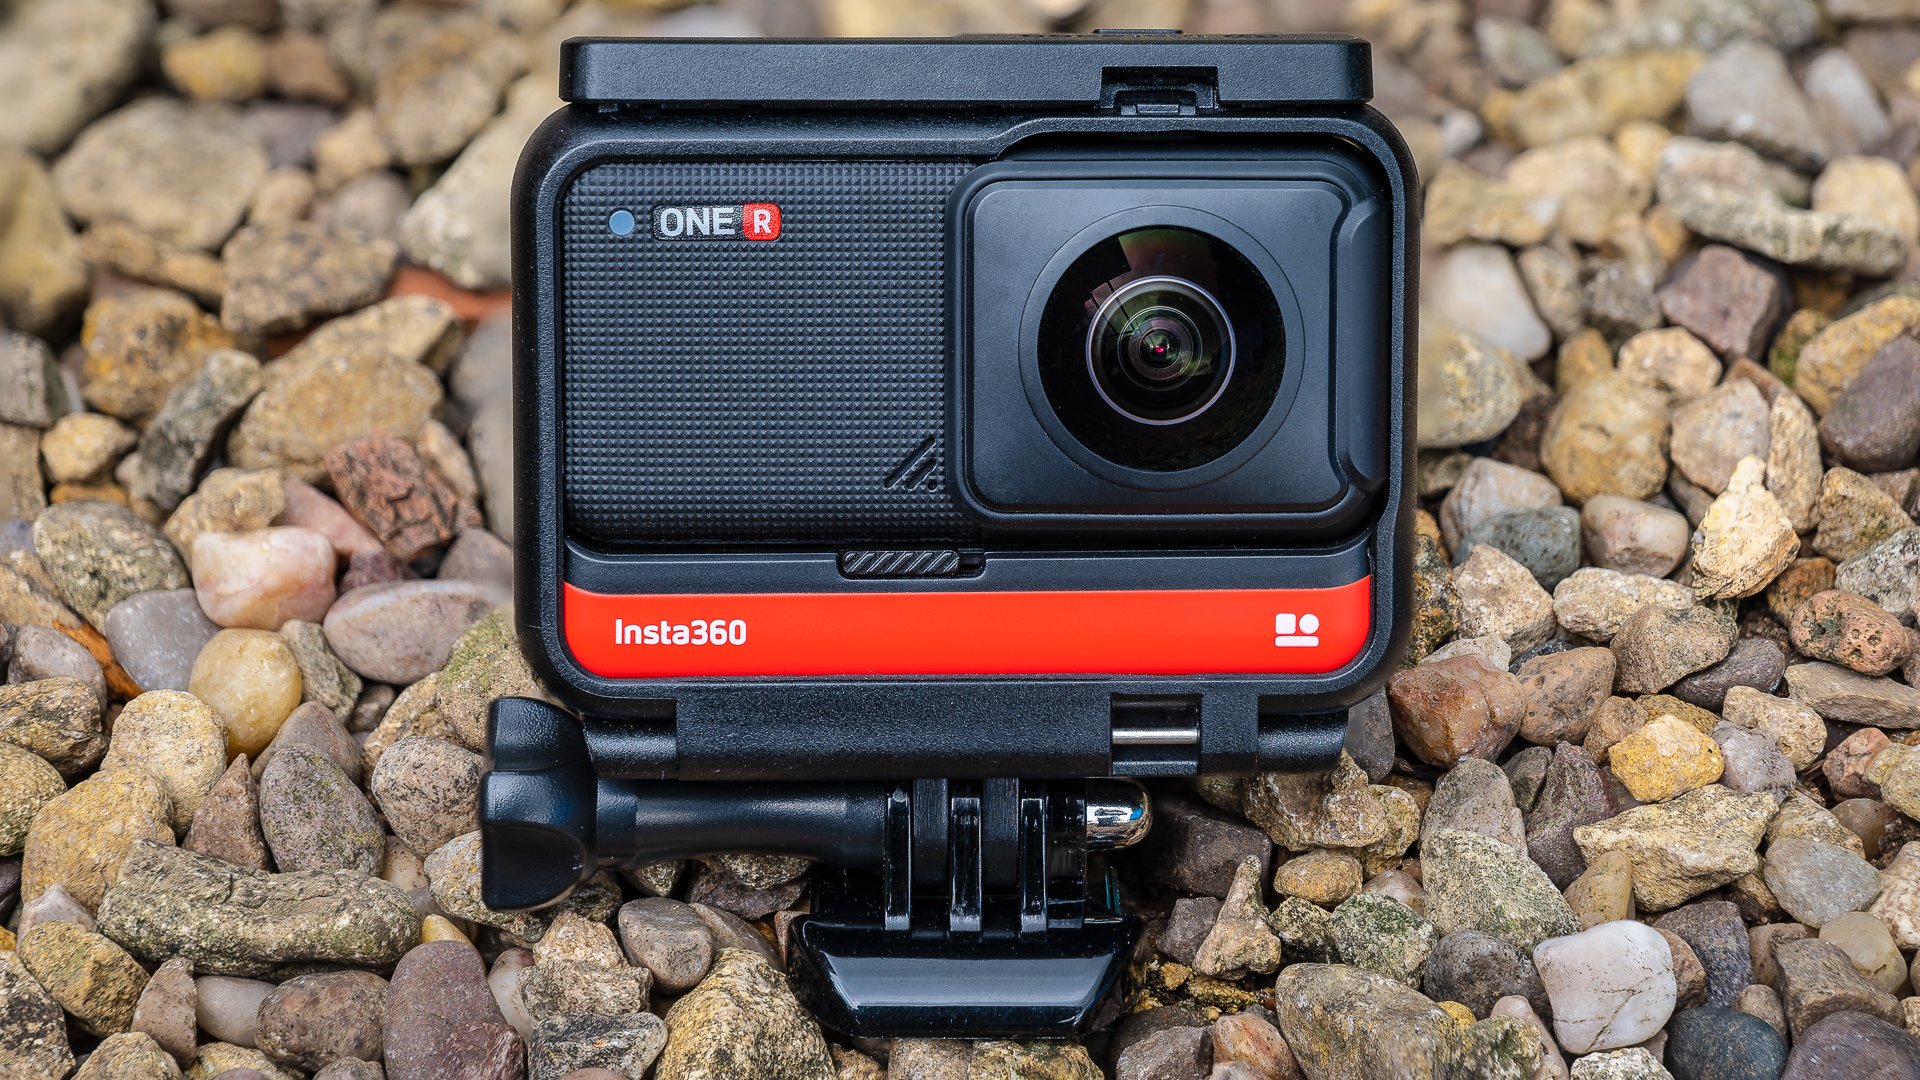
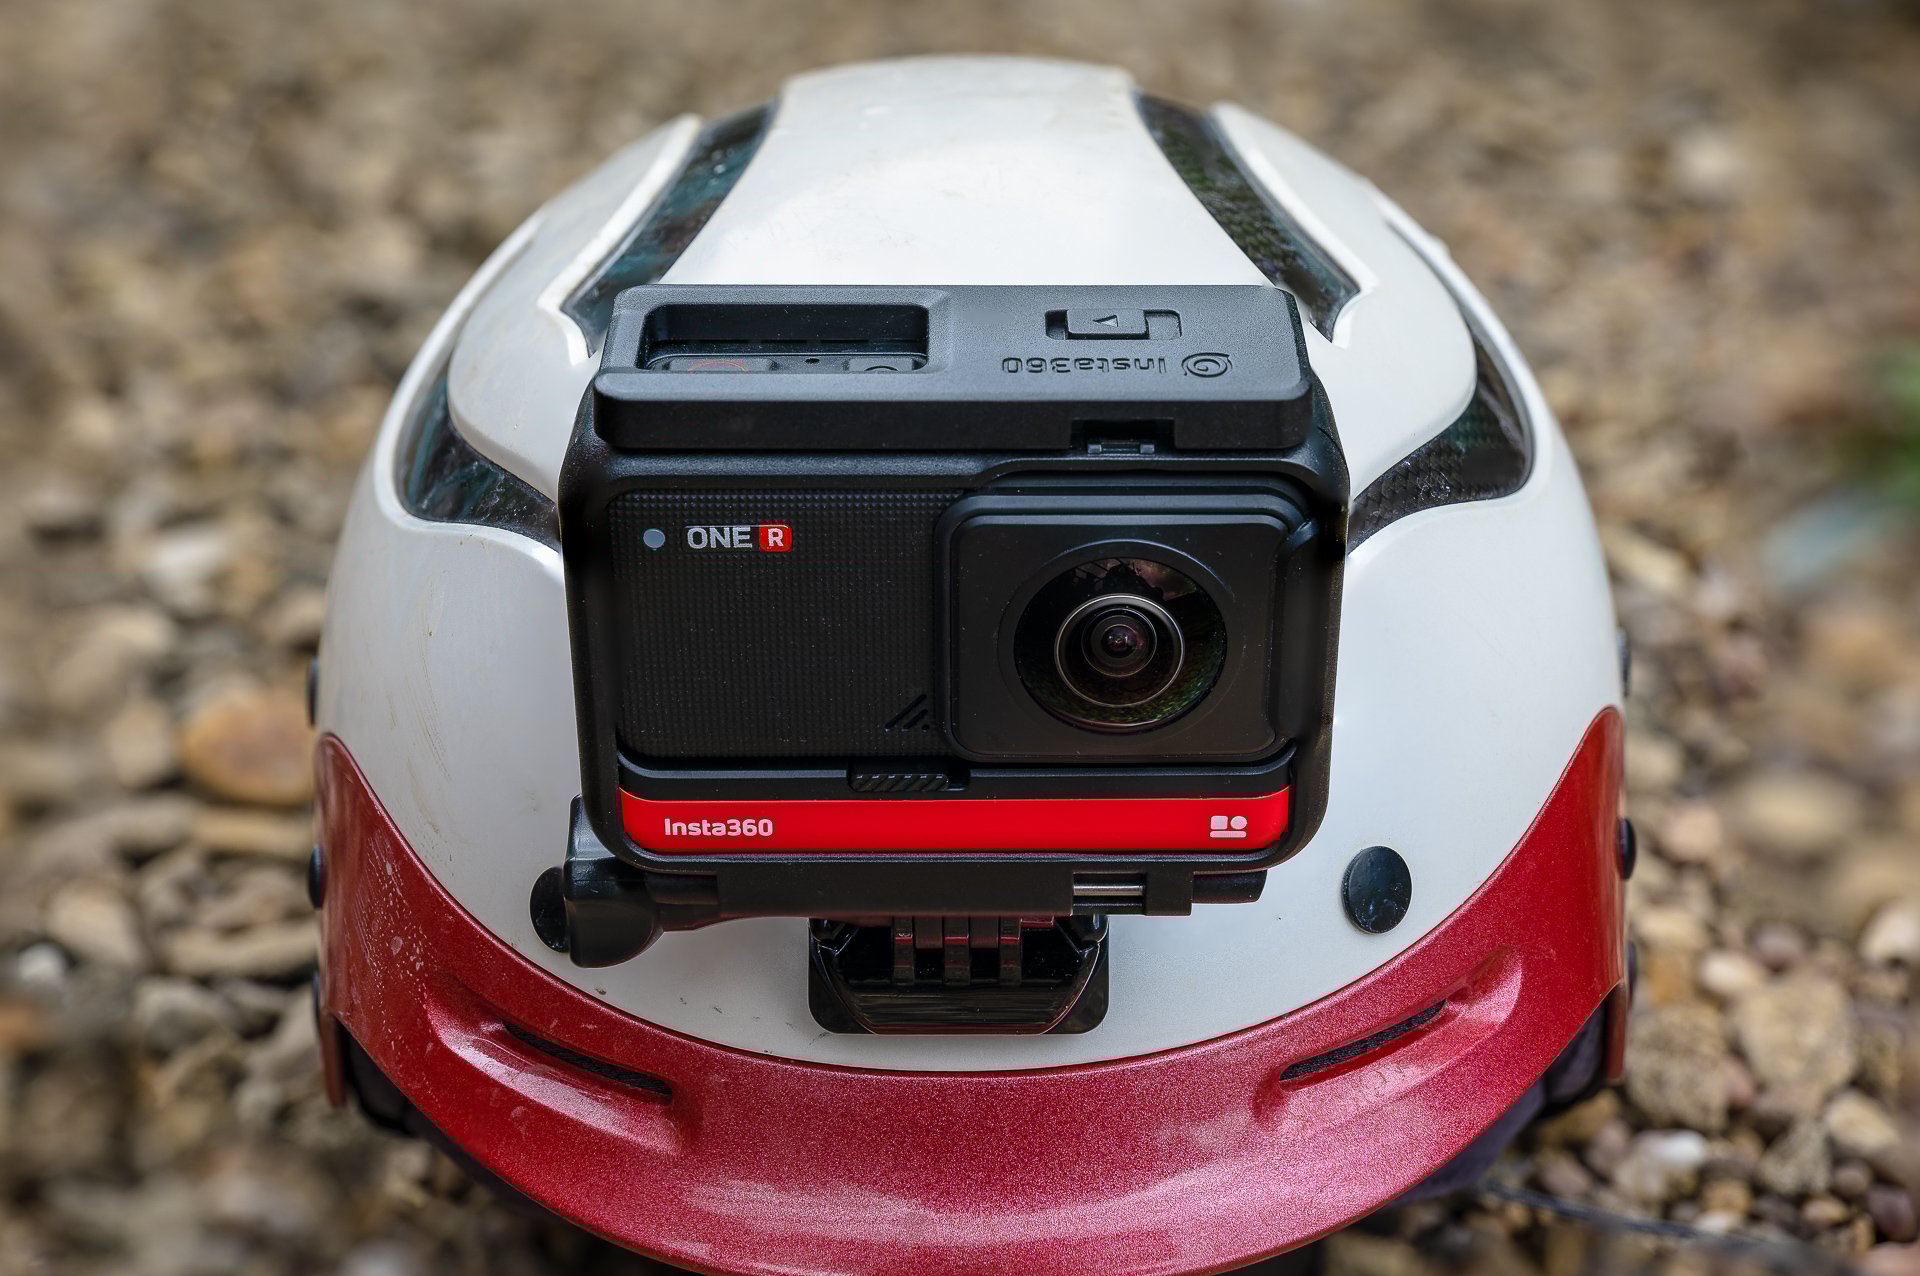
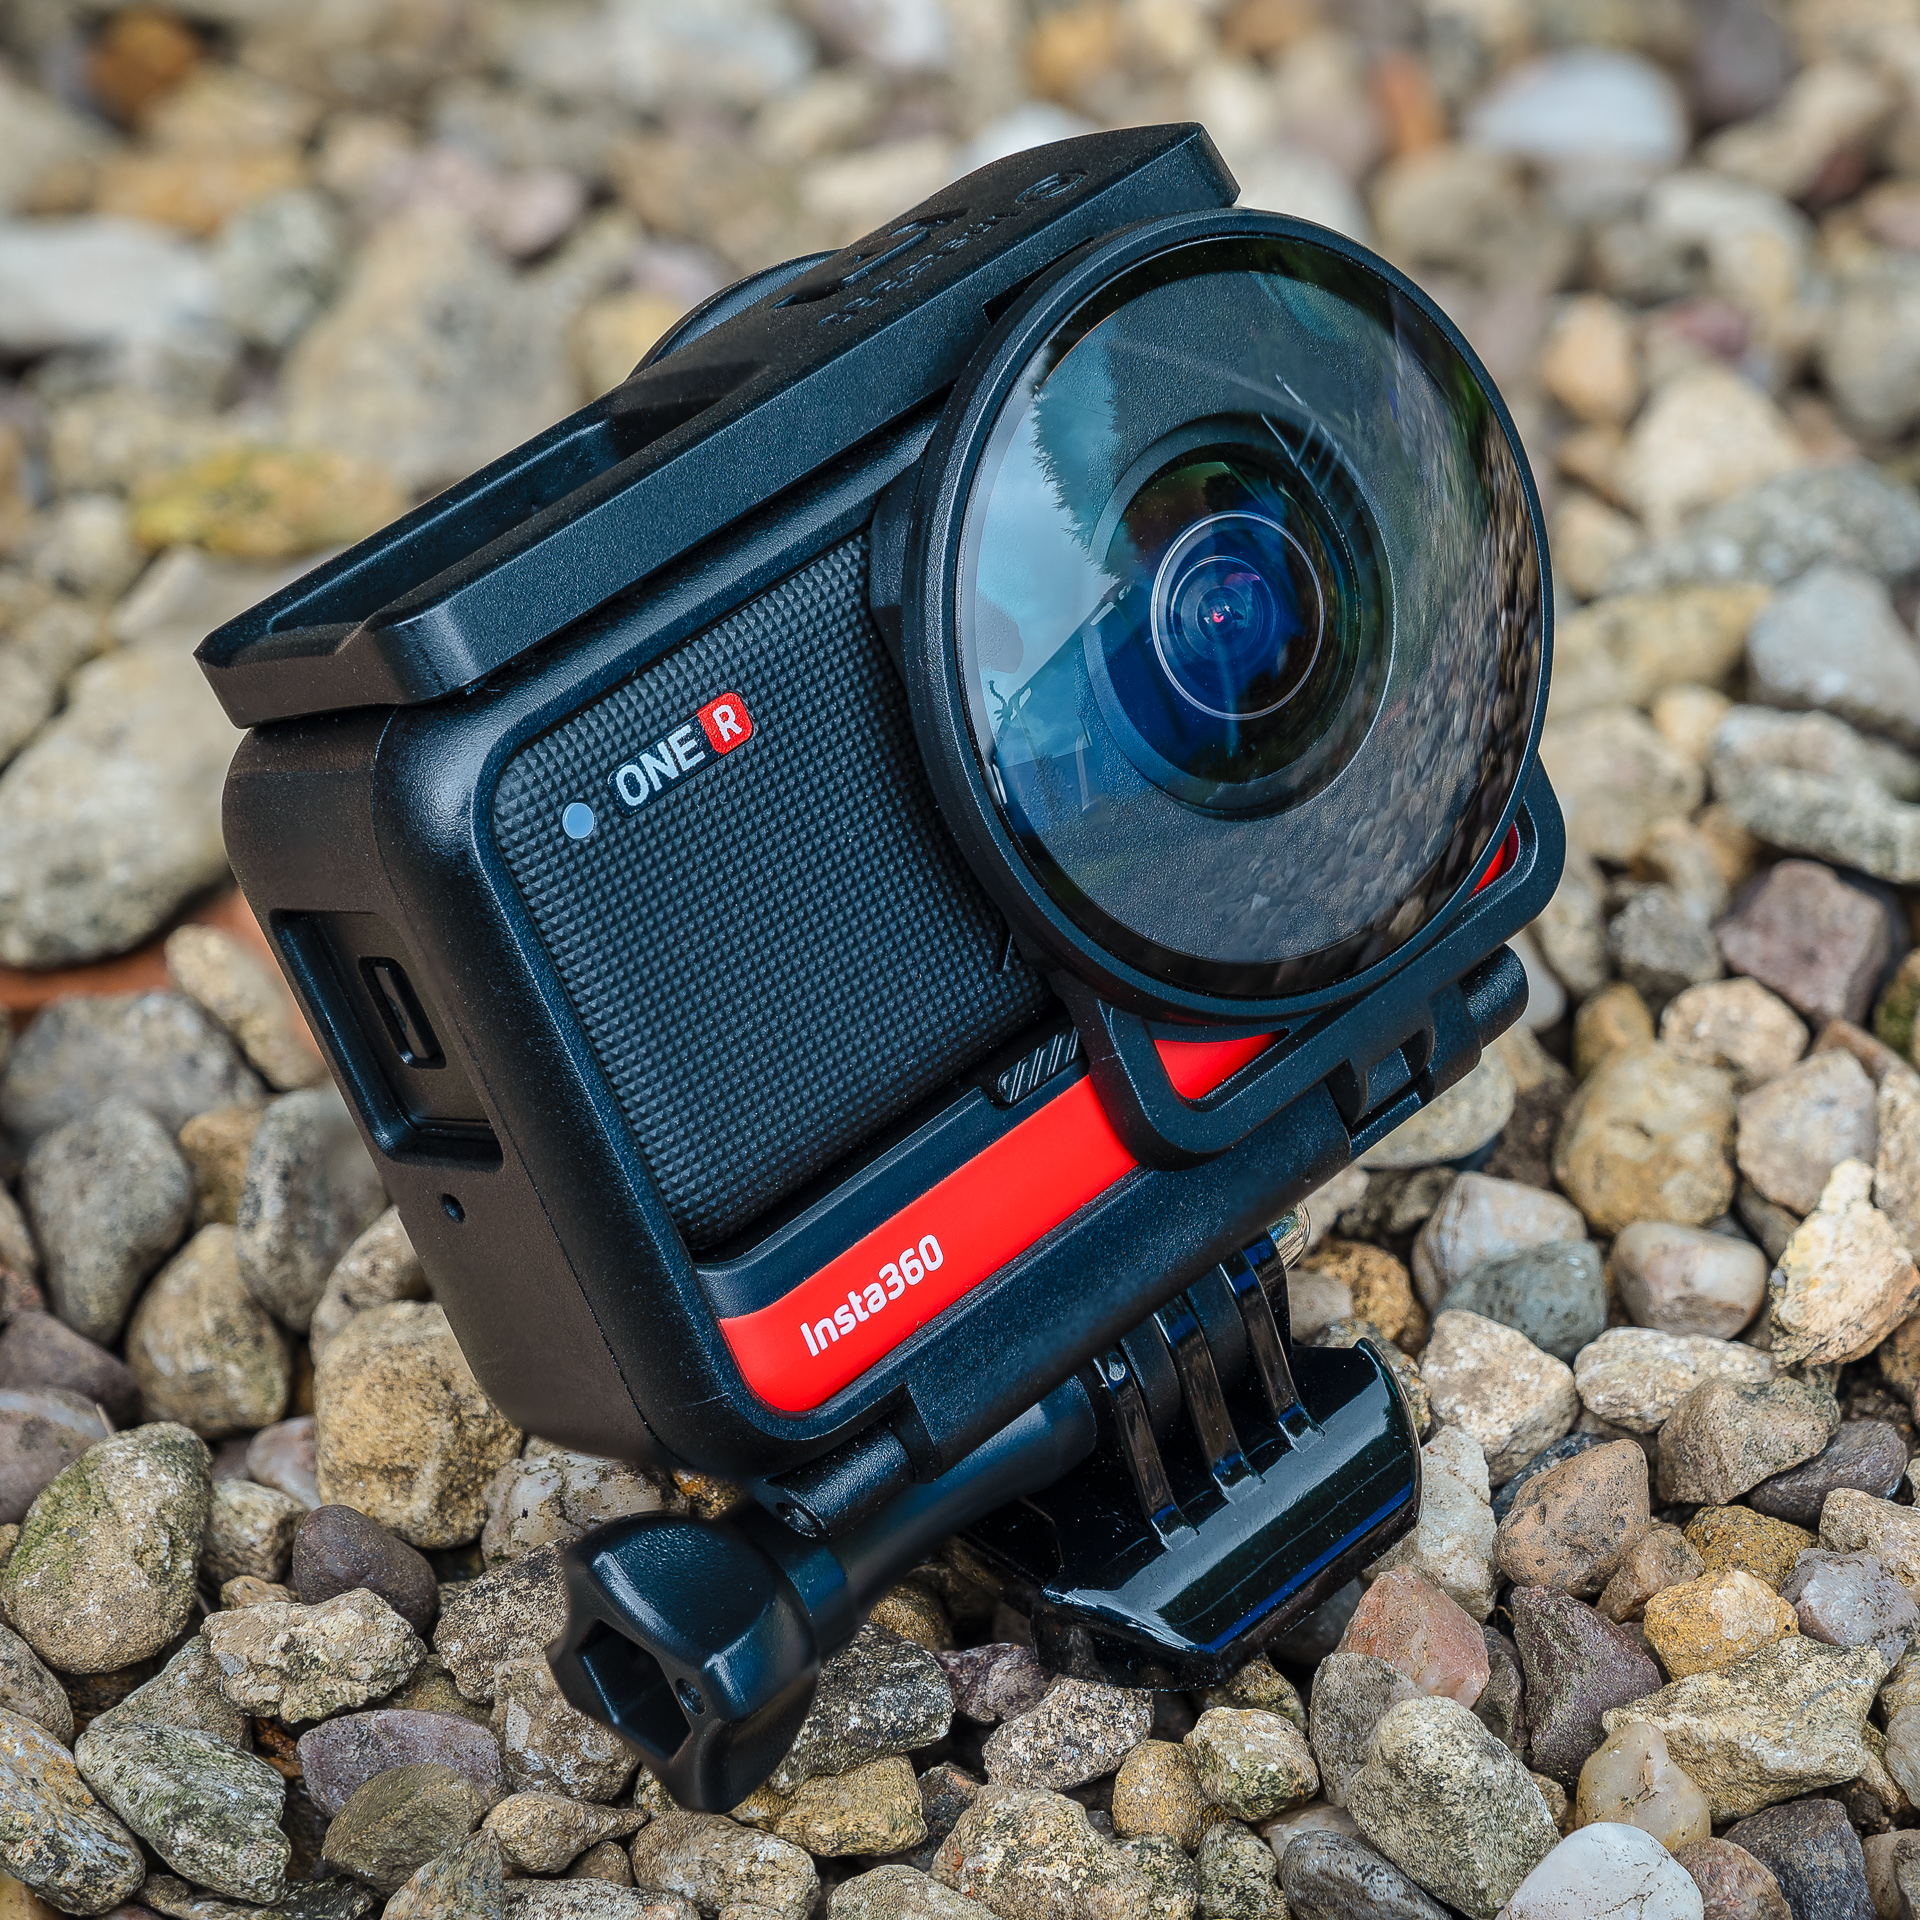
As you will have most likely read, the ONE R is a modular camera. In fact it's the first of its kind, and it opens up all sorts of possibilities for the future assuming the company continues to develop for it over time. The camera body consists of three separate pieces; the lens module, the core module, and the battery base.
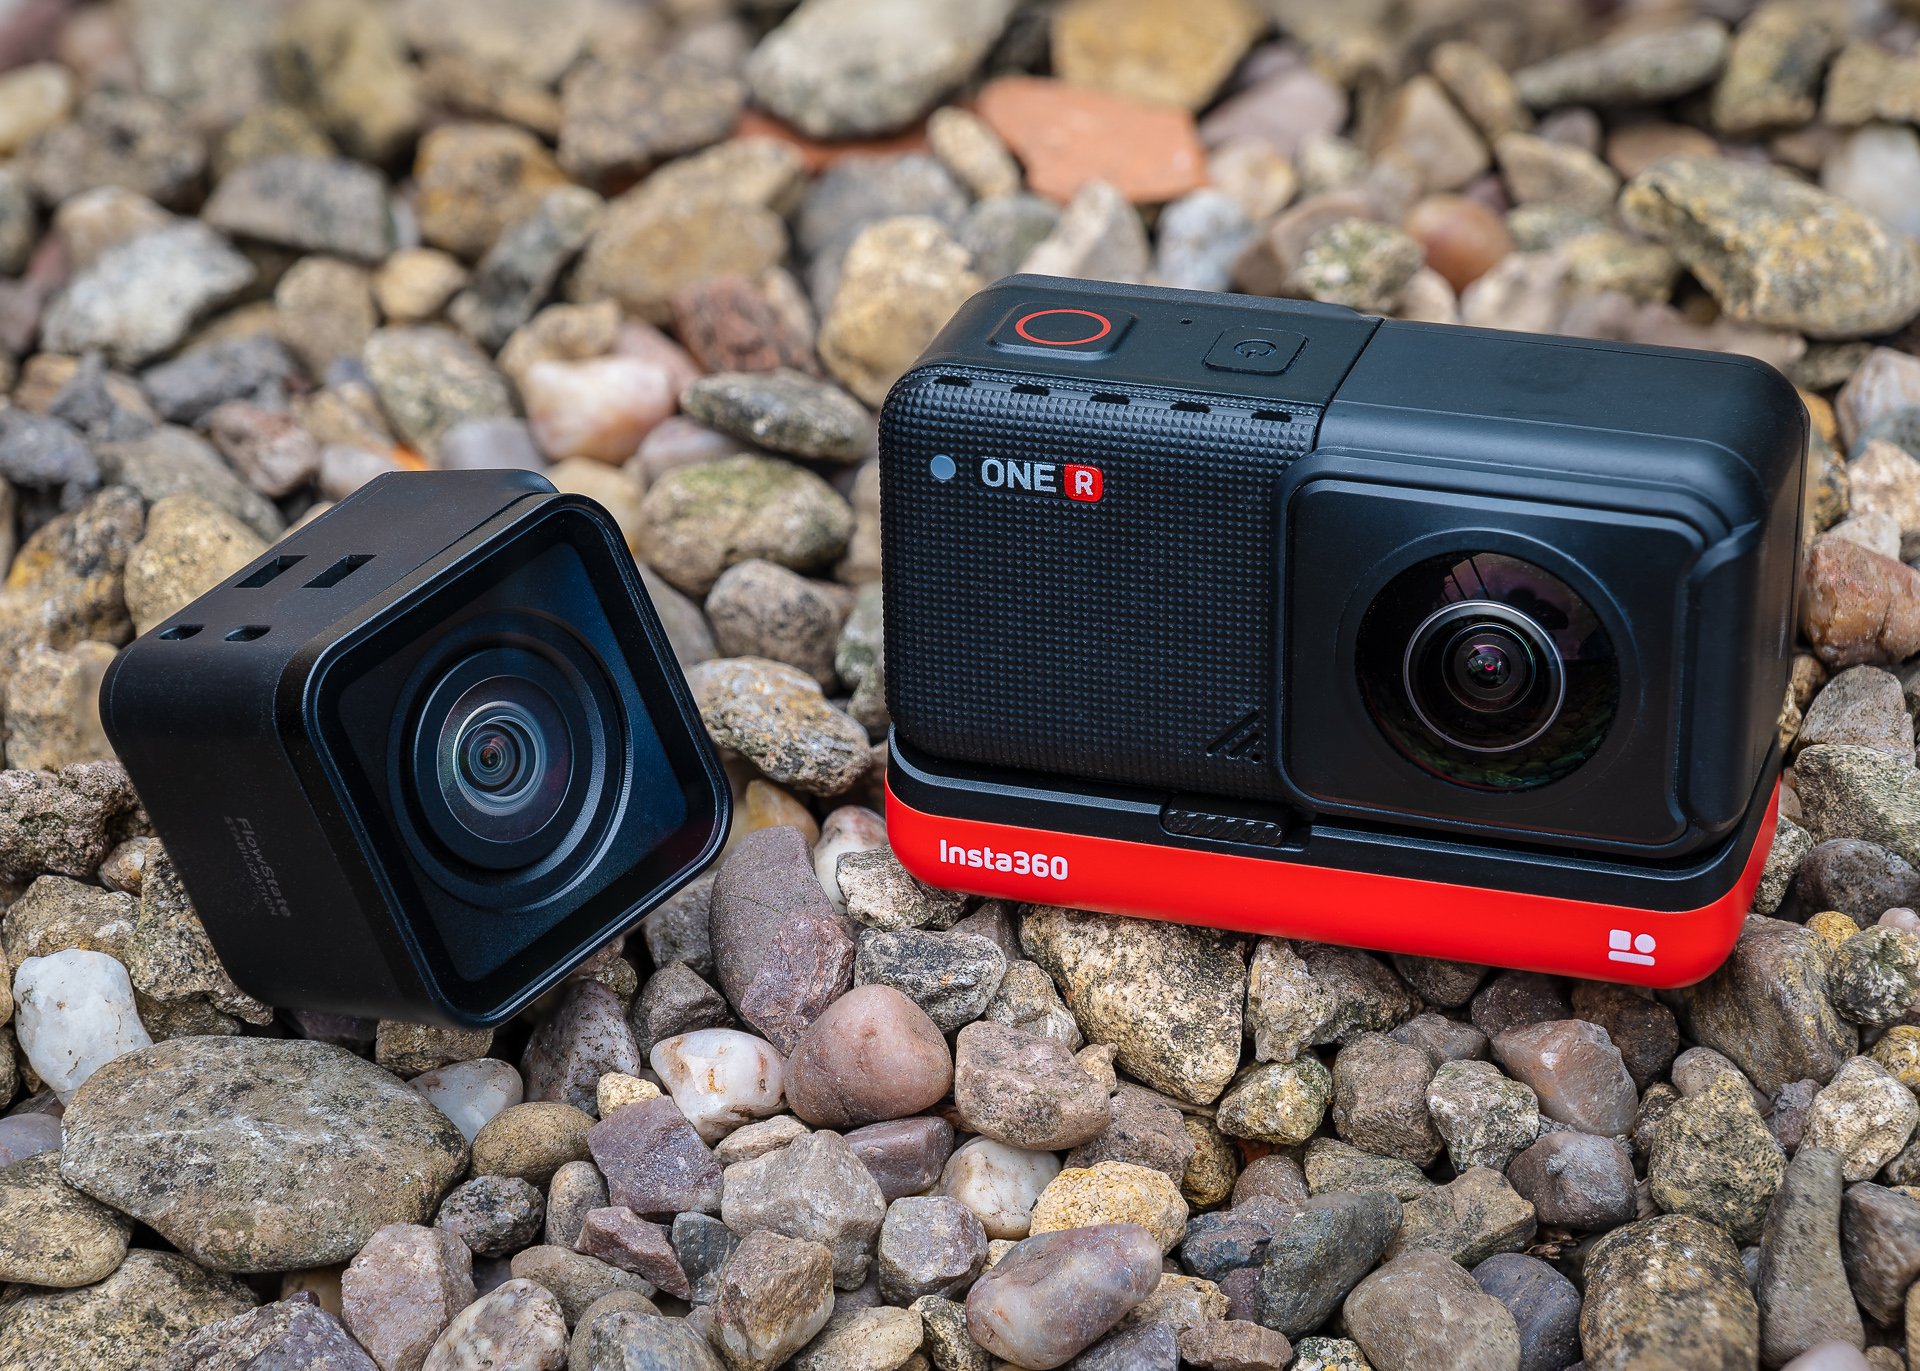
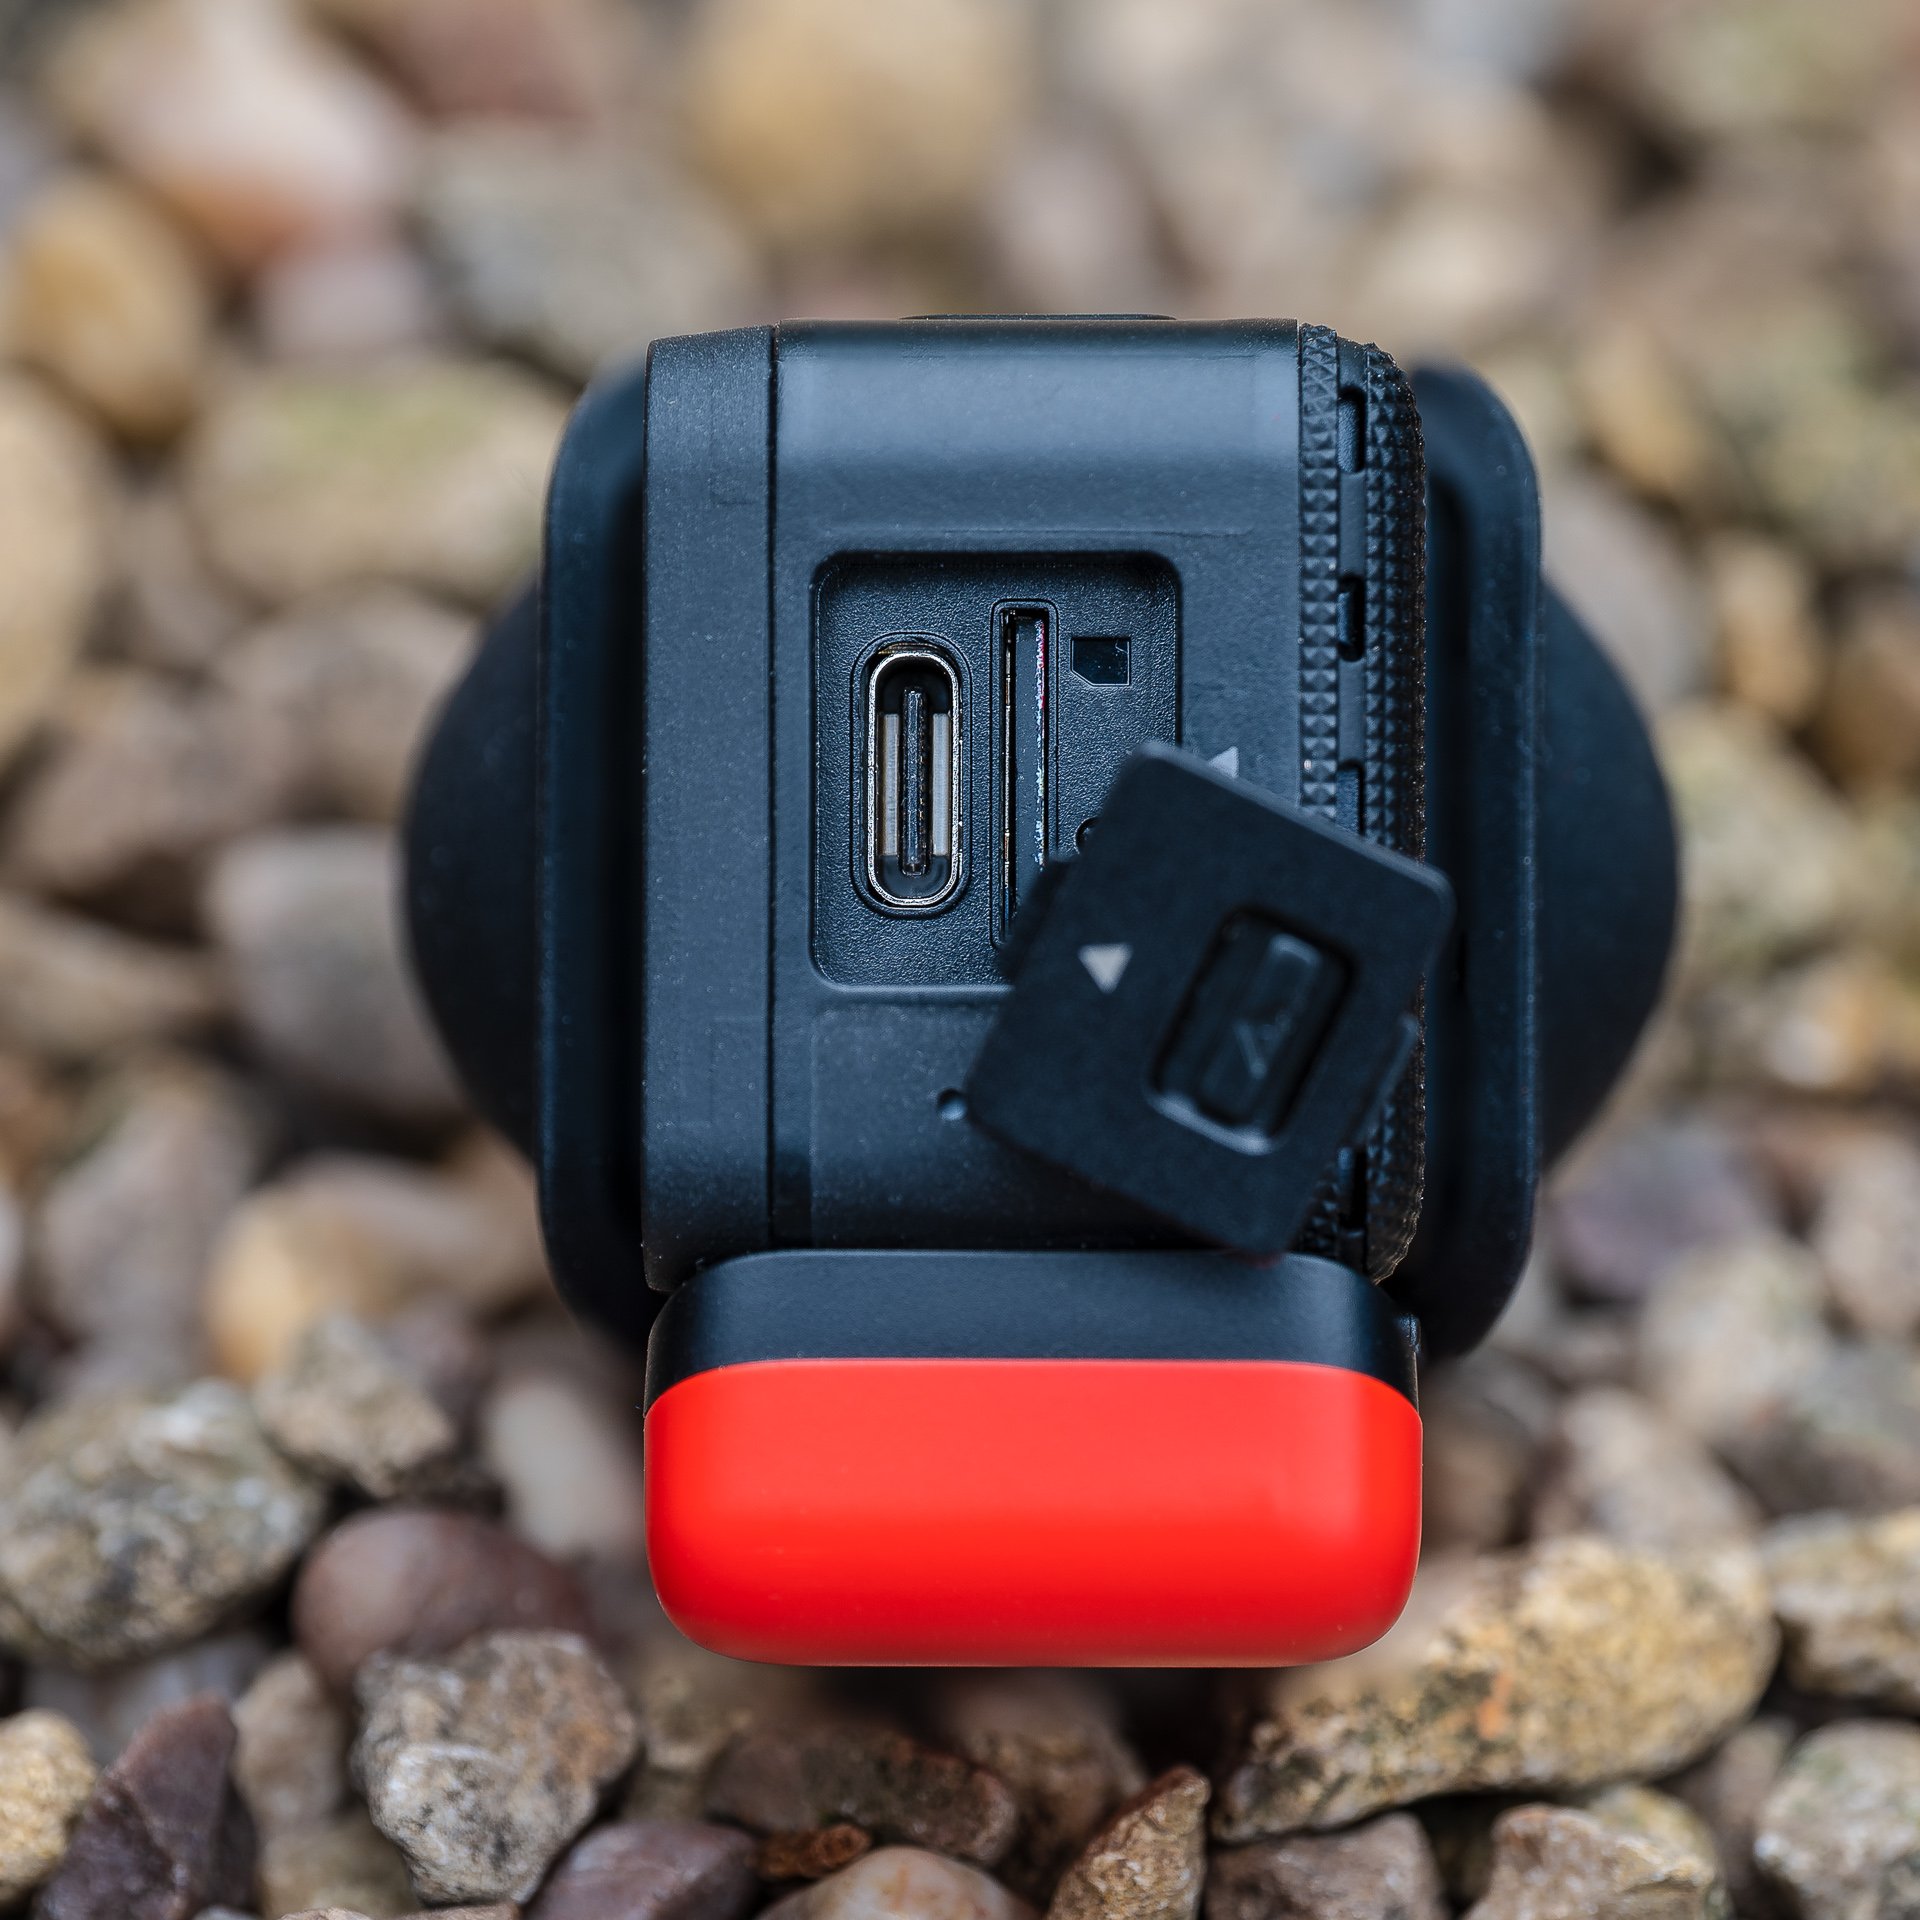
The core module is the heart of the camera. This features a touch screen for both framing as well as accessing camera settings. It also houses the USB-C port and micro SD recording media slot. The lens module houses the lens and the sensor/s. In the case of the Twin Edition this is a choice between the 4K wide angle mod, which makes the camera look and behave like a traditional action camera, and the dual lens 360 mod, which shoots 360 video.
Once these have been clipped together the battery base can be attached to the bottom of them. Finally, the assembled camera is placed inside a plastic frame, which features a GoPro compatible attachment base for attaching to various mounts.
It's an inspired design. The core module can be detached and placed with the screen facing forwards for instance, making it ideal for vloggers. I also found it useful for filming training sessions and for setting the camera up on mounts.
The overall build quality feels very good, although like most people when I put the modules together I did wonder about how waterproof it would be. Especially because I would be using it for my specialist activity, white water kayaking. Overall it also looks pretty good, too, with its stylish red 'go faster' stripe along the battery.
Once inside the plastic frame the ONE R is a fair bit larger than, say, the GoPro Hero8. However when mounted on a helmet its weight was light enough that I didn't notice it much. So although its physical size is larger you won't notice much difference in feel when using it for POV etc.
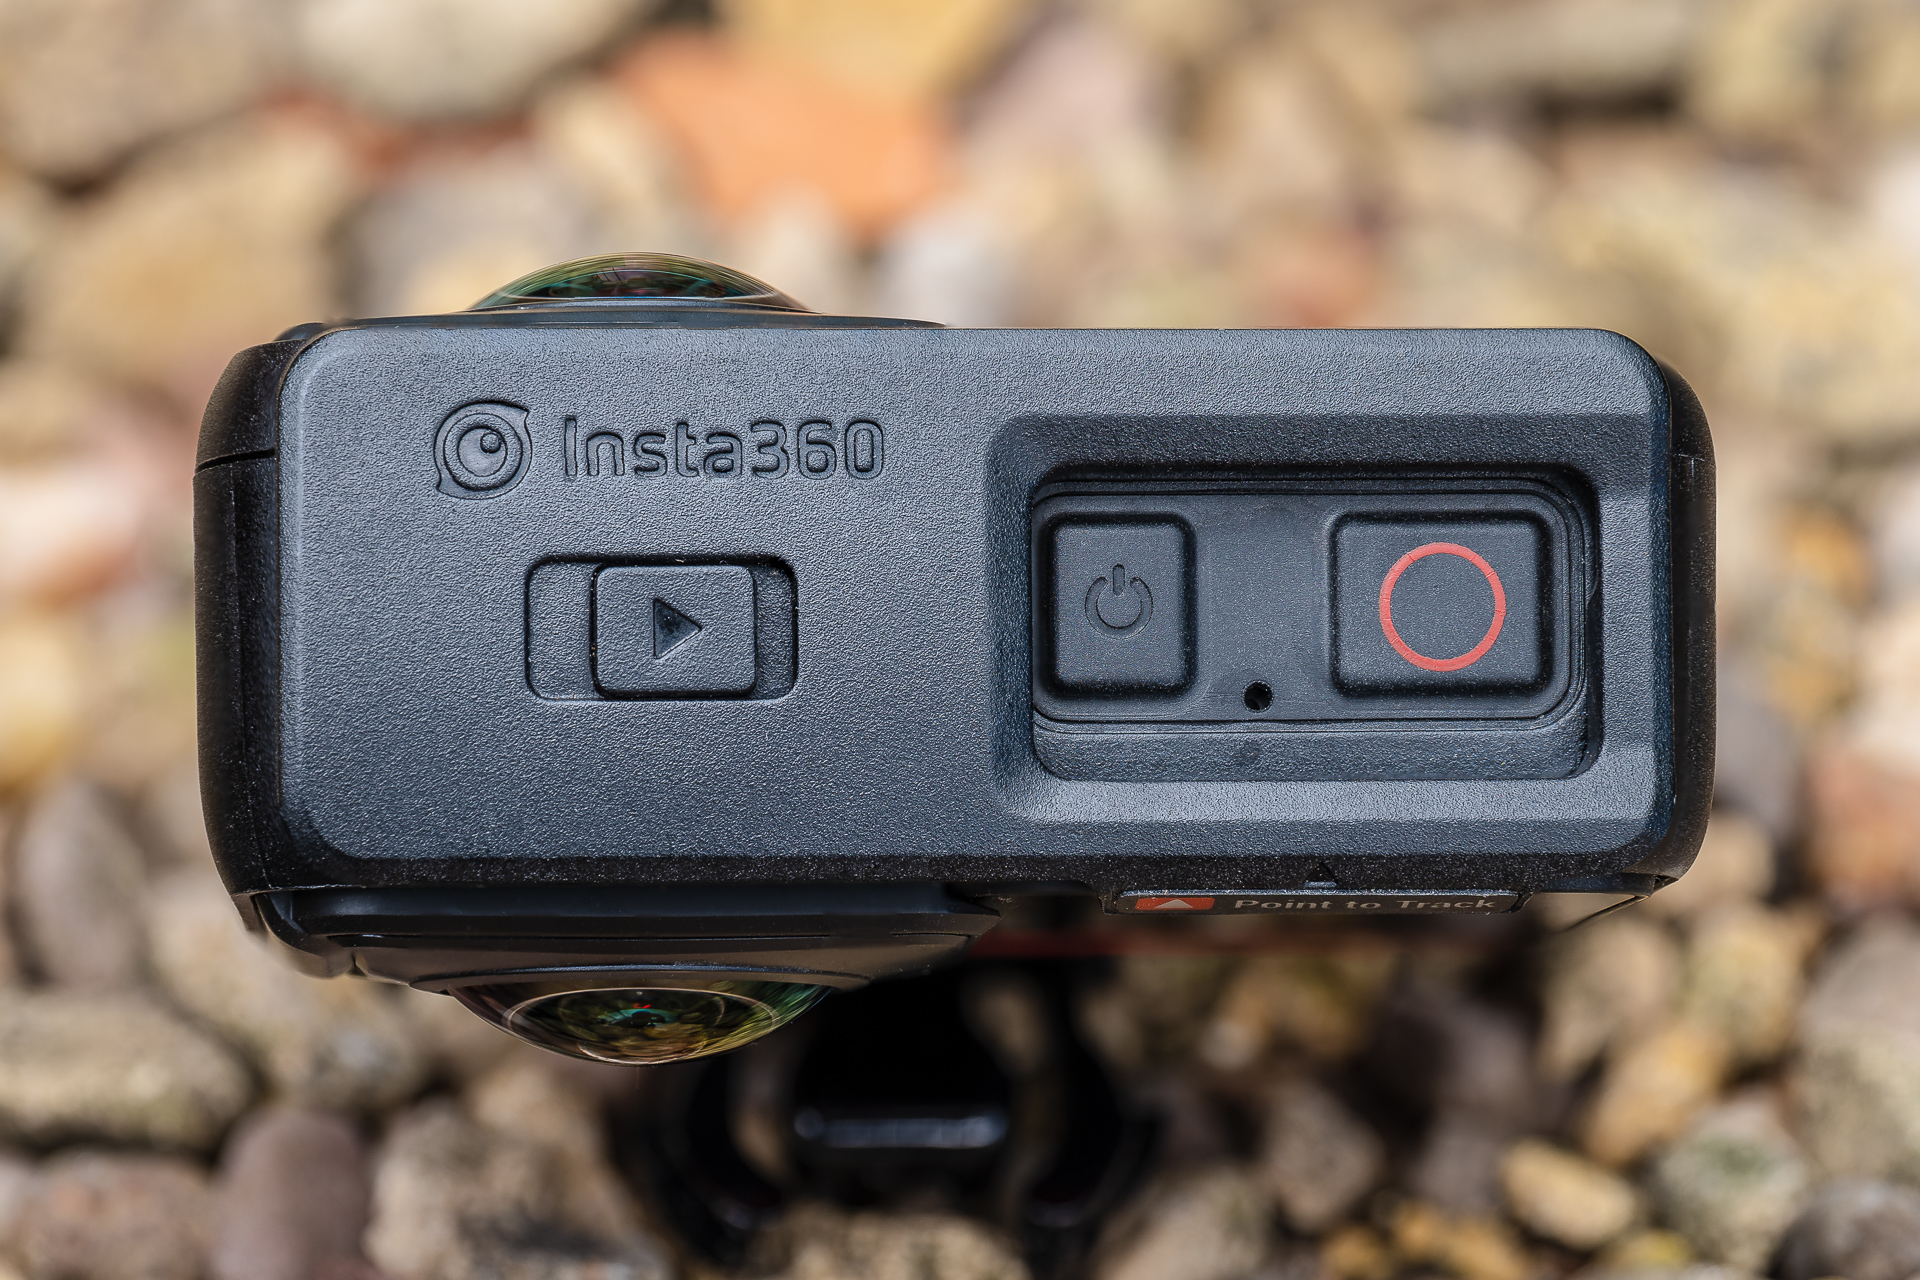
Startup time using the latest firmware is pretty fast at around 4 seconds. There two buttons used for turning the camera on and off and for starting and stopping recording. These are large and sufficiently different in size and feel from one another that it is easy to operate by touch when helmet mounted. There's also the option of using voice commands, which I'll come to later.
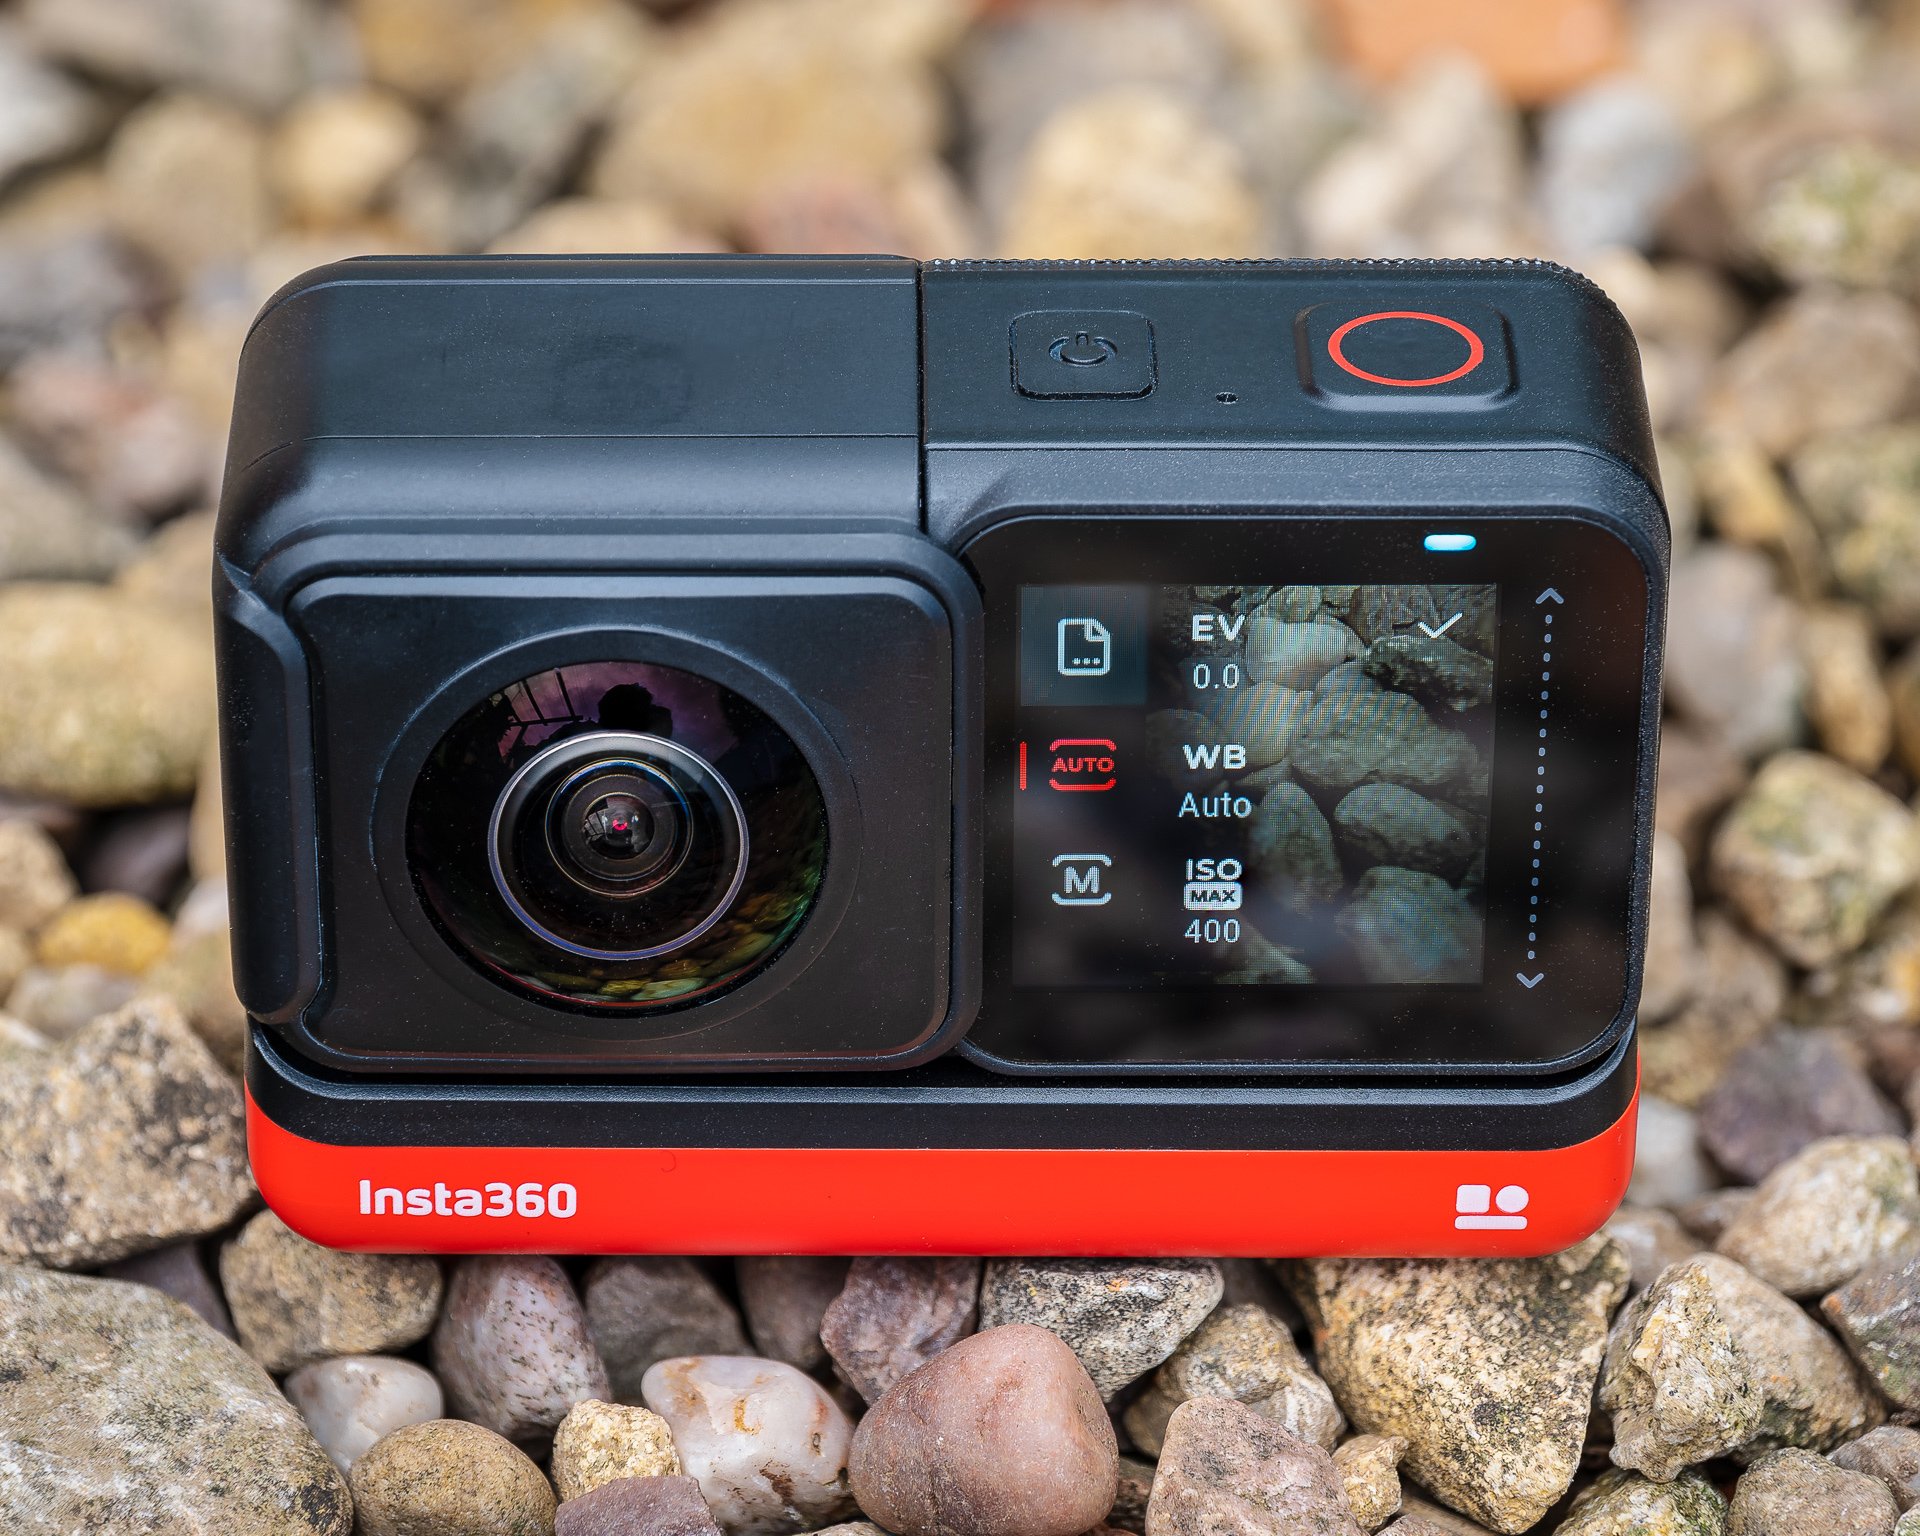
Because the camera is module based the touch screen LCD is smaller than competitors. This is a trade off I'm willing to accept however because of the advantages that modularity brings with it. The screen is bright, clear, and sharp and not too bad for outside viewing.
Like all touch screens on pretty much every action camera I have ever used, including the GoPro, it can be a little bit finicky in its responsiveness. This is particularly noticeable when trying to use it with wet hands. This is an issue that afflicts every camera like this. I'm not entirely sure why we can't have iPhone style responsiveness yet on these sorts of cameras, but perhaps one day...
The SD card and USB C cover flap is quite small. I found that removing an SD card from the camera when it is mounted in the frame requires the deft use of another object to help lift the card out enough to grip it with the end of your fingers. Fiddly yes, but at least you don't have to open up and remove the battery to perform the operation like you do with the Hero8. Something that's rather risky out on the river in the pouring rain!
The setup options for the ONE R are very straightforward and easy to use. You can just go ahead and shoot, or if you want more control you can enable log mode, manually set the white balance preset, set ISO limits, add EV compensation etc. In manual mode you can also tell the camera to stay at a preferred shutter speed.
This will require the use of ND filters to make it work well, particularly in bright light. The ONE R doesn't currently have a lot of choice for these, however Freewell has made some specifically for the 4K Wide Angle Mod. But these won't work with the 360 module, which is much harder to produce filters for. Although the company has said that it is working on a 360 filter.
I would like to see a bit more control over picture aspects such as digital sharpening. Dialling back the sharpness makes the picture less video like as well as making it easier to cut in with other cameras. It also makes things easier on the compression. I have put this suggestion to the guys at Insta360 and they seem open to the idea, so maybe it will be placed into future firmware updates if it is possible to do.
Setting the different shooting modes is easy. On the bottom left of the screen is an icon for the current mode you are using. Tapping on this lets you select between video modes such as
There's also a Starlapse mode for taking time lapses of night skies. In the same menu as Starlapse are five save slots for your favourite modes. All you need to do is set the camera up how you want it, and save to a slot. This way you can set up the camera for different types of shooting and quickly access the exact setup you want. This is a nice feature to see, and it lists the basic resolution and fps settings so you can see at a glance how the camera will be setup for each one.
The creative opportunities for using all these modes are far and wide, and well beyond the scope of this single review. So let's take a look at how the Insta360 ONE R fares as an action camera, particularly with the Dual Lens 360 mod.
I've been fascinated for a while now at the possibilities for using a 360 camera for white water kayaking as an over capture tool. Although I love the 4K output from traditional action cameras, it has to be said that when it comes to white water kayaking filming options are quite restrictive.
We don't have the same variety of mounting points and angles as a mountain biker or a kite surfer for example. Most of these limitations are down to safety. In river kayaking we have to consider things like snag hazards, particularly in the case of a swim. Any stray straps or accessories risk catching on trees and unseen underwater objects in the river flow. As a result using something like a unicorn mount (pole mounted on the helmet) or a pole mounted to our backs is not considered safe.
Slightly less risky is mounting a pole to the kayak itself, which has produced good results over the years. However it has become over used, and it is difficult to roll the boat back upright if you go over with one mounted. Not to mention that the camera risks getting smashed on the rocks on the river bed because white water rivers are often shallow.
A 360 camera gives the opportunity to not only see existing angles in a new light thanks to the much wider field of view offered, along with new stabilisation technology. It also allows multiple angles and shots to be created after the fact like a virtual camera operator in post.
Unfortunately the Covid 19 situation did rather put the dampeners on the stuff I had originally planned with the camera. I was all set to film some freestyle kayaking in a pool that I had set up in my garden. Then a window of opportunity appeared and restrictions were relaxed somewhat. Kayaking is a socially distant sport generally, unless certain types of rescue scenario ensue, so I was able to go to a small rapid about 20 minutes drive from my home to test out how the ONE R could be used.
Paddling this particular rapid won't get me on the front cover of Outside Magazine, but it was the perfect place for experimenting with the camera on moving water to see what would be possible. There were two key shots I wanted to experiment with. A pole mount on the boat, and to see what could be done with a traditional POV shot from a helmet mount.
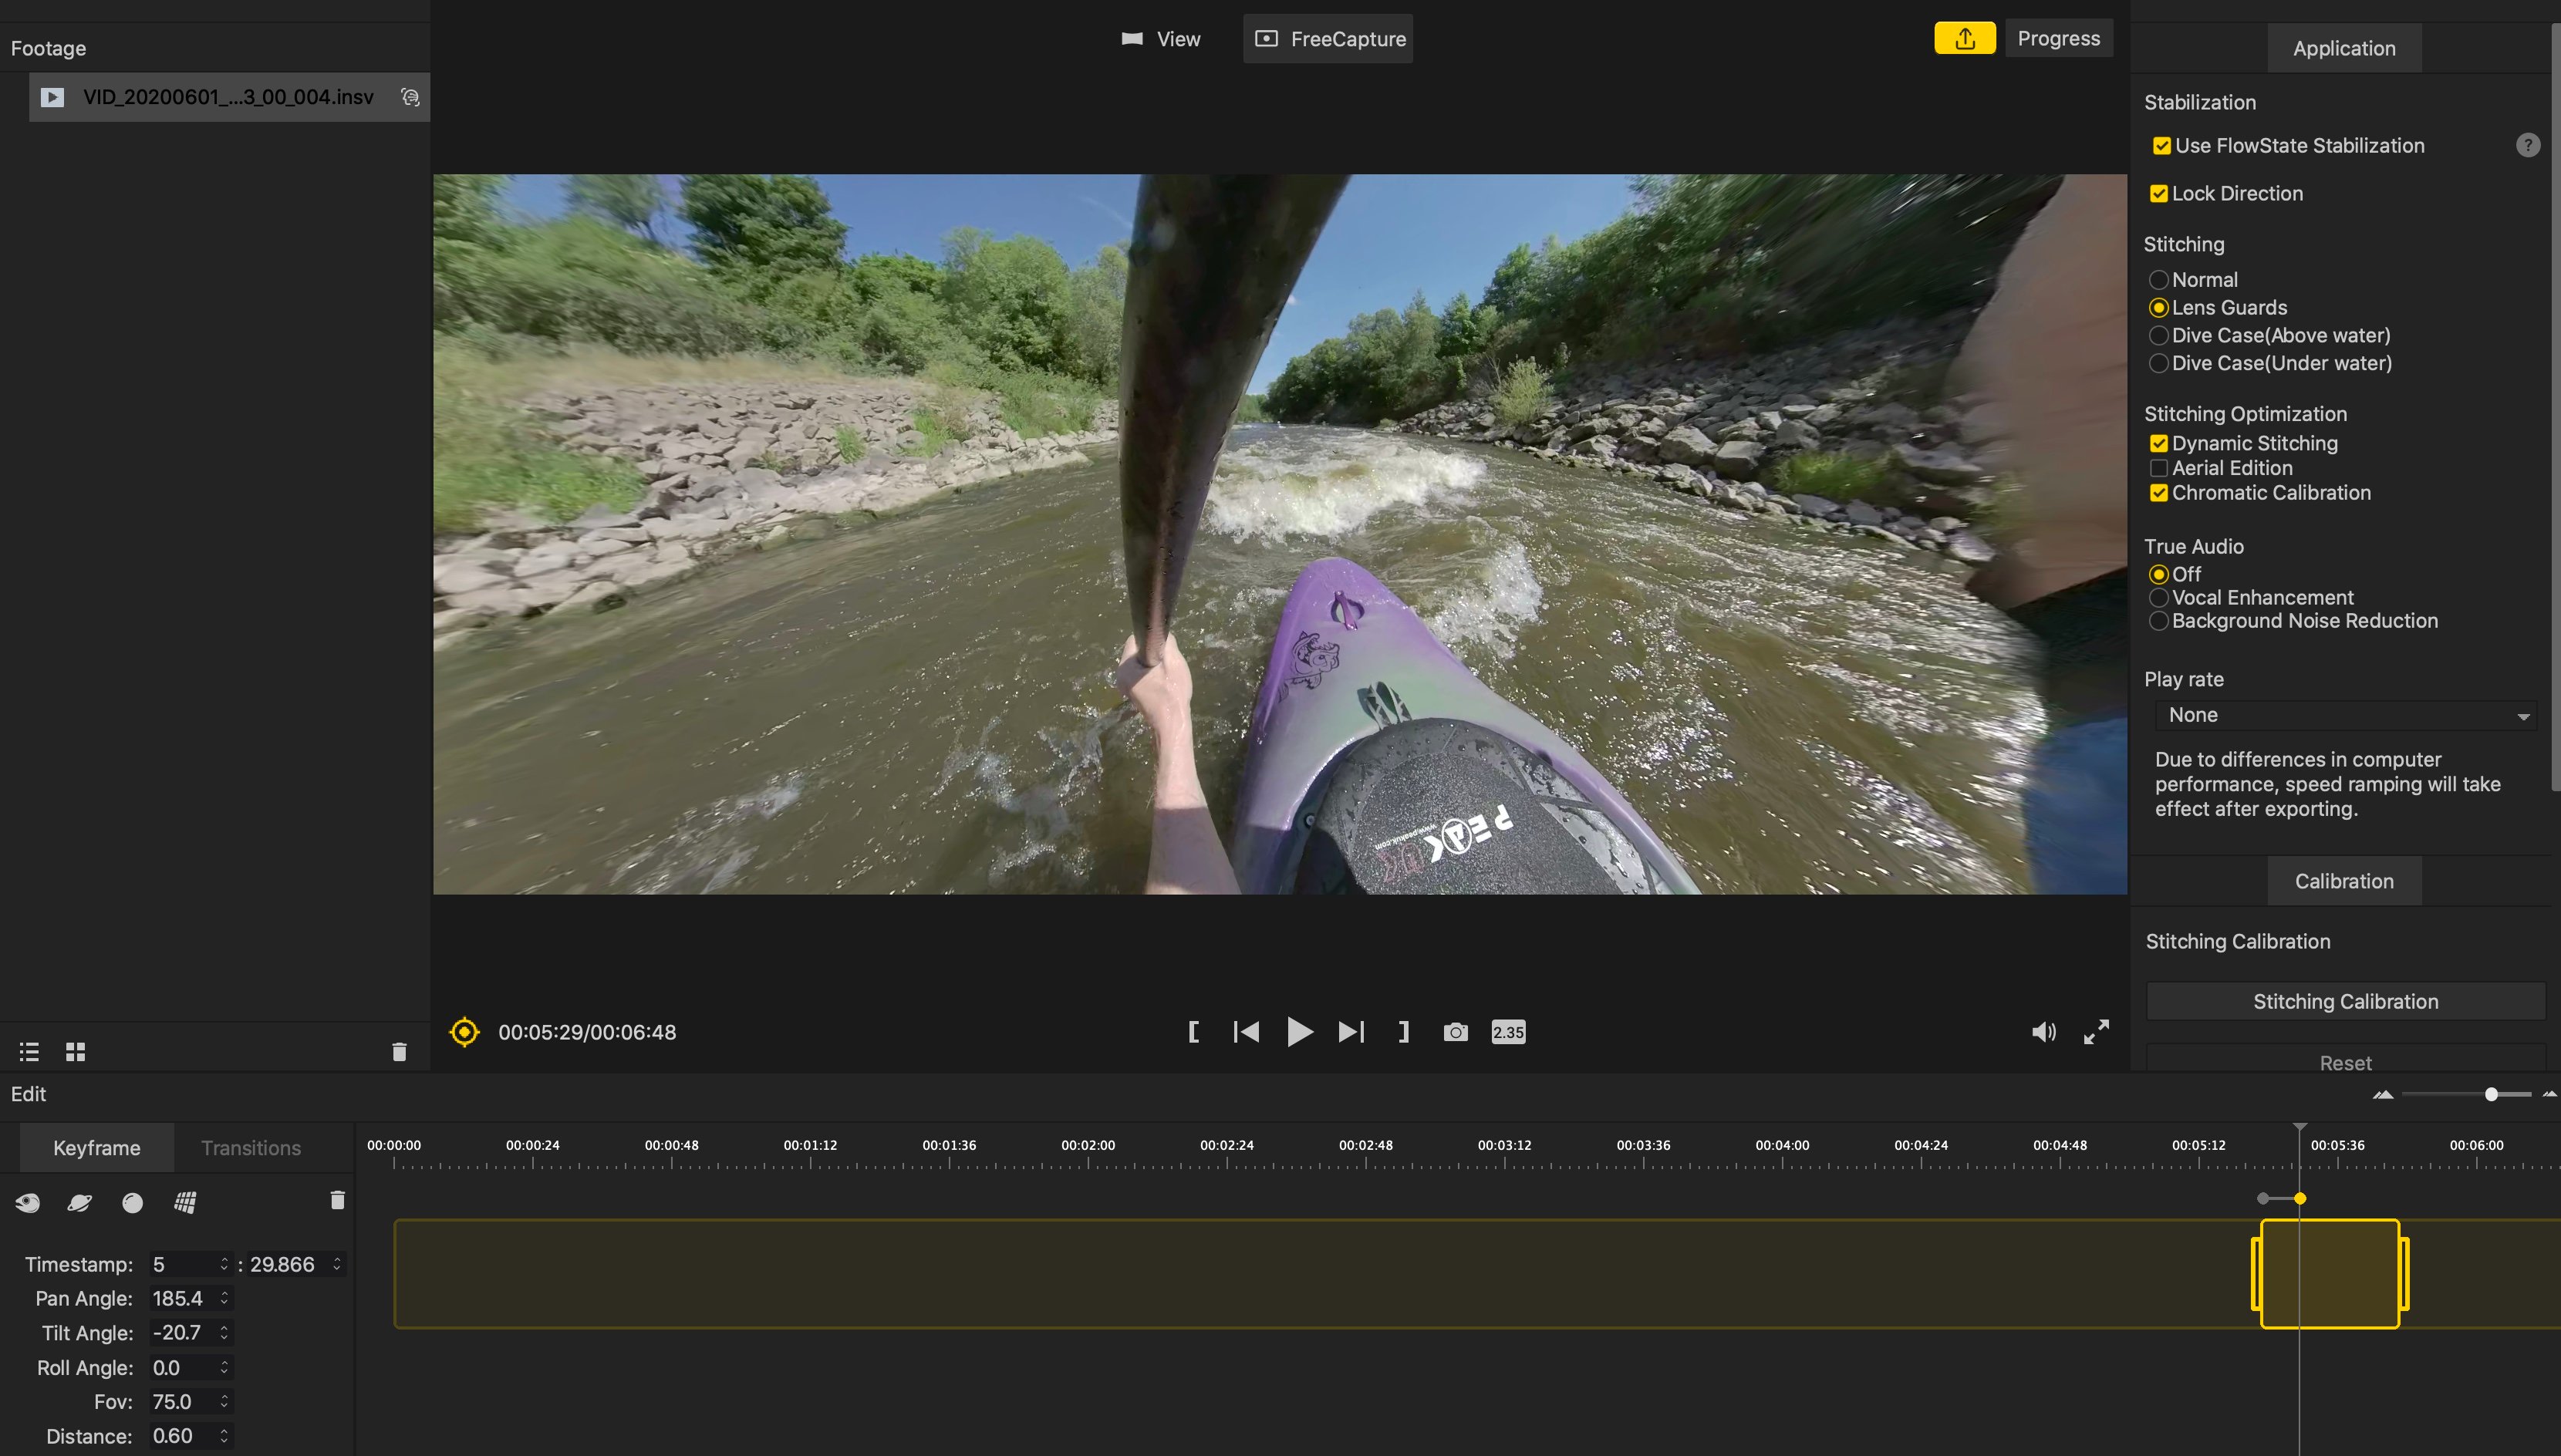
The first decision to be made with a helmet mount is whether to use the lens guards or not. On a basic rapid like the one I tested on the chances of going upside down are very slim. The trouble is that 360 lenses have a reputation for needing to be pristine clean at all times. Realistically with activities like this keeping the lens totally clean is more of an ambition rather than a practical reality. I did use the supplied rubber lens protector whenever possible when handling the camera, but the occasional touch of the lens with my fingers was unavoidable.
I decided to use the lens guards initially after seeing examples online. Because the guard's glass is away from the lenses, any water droplets that appear are in focus. This might sound completely undesirable, but if a water droplet is on the actual lens itself it presents as a large smudge. This makes any action that appears in front of it pretty much invisible. The fact that the lens protectors make water droplets appear sharp is actually an advantage in this case. Unfortunately no amount of RainX or other type of water shedding coating will get rid of all droplets in this type of environment.
It is a case of trade offs though. On the one hand using the 360 lens protectors introduces internal reflections in strong sunlight, but in a higher risk situation it seemed sensible to use them. The reflection issue could be fixed with a new design of projector that fits more closely to the shape of the lens itself.
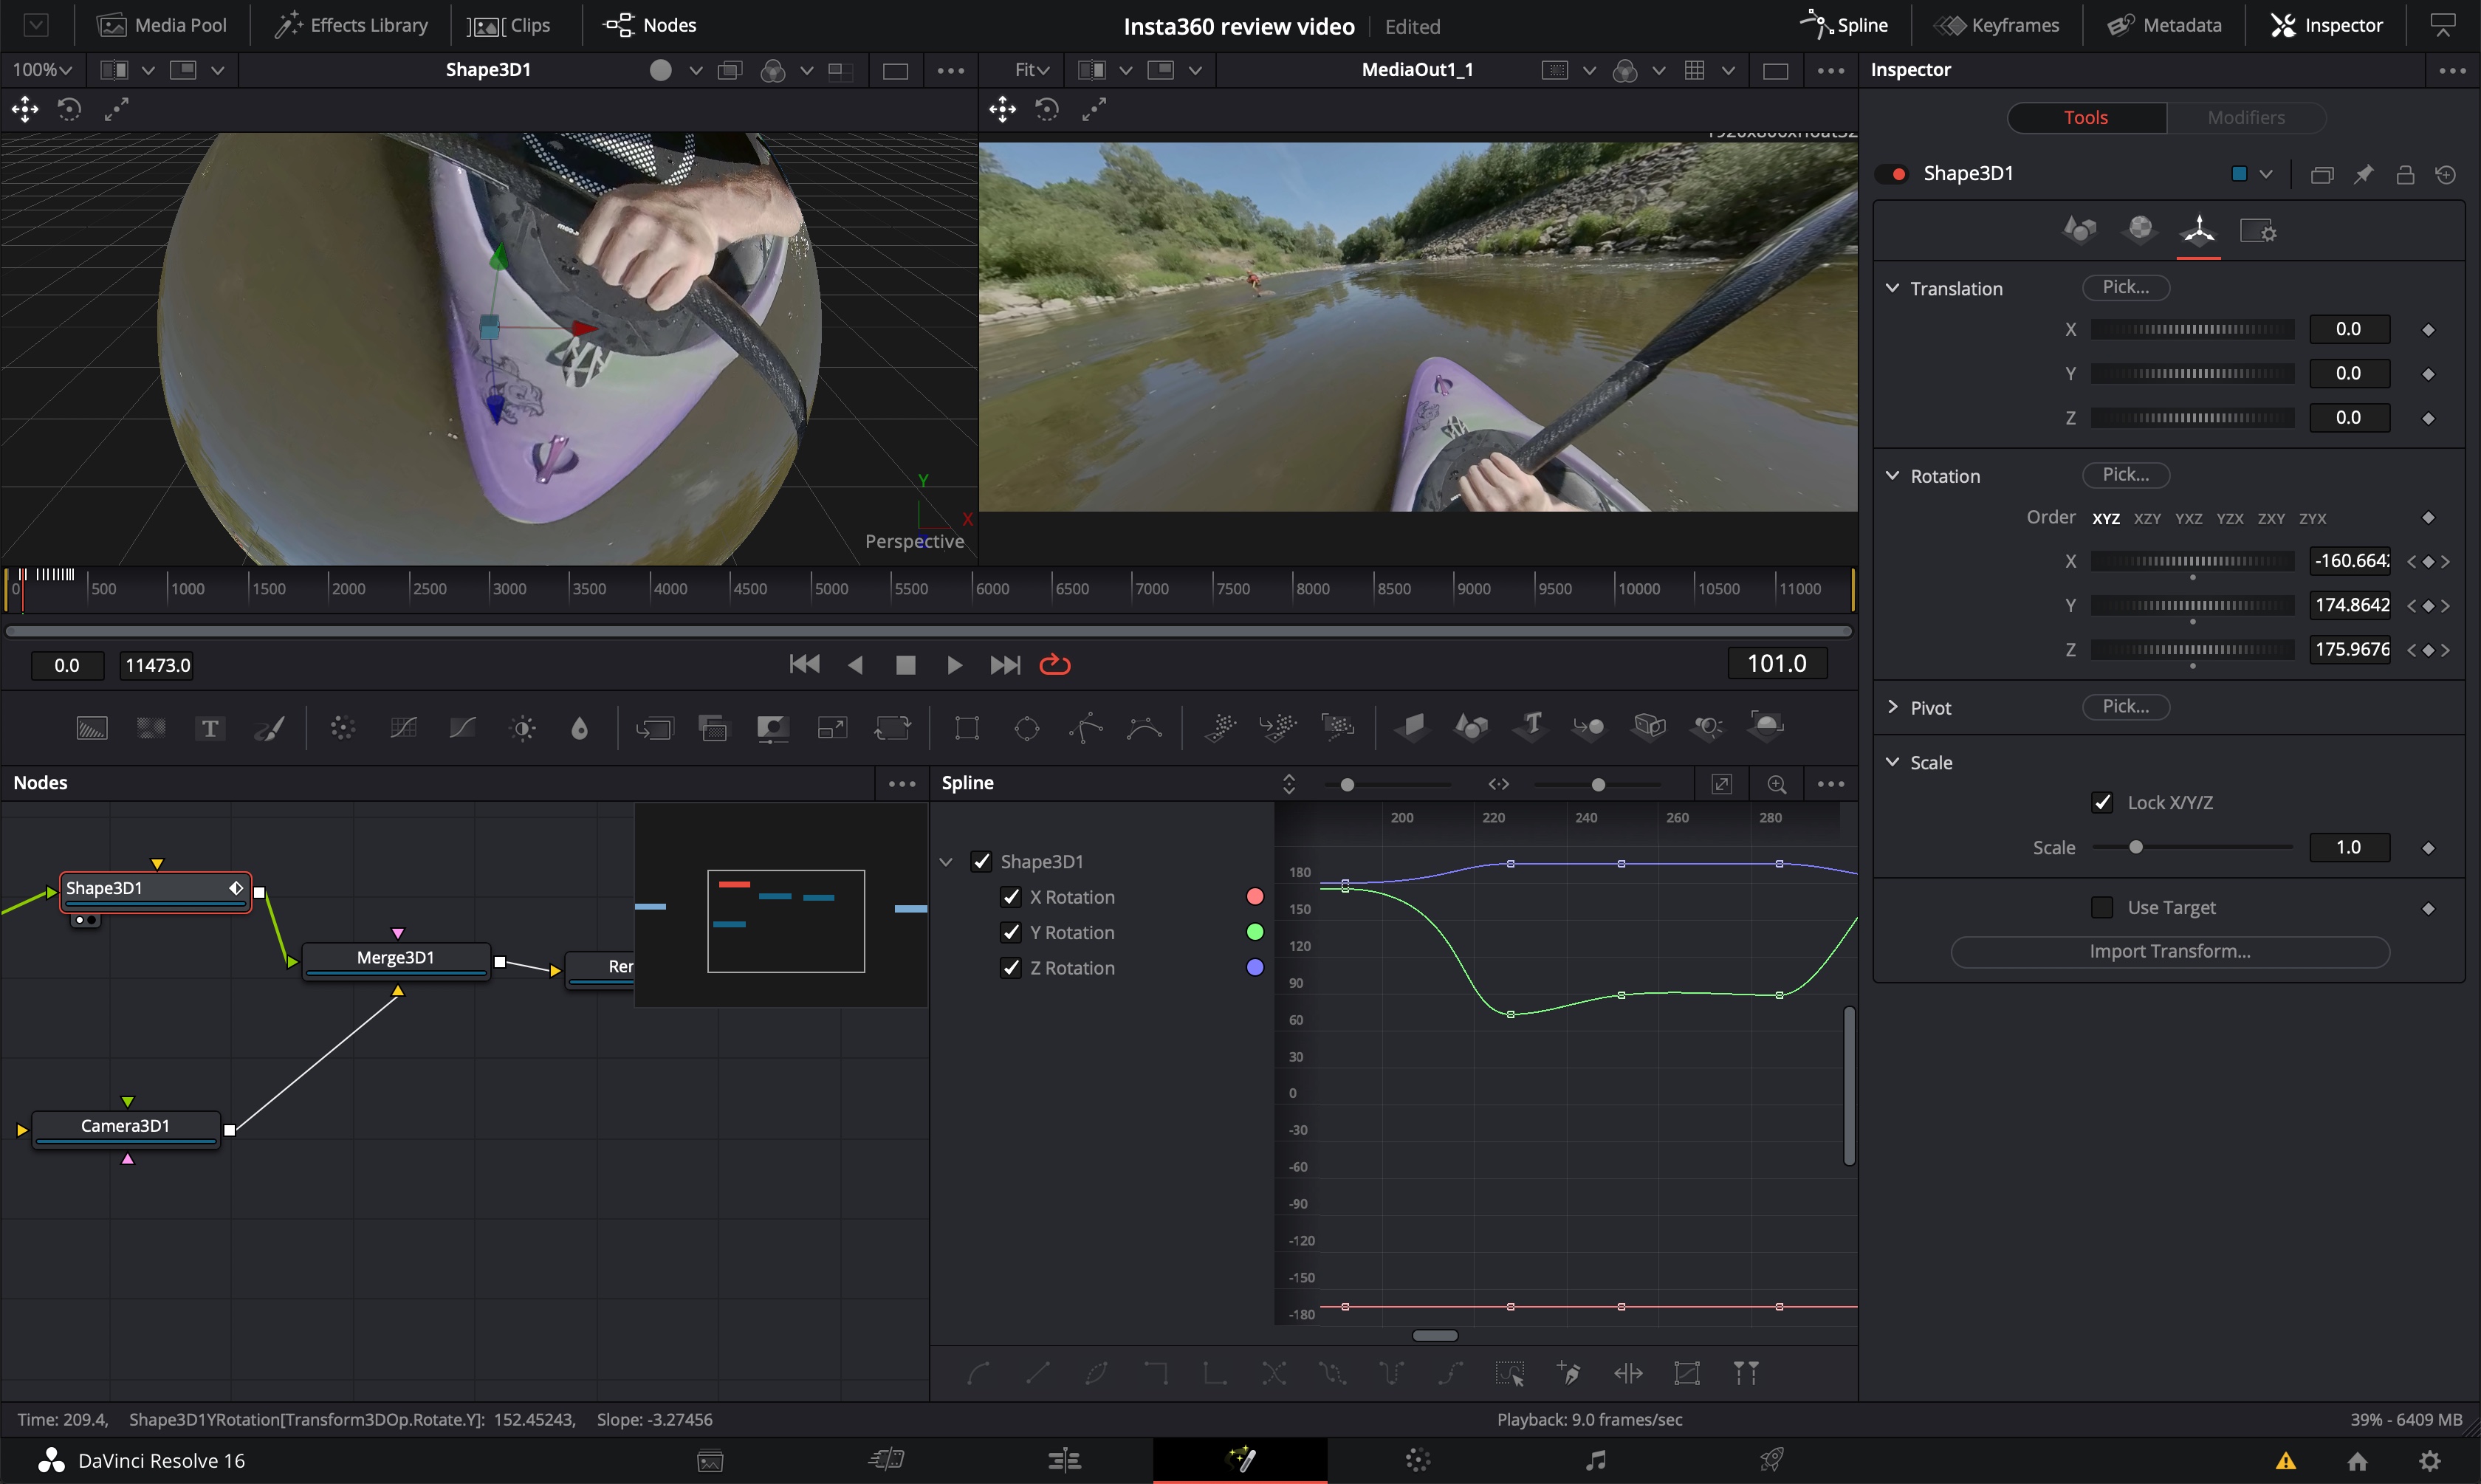
It takes some time to get used to the idea that it doesn't really matter which direction the camera is pointing, although you still need to think about where the stitch line will be. The stitch line is an important aspect to think about when deciding how to mount the camera. Generally you want objects that will appear in front of the stitch line to be further away. I did find that when I used the lens guards the final stitching wasn't quite as nice as without them. The Insta360 app lets you tell it you were using the protectors and it adjusts the stitching algorithm to suit, but it isn't always perfect.
The lens protectors have another key issue when used with surface water sports. If you do go underwater they collect water inside once you break to the surface again. With water trapped behind them the camera can't produce 360 stitching with any degree of success. The inside of the guard can also end up stained from water droplets. Because of the design they are incredibly hard to clean on the inside. In the end I took the protectors off and risked the bare lens. I'm not sure if it would be possible for the company to make a new type that has some sort of seal around them.
Another issue with the lens guards is that they obscure the touch screen, so operating it is tricky with them mounted on. There is a way around this by turning on the auto rotate option. Then you can turn the camera on its side and the interface becomes more accessible. This might be difficult to do when the camera is actually mounted somewhere, so I feel that the design of the guards does perhaps need a rethink.
A solution to these issues is to use the optional dive housing. For shooting with the 360 mod this changes the shape of the camera to one more akin to the ONE X. It uses a new vertical battery so the camera becomes tall rather than wide so it won't be as easy to use in certain mounting situations such as on a helmet.
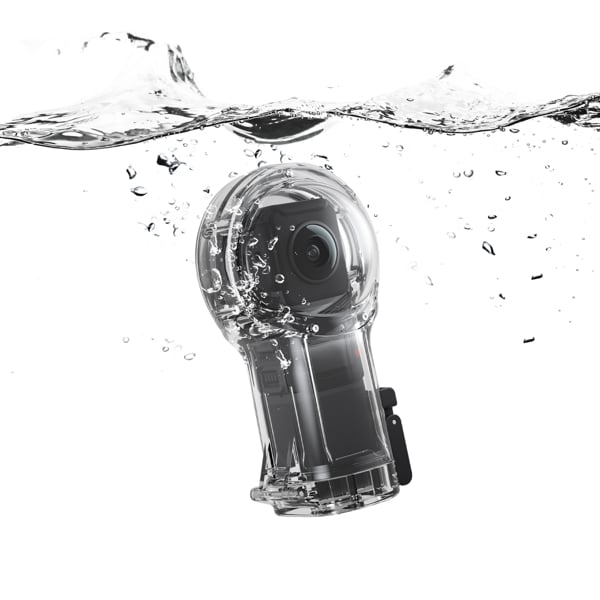
There is also the potential for it to suffer from condensation issues, which regularly affects action cameras mounted inside housings. This is usually more of an issue during the winter months, but it is something too bear in mind. Ultimately with a sport like white water kayaking which is a mix of both in and above water activity, there is no perfect solution. You just have to decide which compromises you are prepared to make.
An angle that I was truly looking forward to trying out with a 360 camera is one mounted from a pole on the front of the kayak. Pole mounting on the boat is risky since there's only really the Heath Robinson method for working out how to attach one to the various grab handles. Jackson Kayak used to make a mount called the Levator, which was pretty solid. But there's no officially made white water kayak mount any more. In any case I wanted to mount the camera off at an angle rather than just directly above the hull, which the Levator couldn't do.
Unlike skiing or mountain biking it is near impossible to do follow style shots with white water kayaking. With a 360 camera however, the pole it is attached to cannot be seen once the stitching is done, so the effect is like that of a drone following the boat.
The results I achieved were pretty good for a first try at this. With a much more solidly attached pole the shot could be made much better. Sometimes I found that the shot worked better with the Flowstate stabilisation turned off, but for the review video I left it on. With a more solid pole there would be less movement of the boat within the frame.
A huge advantage of using a 360 camera is that you can keep an ultra wide angle while the stabilisation is employed. The Insta360 ONE R works very differently to the GoPro, even when you use the 4K Wide Angle mod. Regardless of the mod you use, when you record footage it gets laid down to the company's own insv file format.
This has come in for some flack from some quarters because in order to edit it you need to use either the Insta360 mobile app or the Studio 2020 software to transcode it to the editing format of your choice, including ProRes 422.
Normally I would agree with such sentiments, but in this case I don't. The insv format has some very useful advantages to it. If you film with any other action camera and you choose your angle of view and stabilisation system, this gets baked into the footage. You can't change it afterwards.
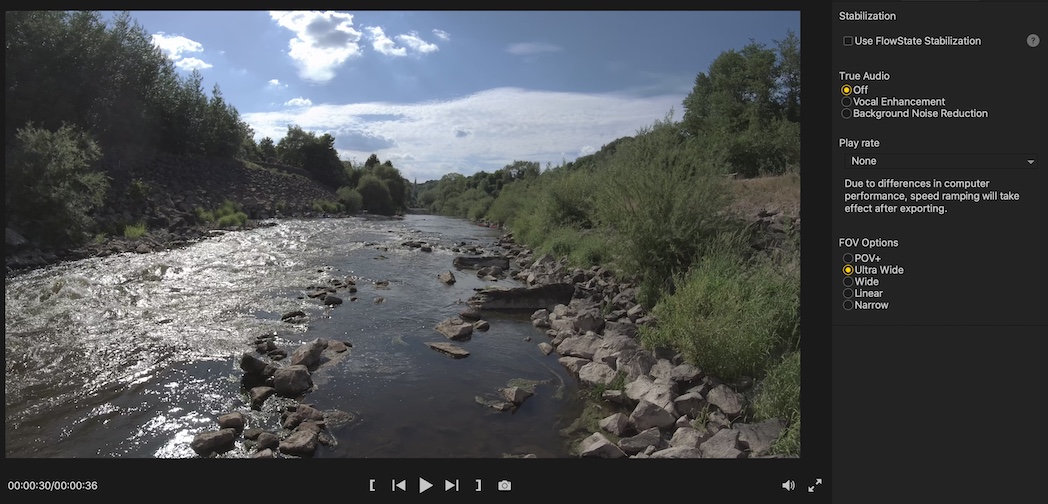
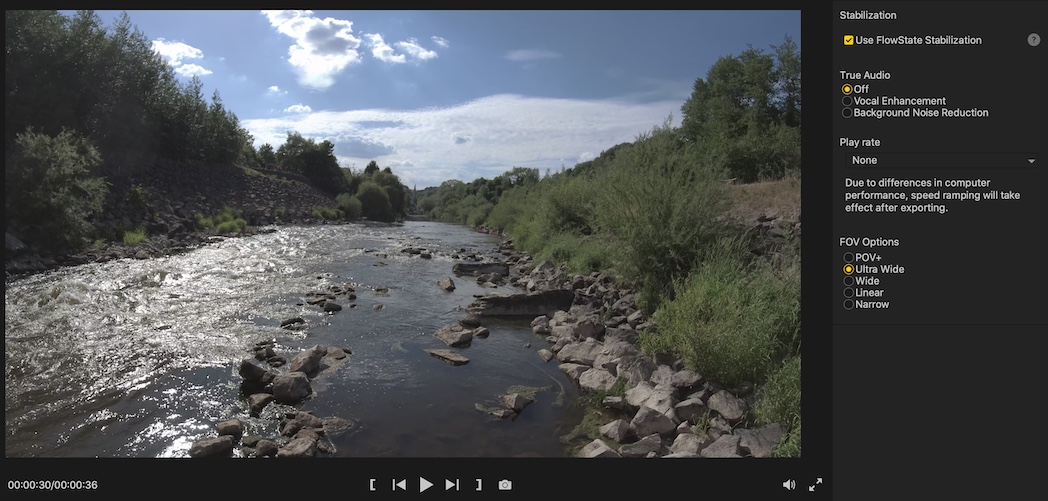
The ONE R is different. Everything is held in metadata. So if you recorded something in Linear or Narrow field of view mode and you find yourself wishing it was wide angle instead, you can switch this in the apps. The camera records all the data without baking it in. This includes the Flowstate stabilisation, which can be turned on and off within the app.
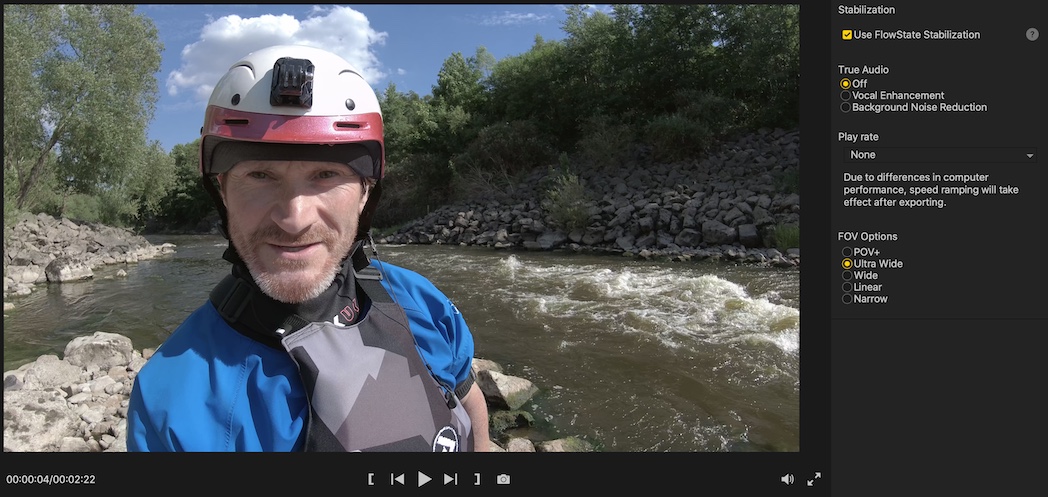
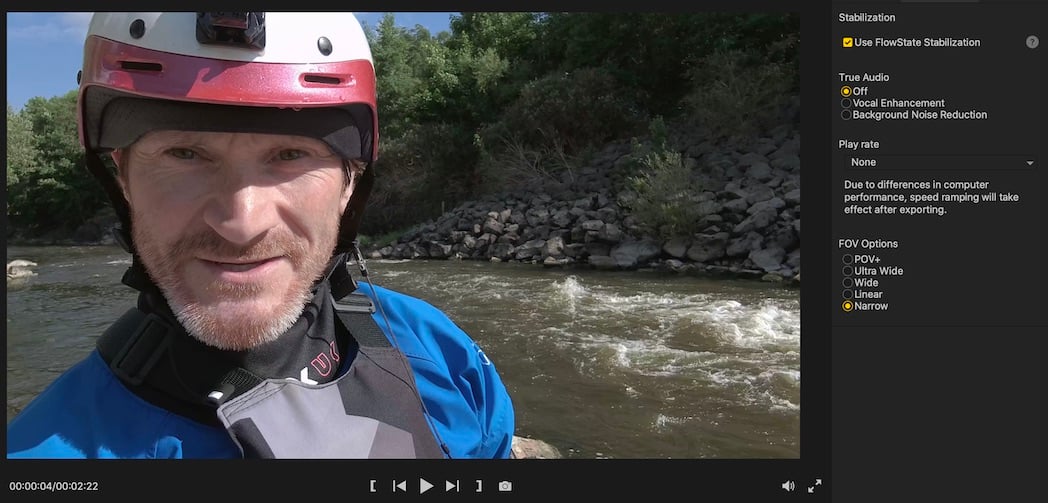
Interestingly even with the 4K Wide Angle mod, there doesn't appear to be a crop in when you use the wide angle setting with Flowstate turned on. I don't know how Insta360 is doing this, but it's impressive and seems like Voodoo. Not least because Flowstate would appear to be as good as GoPro's Hypersmooth system. I keep checking this to make sure I'm not mistaken, but even on the Ultra Wide setting there's no crop.
Flowstate doesn't let you control the degree of stabilisation. The camera only gives you a choice between Basic stabilisation and Flowstate. Flowstate is roughly comparable in stability to GoPro's Hypersmooth on the High setting. It's very good indeed, and there's a low light mode that also seems to work very effectively in such situations. Assuming you remember to turn it on that is!
As someone who is used to post production workflows and who enjoys being able to control things after the fact, Insta360's file system works for me. Although I can understand why some people who just want to quickly put something up on Instagram might not like it as much. That said, I found the mobile app incredibly intuitive to use. Its human, and animal tracking works absolutely brilliantly. I just wish it wouldn't autoplay footage when it's selected to be edited. It would be nice to see the tracking feature make it into the desktop app as well in the future.
When you use a 360 camera for reframing, even if it is recording a 5.7K complete image, your final output will only generally be 1080p. That's no bad thing as this resolution is perfectly acceptable, and it’s still the most widely used around the world.
You also have to allow for the fact that reframing is not only cropping the image, but distorting it as well. Although reframing is only one way to output footage. You might want to go for the full VR experience for instance. With those caveats out of the way I have to say I'm very impressed with the ONE R. It seems to cope with variable lighting very well. Sometimes, particularly in bright sunlight, stitch artefacts are visible, but I this seems to be the case with most other cameras of this type as well, and this can be improved upon with firmware and software updates.
Colours appear very accurate. Out of the camera, even with Log turned off, colours are generally natural. Insta360 does offer a Colour Plus option within its software to make the colours pop, but the for the default out of the camera look, everything is kept much more realistic. Skin tones are perhaps a little pale, but it's nothing that isn't correctable in editing.
Sometimes I have noticed my Hero8 (and the Hero6 before it) clipping saturated colours likes reds and blues in bright sunshine. The Hero8 also sometimes renders bright reds as orange. The Insta360 ONE R seems to handle these highly saturated reds and blues much more easily both on the Dual Lens 360 mod and the 4K Wide Angle one.
There perhaps isn't the depth of texture seen on the GoPro, and the inability to turn off the digital edge enhancement on the ONE R does mean that its image appears more ‘electronic’. But it is sharp, and it is detailed. The H.265 compression helping substantially here.
I noticed that although on paper the ONE R should achieve 100mbps, the 4K mod was recording at between 75 and 85mbps, while the GoPro in Protune mode seems to consistently report around 99mbps. This would indicate that the GoPro is constant bitrate while the ONE R seems to be variable. 360 video from the Dual Lens mod reports as around the mid 90mbps.
In short the Insta360 ONE R produces a quality picture that easily rivals its closest competitor. As I mentioned previously I would like to see control over the digital sharpness in a future update to really help give it a less video like appearance.
The ONE R can shoot slow motion with the 360 module. It's capable of 50fps by reducing the overall 360 capture to 4K, or up to 100fps by reducing it to 3K. The drop off in resolution is quite noticeable, particularly in 3K mode.
On the 4K Wide Angle mod, slow motion. results in a picture crop. There's still some respectable options such as 100fps in 2.7K mode, although it does produce a softer, less detailed result than the Hero8. That said, it is still perfectly usable, but maybe this can be improved with newer modules for the camera in the future. That's the beauty of a system like this.
My suggestion for these modes would be to get as close to the action as you possibly can. This is a good rule of thumb for any action camera, because while wide angles are great for POV, they aren’t so great for general filming. All action cameras are at their best when they are in amongst the action.
Filming with the ONE R in 360 is easy. Editing 360 video on the other hand is an area I am completely new to, so I had to take a crash course in researching the subject. It seems that 360 editing still has some way to go in terms of maturity, and it could do with more integration within the various NLEs. I tried everything from FCP X through Resolve, to the Premiere Pro GoPro plugin and everything in between. Each option had various plusses and minuses.
No matter which option you go for you will need to use Insta360 Studio to transcode the footage to an equirectangular image ready for importing into your NLE with the exception of Insta360's own Premiere Pro plugin.
The main thing I discovered about editing 360 video is that it generally requires a pretty powerful editing machine to deal with it. It is possible to edit 360 video quite effectively within DaVinci Resolve for example by using Fusion. But I had to give up on the idea because my machine just could not play back the footage well even at reduced quality.
If the Resolve developers could make a really good OFX 360 reframe tool that could be used on the main Edit page, complete with camera movement motion blur options, Resolve could quickly become the go-to app for this type of editing.
FCP X has the ability to reframe 360 video built in, and this is actually a pretty neat and fast option. Playback is very smooth indeed and it's easy to keyframe the camera moves. The drawback is that you don't have control over the keyframe interpolation with the orientation tool, and you can't introduce motion blur to those moves either. Therefore for advanced 360 reframing at least FCP X is off the cards.
Premiere is another option with both the GoPro 360 and Insta360 plugins. Again though I found the laggy controls and playback irritating on my machine. So what was my solution? I decided in the end, for the video that accompanies this article, to keyframe the camera moves within Insta360's own Studio software. I approached it as if I was filming each camera move, exporting each as a separate ProRes clip, which I could then edit in a timeline in Resolve like any other video.
Insta360 Studio 2020 gives a fair amount of control over keyframe interpolation, and it's very fast and easy to use. All it really lacks is motion blur on the camera moves, but this can be added afterwards in Resolve if required. Insta360 Studio 2020 lacks the ability in the current version to make multiple selections within a single clip, but I am told that this feature is coming in a future update.
The story doesn't end there however. Since making the example video I have discovered that I can edit 360 footage within Apple's Motion software in the same way as FCP X. Except that with Motion I have full control over the keyframe interpolation and I can add in realistic camera motion blur as well.
There are a few issues preventing me from using it as my main tool currently though. This stems from the fact that whilst editing of 360 VR style videos is catered for quite well, using 360 video for over capture is far less well catered for. So the workflows for over capture would appear to be quite clunky across the board at present. With any luck as more people use their 360 cameras for this purpose the tools will hopefully become much better.
It’s no secret that I love my Hero8, but the Insta360 ONE R gives me the sort of creative control that simply cannot be achieved with any other action camera on the market. For the price, you are getting two different action cameras in one. If you purchase the Leica based 1-inch module you would have an incredibly versatile tool. The reversible screen is also incredibly useful for both vlog style self shooting, as well as setting up the camera on different mounts.
The sound recorded from the internal mic of the camera isn’t ideal. GoPro definitely leads here, but then it has been refining its sound capture for over ten years. You can buy a USB-C mic adaptor, which will let you mount an external mic, be that a shotgun or a lav style system, but I didn’t have access to one for this review.
There’s only so much that an internal camera mic can do, regardless of how advanced it is. While I feel that having better internal sound in an action camera will always be a good thing, I find that complaining about it is a bit like complaining that an ENG camera isn’t tiny. In a white water environment with H20 sometimes engulfing the mic pickup there will never be a perfect solution.
Talking of sound, I did try to use the voice command option on the camera. A noisy river environment is a stern test of this technology, and unsurprisingly I couldn't get the camera to hear me unless I spoked right up next to it. I haven't found an action camera yet that responds well to voice commands in that type of location.
The Insta360 Flowstate stabilisation is easily the equal of Hypersmooth, the first time I’ve used an action camera from another company that can come anywhere close to this claim. But what I really like about using the ONE R is the sheer versatility it gives me when I’m out on the river. Whether 360 capture and editing is suited to your own personal circumstances is another matter. But even if you only use the 4K Wide Angle mod you will be using a camera that is up there with the very best on the market.
Battery life was around 45-50mins, which is pretty respectable and aligns well with the competition. Although you can also purchase a boosted battery base for longer runtimes. This has the added advantage of having built in mounting feet, although it cannot be used for water sports in this configuration.
This has been a long review, and I haven't even scraped the surface of what this camera does. Certainly for POV and many types of mounted shot, the Insta360 ONE R will be my go-to camera. I love the ultra wide, smooth glide like view it produces. I can also foresee a time in the not too distant future where traditional 'flat' action cameras are a thing of the past. The ONE R definitely comes recommended from me.
The ONE R Twin Edition retails for £439 on the Insta360 store.
(Article updated to mention that there is no need for a transcode when using the Insta360 Premiere Pro plugin)
Tags: Production VR & AR Featured

RedShark 2020 @ All rights reserved.

Comments