3 minute read
Premiere Pro's audio tools have evolved to the point where editors really don't need to be going anywhere else to work with sound in all its forms.
Many content creators recognize Premiere Pro as a leading video editing tool. However, when it comes to editing audio, they still tend to export the tracks to audio native editing software such as Adobe Audition or Avid’s Pro Tools. While these platforms offer a comprehensive suite of features, they can be challenging to navigate.
Fortunately, Premier Pro also has an extensive toolset for editing and mixing audio. These tools are located in the Essential Sound panel for a straightforward audio editing experience. In this article, we will explain how to navigate and use the features available in the Essential Sound Panel on Premiere Pro.
To locate the Essential Sound Panel, navigate to the Window option on the toolbar at the top of the screen. Scroll down to the Essential Sound panel option and select it. The Essential Sound panel will appear on the right-hand side of the screen.
Ensure that you select an audio clip before using the Essential Sound panel. If no clip is chosen, the panel will remain greyed out.
Once a clip is selected, Premiere Pro will prompt editors to tag the clip as either Dialog, Music, SFX, or Ambience. Once the audio clips are categorized, Premiere Pro will open a list of category-specific tools that allow editors to adjust and mix the audio clip.
Listening and categorizing each clip is a time-consuming task. Instead, users can take advantage of Premiere Pro’s Auto Tag tool. This feature leverages AI technology to automatically analyze and classify the audio clip with the click of a button.
Sometimes, audio clips have different levels of loudness based on how they were recorded. It can be tedious to go through and adjust the audio levels so that the loudness is consistent throughout. Instead, once the clip is tagged, editors can navigate to the essential sound panel and enable the Loudness tab. Then, click on the Auto-Match button. Premiere Pro will analyze the different loudness levels within the clip and unify them. Once the process is complete, it will indicate that the audio clip has been Auto-Matched to a target loudness. Listen back to the audio clip to ensure the audio levels are to your liking.
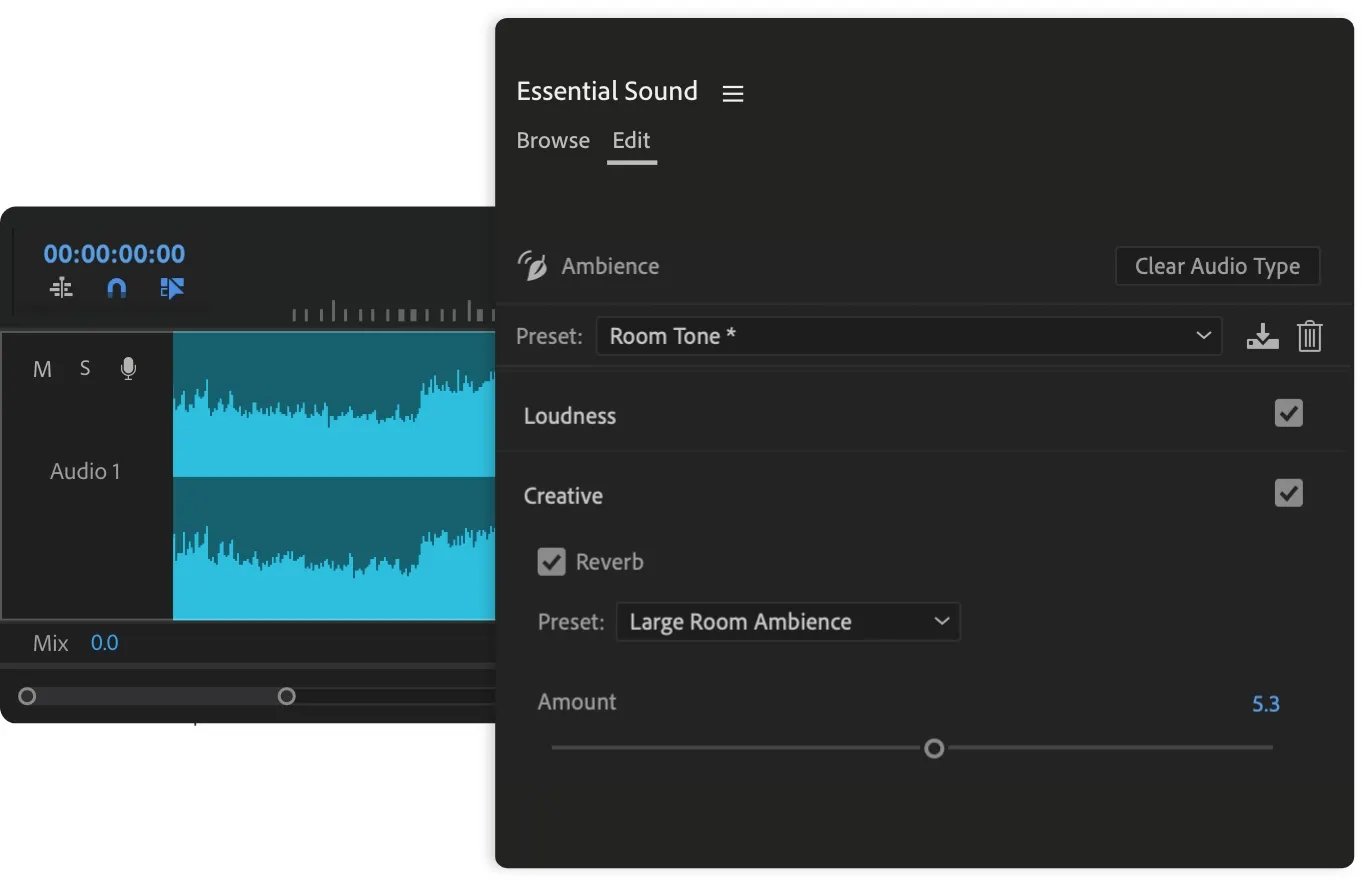
Another important tab in the Essential Sound panel is the one entitled Creative. Once enabled, editors can use the tools in this tab to transform the audio to sound like it was recorded in a particular type of environment. Premiere Pro offers a variety of presents to choose from. Each of these presents will add reverb, transforming the audio clip. Use the slider below to adjust the amount of reverb as needed.
One of the more valuable features of the Essential Sound panel is the ability to Repair dialog. This feature is only available for dialog clips because it aims to enhance speech by cleaning up the background noise, reverb, and other blemishes from the recording. When enabled, editors can choose to Reduce Noise, Reduce Rumble, DeHum, DeEss, and Reduce Reverb.
Each of these tools also features a slider that you can use to adjust the intensity of the effect. Keep in mind that repairing dialog can be a time-consuming task as it requires some trial and error. It’s important not to rush this step, as muddled dialog can be off-putting for viewers.
After repairing the dialog, use the Clarity tab to further enhance the dialog. Under this tab, editors have three primary options: Dynamics, EQ, and Vocal Enhancer. Dynamics refers to the dynamic range of the audio clip. Once enabled, Premiere Pro will automatically analyze the audio clip, allowing editors to adjust the level between Natural and Focused. The EQ option will enable editors to modify the frequencies of the audio track. Once again, Premiere Pro offers a list of presents and a slider to adjust the amount. Finally, the Vocal Enhancer option allows editors to amplify the voice based on the tone of the recording.
Often, when working with a music track, editors will have to edit and adjust the music clip to match the length of the video clip. However, inexperienced editors might have difficulty finding the best way to shorten or lengthen the music track. To simply this process, select the music clip and navigate to the Essential Sound panel. Enable and expand the Duration tab. Here, Premiere Pro gives editors the option to Remix or Stretch the audio clip. Editors can also adjust the Target Duration. Then, Premiere Pro conducts a Clip Analysis based on the parameters and modifies the audio clip on the timeline. Adjust the Segments and Variations under the Customize option to find the best fit for the video.
The Clip Volume section is at the bottom of the Essential Sound panel. Here, editors can use the sliders to adjust the audio levels while mixing tracks. There is also an option to mute the track if needed.
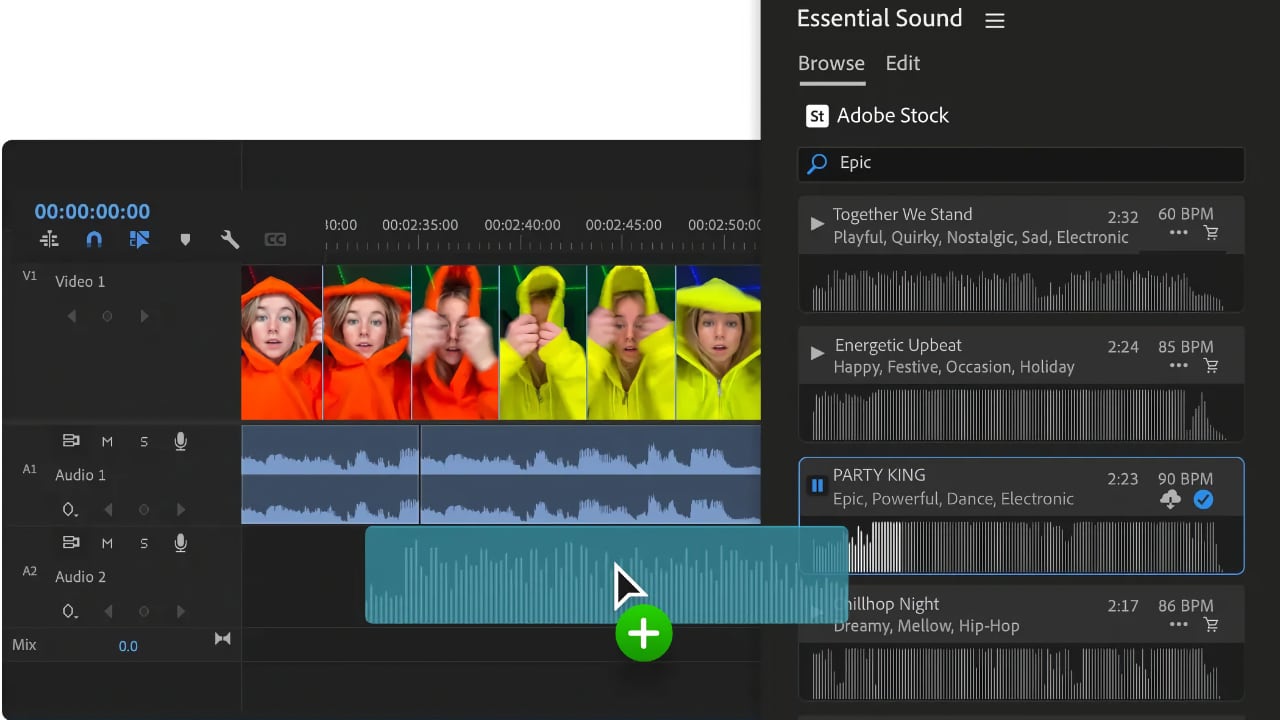
Adobe also offers a comprehensive library of Adobe Audio Stock, available directly on Premiere Pro. To find this section, navigate to the top of the Essential Sound panel and click the Browse tab. Use the Moods, Genres, or Filters menus to browse the Adobe Stock library. Once editors find their desired audio track, they can drag it directly onto the timeline to start editing.
NB This feature was written before the release of Adobe Premiere Pro 24.2 which transitioned some audio tools from beta into the main release.
Tags: Audio Adobe Audio

RedShark 2020 @ All rights reserved.

Comments