7 minute read
Ever wondered how some people get much better results than your own with AI image generators? Here's some tips for obtaining photorealistic results with Midjourney.
I'm going to say right off the bat, let's park the debate about whether AI image generators are the death of art or photography, or whether they should exist or not. The fact is, that if I want an image that I can't get anywhere else, an AI image generator can often give me what a stock photo site cannot. It's a tool that you can choose to use or not, and I'm going to leave the debate there.
Instead I want to focus on how to get results from one of the most popular, and capable AI image generators around; Midjourney.
Midjourney has built a bit of a reputation for some of the stunning images, both photoreal and stylised, that it can produce. I'm going to focus here on results that look like they were taken with a camera or as a still image from a movie. So here's a few guidelines and some prompts you can use to help improve the results you're getting if you're new to this.
Midjourney works through Discord, so you'll need to create a Discord account first of all. You can then use the system via a web browser or by downloading the Discord app. When you sign up for Midjourney you'll get a certain number of 'processing minutes' for free. After that you'll need to choose a subscription tier. Note that unless you sign up for the Pro account tier, all your image generations will appear on the public message board, even if you prompt with a private message to the Midjourney bot. Only Pro accounts have the ability to use Stealth mode. This is, of course, a good thing because it prevents the dodgier uses of the system.
The first thing to know about Midjourney is that it places less importance on the later things you put into your prompt versus the beginning. What this means in practice is that if you absolutely need something in the image, it needs to be put near the beginning or middle of the prompt. It's no guarantee, but it is more effective that way.
Furthermore, you don't need to be too wordy. The shorter and to the point the prompt is, the better the results generally. At least this has been my own experience when using it.
One of the primary ways to get realistic results from Midjourney is by using lighting and lens descriptions. Midjourney will understand prompts that include the mention of specific cameras, such as a Sony A7S or Canon R6 etc, as well as specific lenses and focal lengths. It will also respond to film stock specifications. For example, specifying Ilford film stock will give you a black and white image.
Using phrases like "high key" or "low key" as well as "high contrast" and "low contrast" can also help you to get the type of result you want. However, some of the most powerful keywords to use in a prompt comes with the use of "global illumination", "natural light", "uplight". Using the phrase "uplight" can give a softer look to the image.
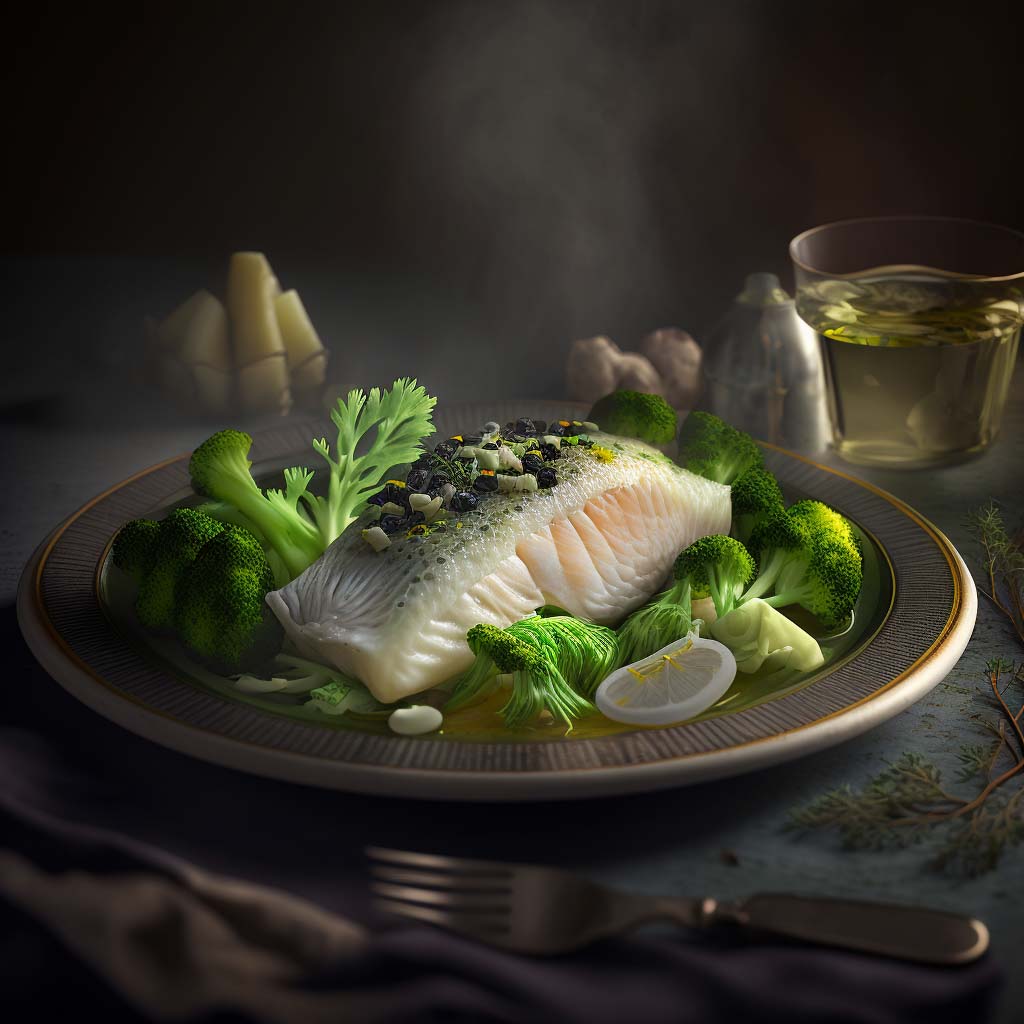
Below is an example of a plate of food using some of those descriptions. The prompt I used was "Close-up of a plate of food consisting of sea bass fillets sitting on a bed of broccoli with a few capers. Natural light, global illumination, uplight f/1.8".
You can see that it still doesn't look very realistic, so what can we do to improve that?
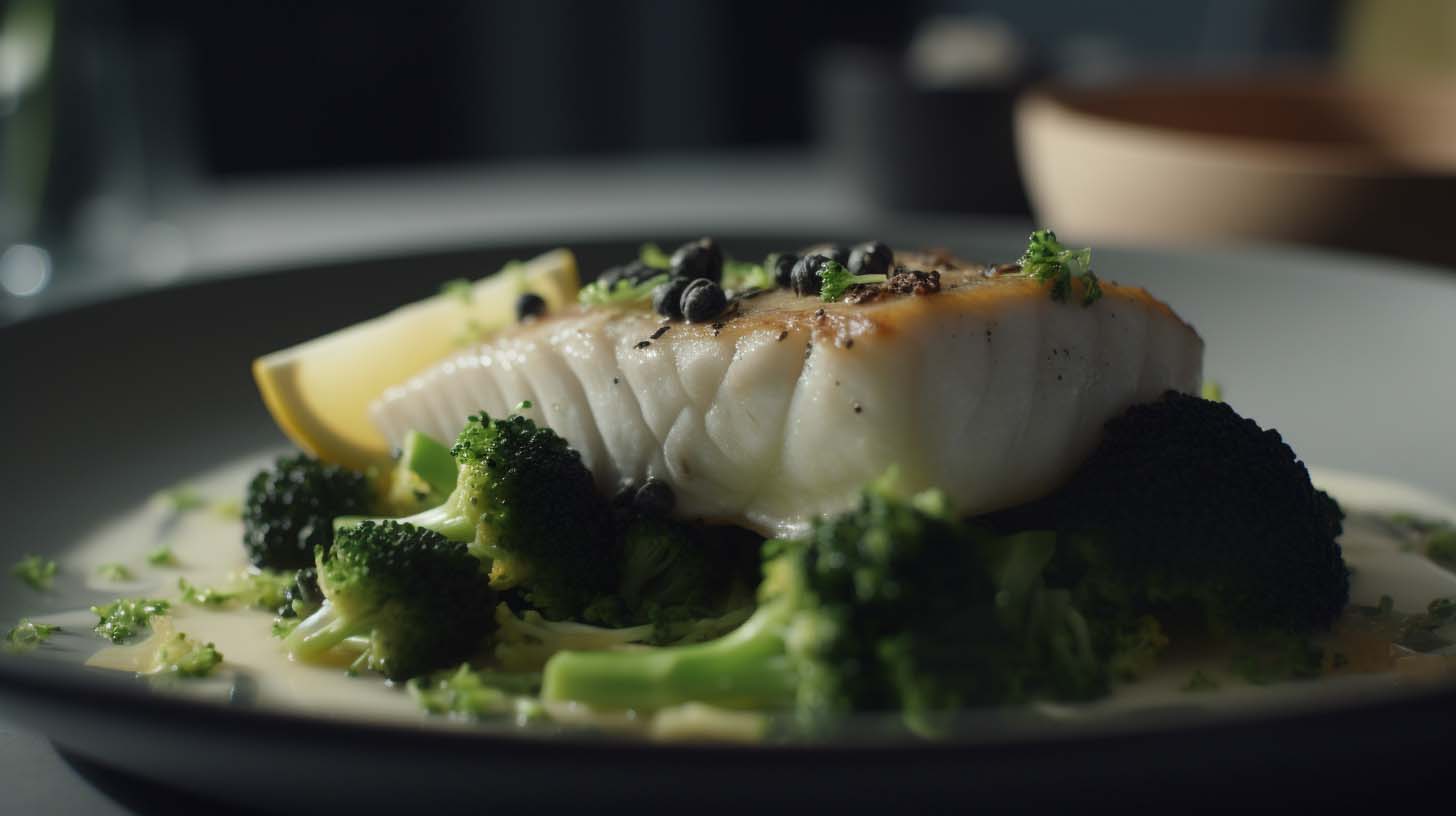
One of the most powerful phrases to use in Midjourney is "film still" and "in the style of" or "style by". Let's take the prompt used above and add a style description. Both these tell Midjourney that the image you want could be a still taken from a TV programme or movie, while the style description lets it know a programme or film style reference. Let's add "Film still in the style of a 2020s cooking programme" to the first prompt, making the full prompt "Film still in the style of a 2020s cooking programme, close up of a plate of food consisting of sea bass fillets sitting on a bed of broccoli with a few capers. Natural light, global illumination, uplight f/1.8"
Hmm, it's slightly better, but it's still not something you'd describe as 'photoreal'. Now, we could specify the phase "photograph" or "photoreal", and even "extreme detail. However there are a few other parameters we can use instead, or in addition to these.
Firstly, let's stop Midjourney generating a square image. For this I'm going to use the "--ar" instruction. So, if I type "--ar 16:9" into my image description prompt, Midjourney will output an image in the specified aspect ratio. I'm also going to force it to use the highest quality by using the "--q 2" instruction. This uses double the amount of computational credits, but it gives a hugely improved result. Additionally I'm going to add in a seed command to add in some variation to the generations, for example "--seed 3000". Lastly, I'm going to force Midjourney to version 5.
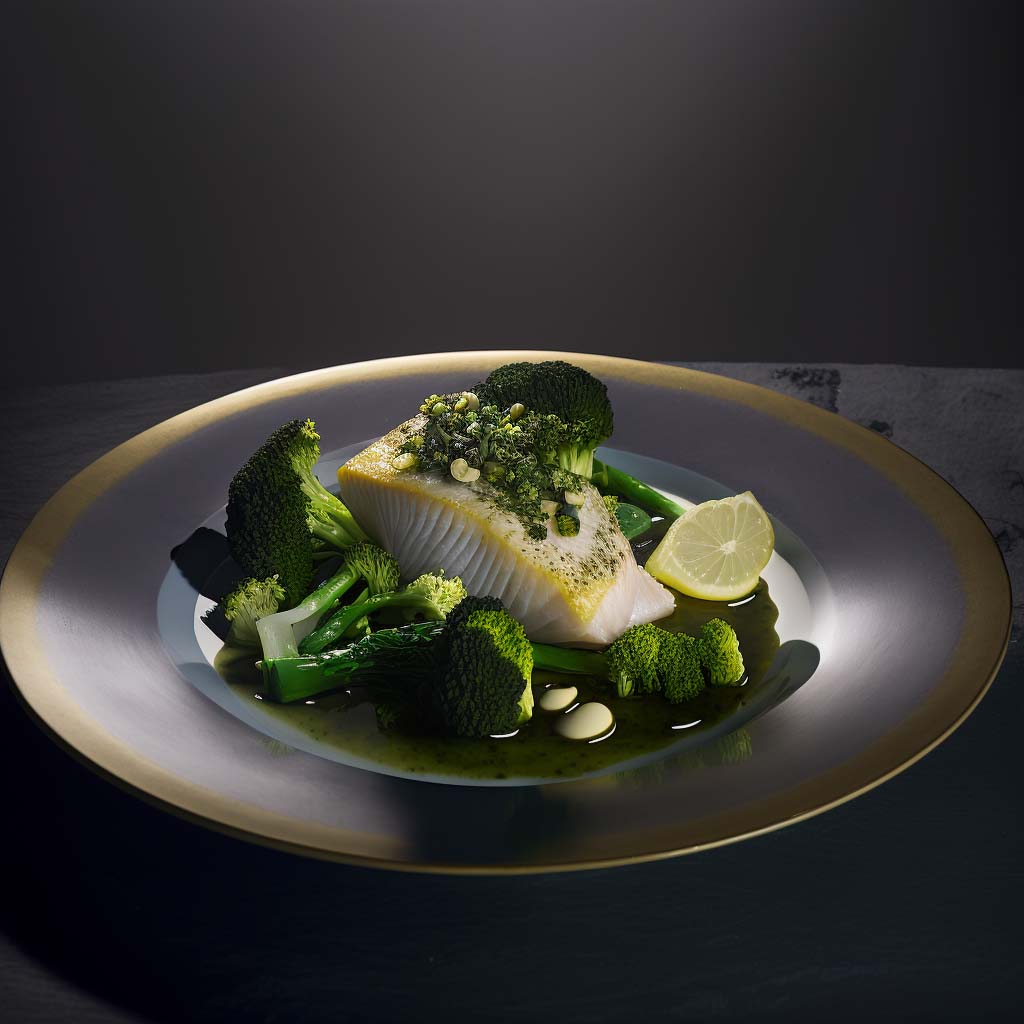
The result is this prompt and the image below, "Film still in the style of a 2020s cooking programme, close up of a plate of food consisting of sea bass fillets sitting on a bed of broccoli with a few capers. Natural light, global illumination, uplight f/1.8 --ar 16:9 --seed 3000 --q 2 --v 5".
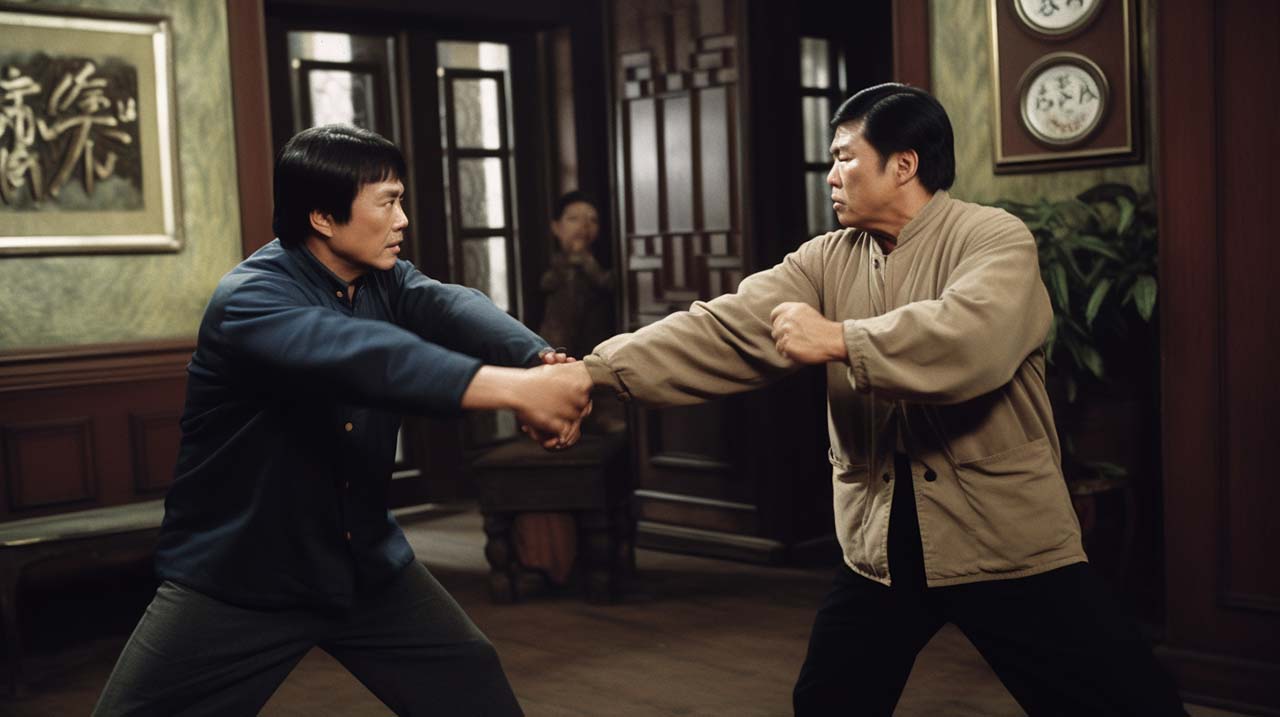
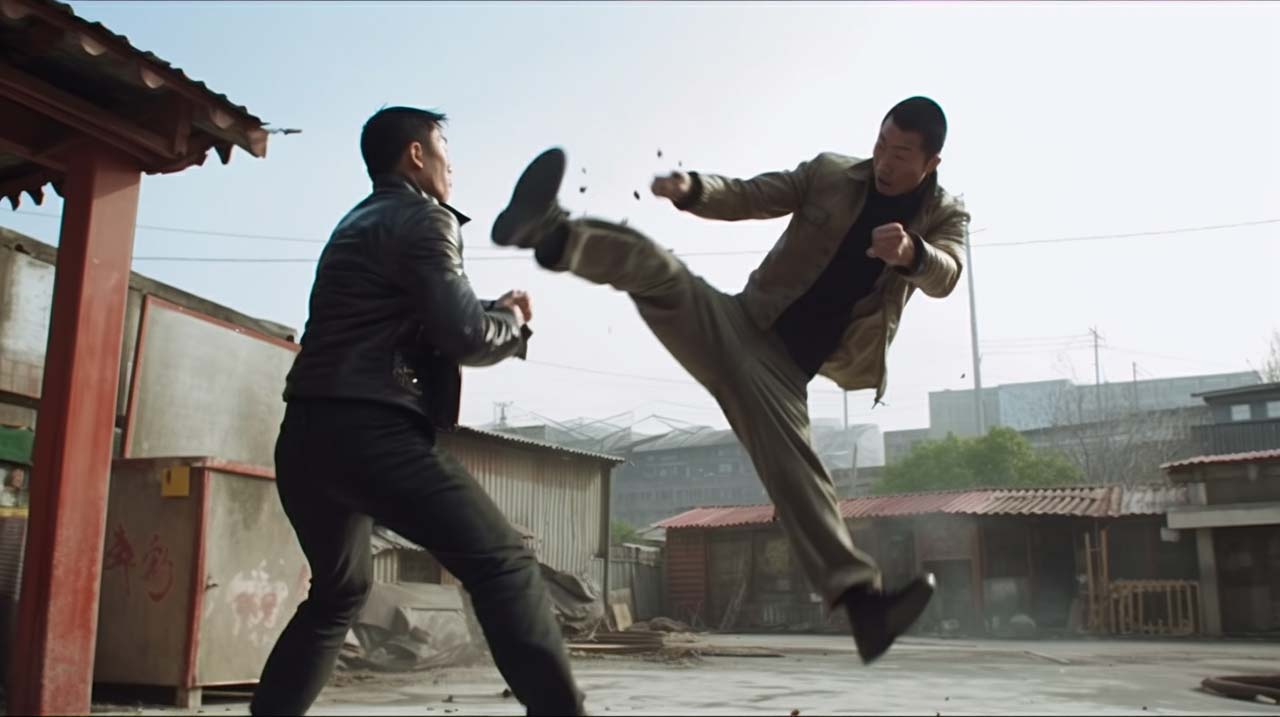
I think you'll agree that this is a hugely improved result, and could be classed as a realistic 'photograph'. We can use these parameters to get some startlingly realistic results, and Midjourney understands a vast number of styles. Want to create a still frame from a 1980s Hong Kong comedy action film? No problem! The images below came from the prompt "Film still, style by 1980s Hong Kong comedy action film. Starring Sammo Hung, Jackie Chan and Yuen Biao. Eighties clothing. Sharp and detailed, film grain, Kodak 200T, no dramatic lighting, global illumination, uplight, 16-35mm lens, f1.8 --ar 16:9 --seed 1500 --q 2 --v 5".
What's staggering about these is how it has recreated the lighting style, film look, and characterisations extremely faithfully.
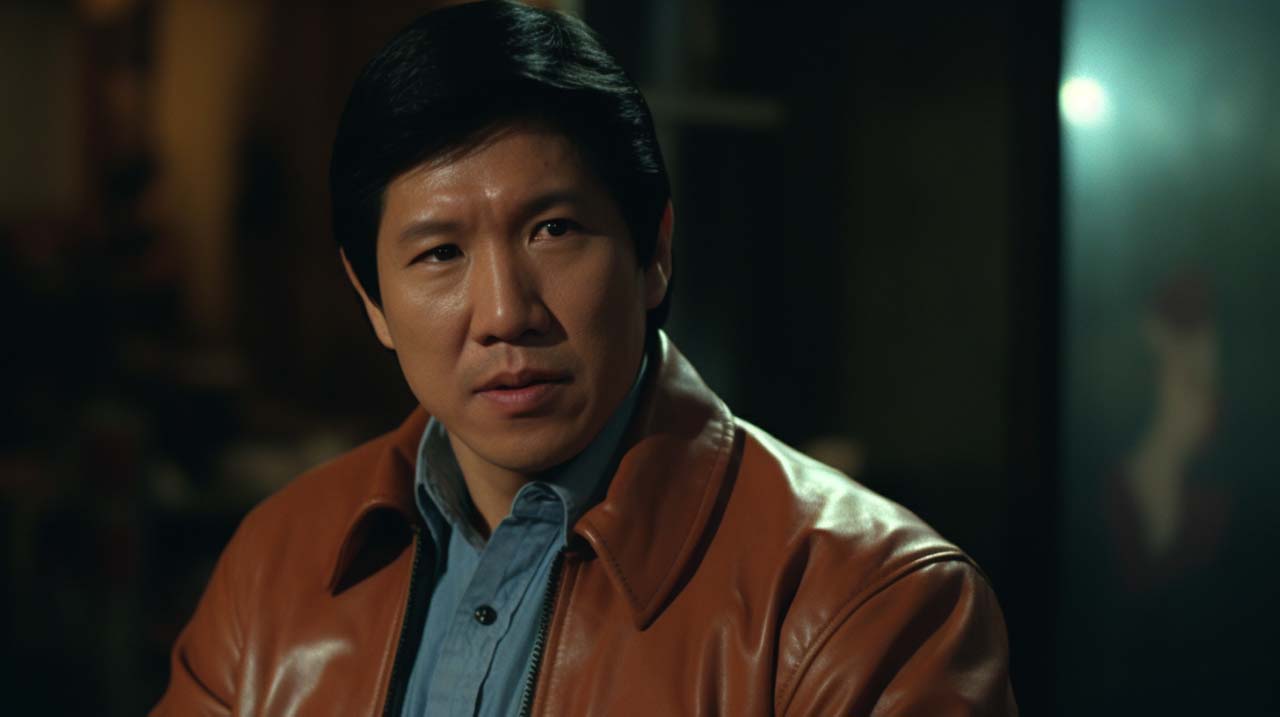
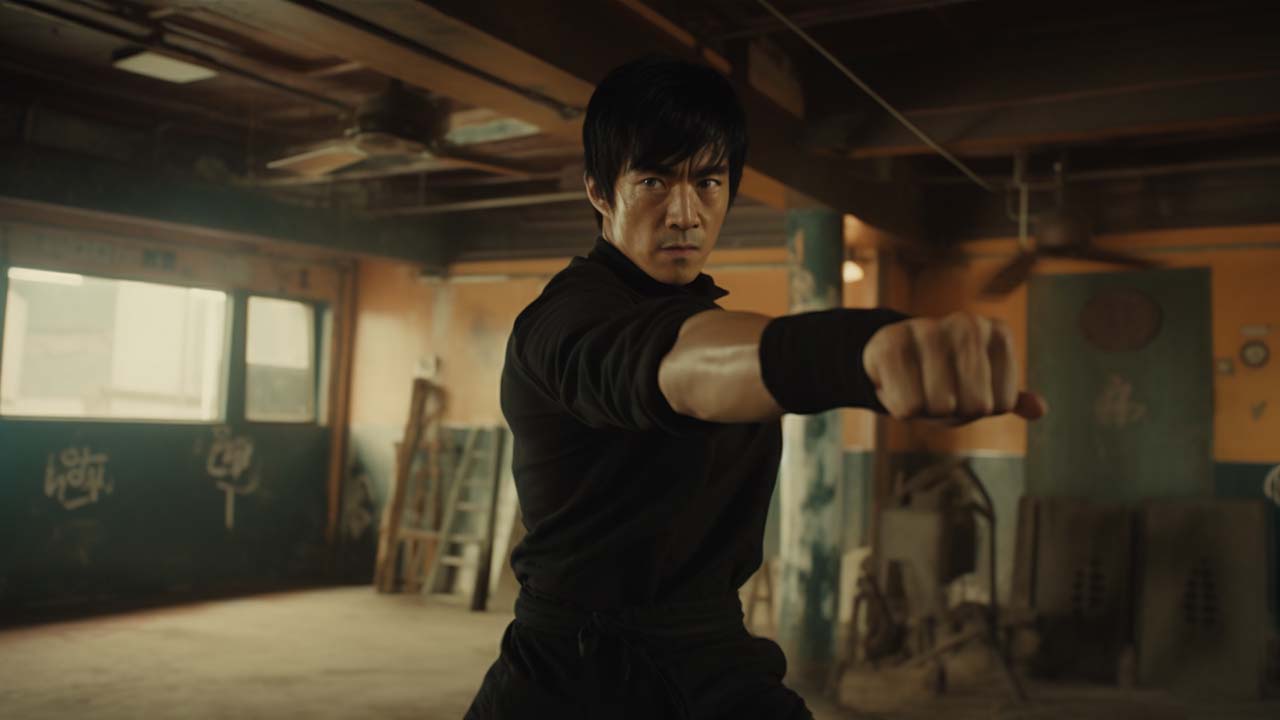
Compare these to the image below, which I specified as a more up-to-date style with "Film still, style by 2020s Hong Kong martial arts thriller. Starring Bruce Lee. Sharp and detailed, fine grain, Kodak 200T, global illumination, uplight, 16-35mm lens, f1.8 --ar 16:9 --seed 2000 --q 2 --v 5".
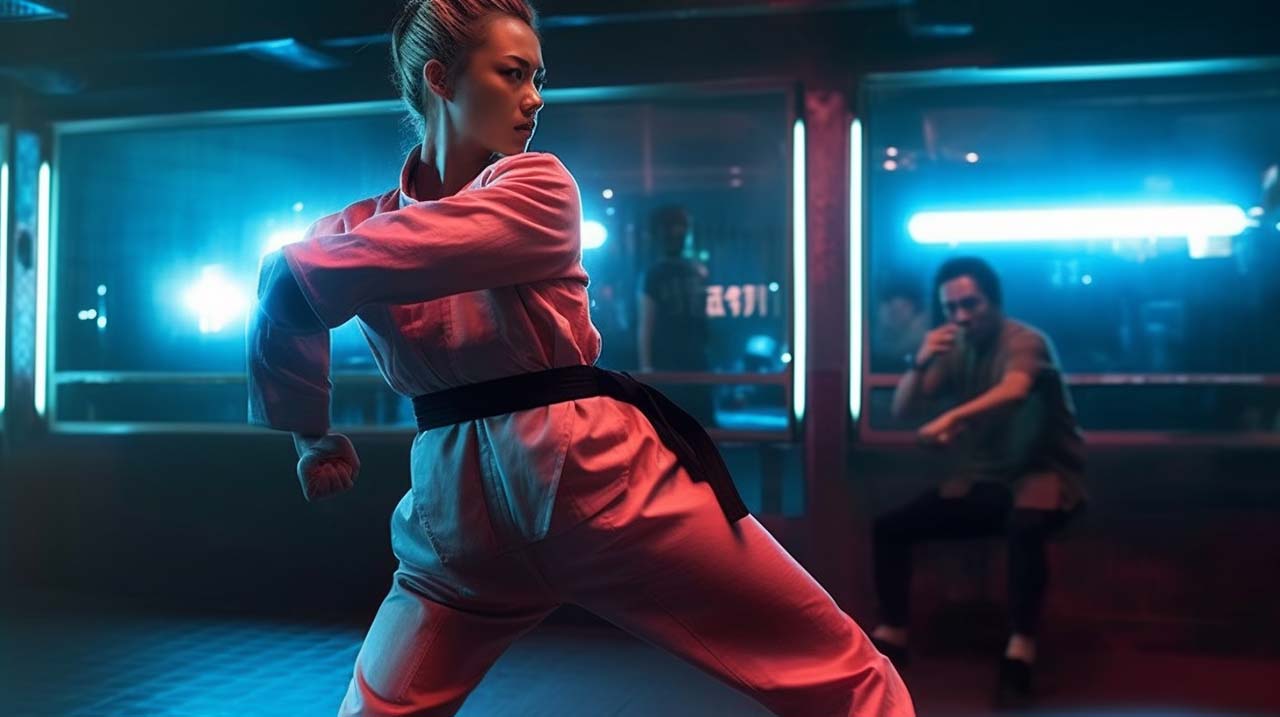
The above images are all very well, but what if I wanted to capture an image in the middle of an actual fight sequence? Midjourney has huge problems when it comes to generating certain types of image and interaction. For It doesn't have much comprehension of how human limbs work, which can create some utterly hilarious generations such as the one below!
We can reduce (not eliminate) such ludicrous generations by giving Midjourney a reference image. To do this, find an image showing roughly the kind of position you want the generation to show. This can be one from the web, or even better, one you've taken yourself, even if it's just with your phone. Double click the "+" icon next to the prompt box and select the image from your computer to upload, and then send the message.
Your image will appear in the list of messages you've sent. Click on it to enlarge it, then right click and select "Copy image link". Now, when you start an image prompt, simply paste the link at the beginning, then continue your image description. It won't give you perfect results, but you can usually get far, far closer to what you want. You can give the system multiple reference images, but I would say to use three maximum, preferably two. The below image was generated using a reference still image from a Scott Adkins movie.
Right, so those are some tips you can use all round, and it's worth experimenting with the "style by" instruction. But, what can we do to improve portraits and more traditional imagery?
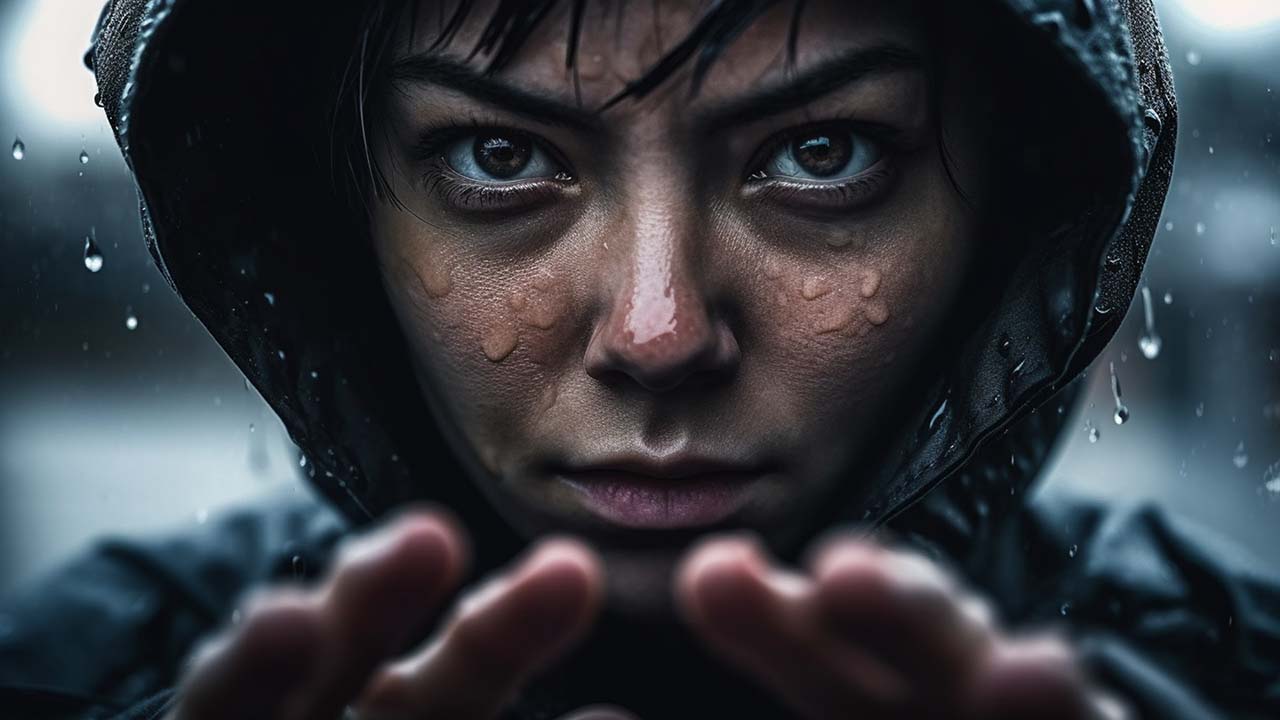
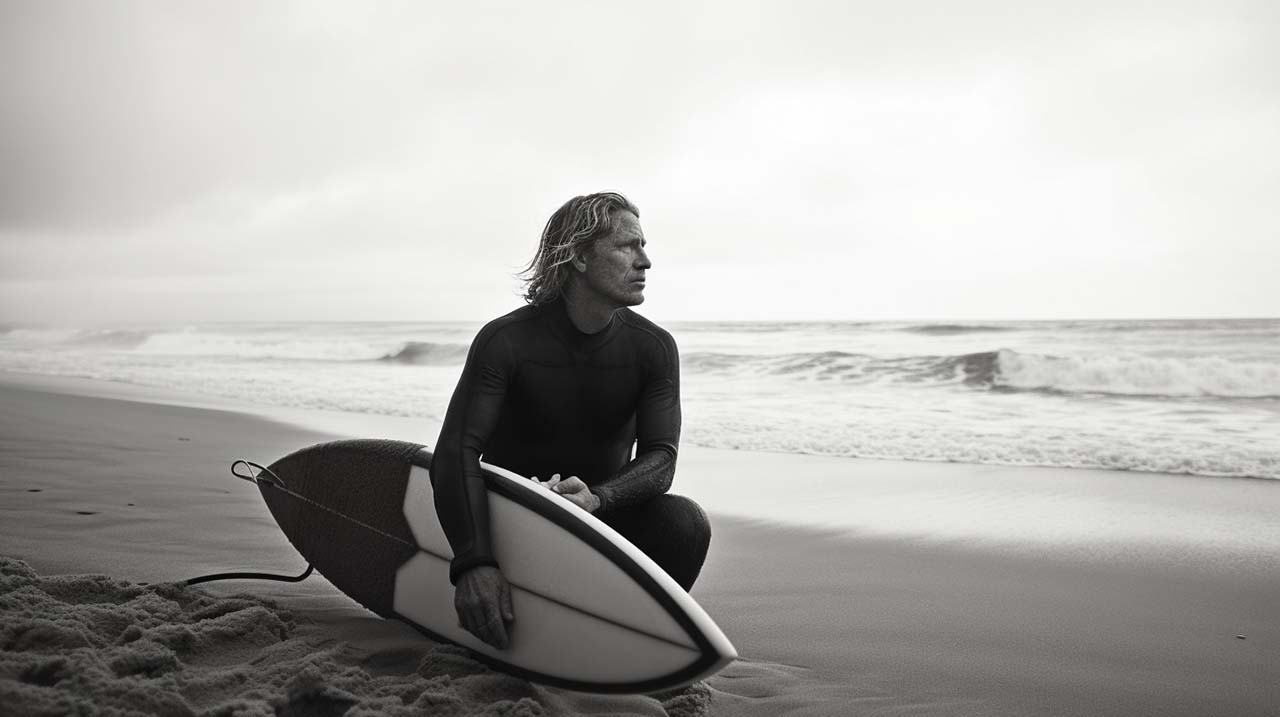
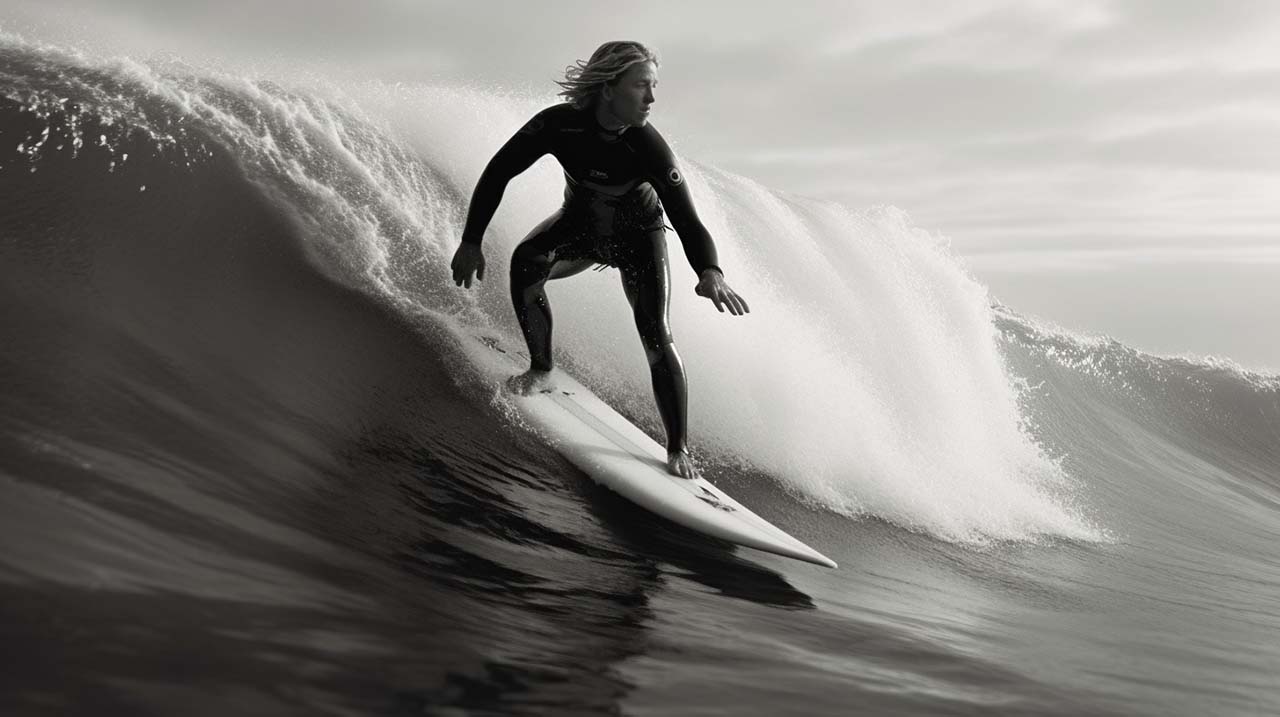
Another command that Midjourney understands is "clear facial features", and this can come in very useful for portraits. I've had some exceptional results by including this in descriptions. The images below resulted from the prompt "Craggy old male surfer sitting next to surf board on a beach, black wetsuit, barefoot. wide-shot, stormy weather. Sand in hair. Clear facial features, 16-35mm lens, f/1.8, global illumination, natural light, uplight, Ilford film stock --ar 16:9 --q 2 --v 5"

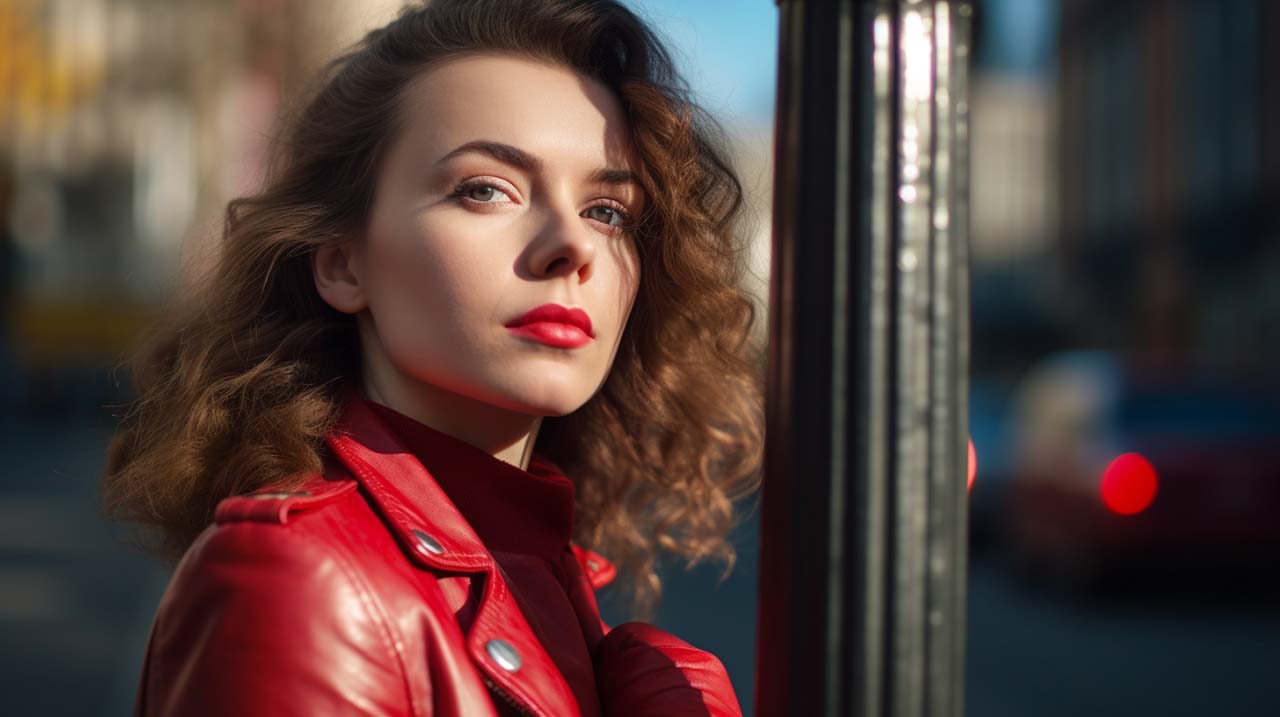
The image below was created with the prompt "Portrait of a female surfer with surf board on a beach. Sand in hair. Clear facial features, 35mm lens, f/1.8, global illumination, natural light, uplight, Ilford film stock --ar 16:9 --q 2 --v 5"
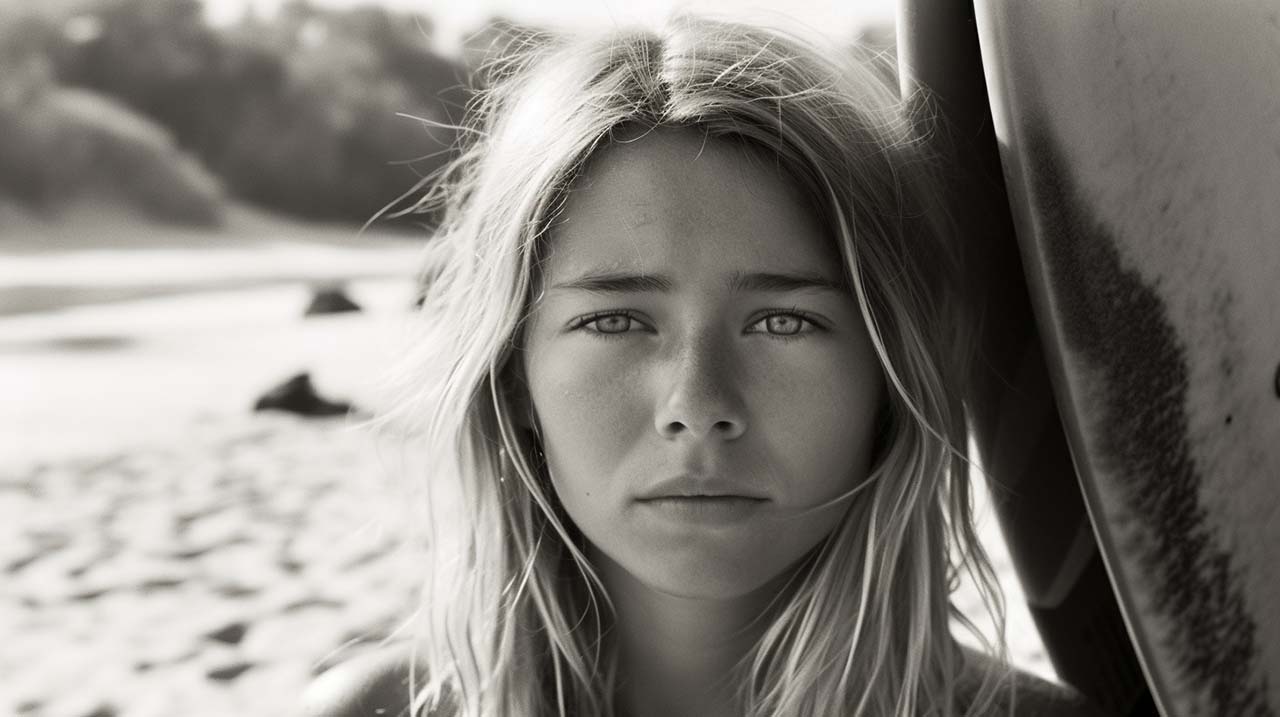
For some reason it gave her two surfboards, but this could be rectified with multiple generations, which brings me onto...
Most of the images above took quite a few regenerations to create. So another top tip is to have patience and to not only use the regenerate function from your initial prompt, but also create variations of the image you like the most from the initial four, and then create a variation of that, and so on. If you activate the "--prefer remix" command, you could create a variation of the image you like, but specify a different seed value, or add something else to the description. There are endless possibilities. Remix mode offers some very powerful ways to manipulate existing images. For example, you could change a photograph of a pile of footballs and make them into a group of puppies.
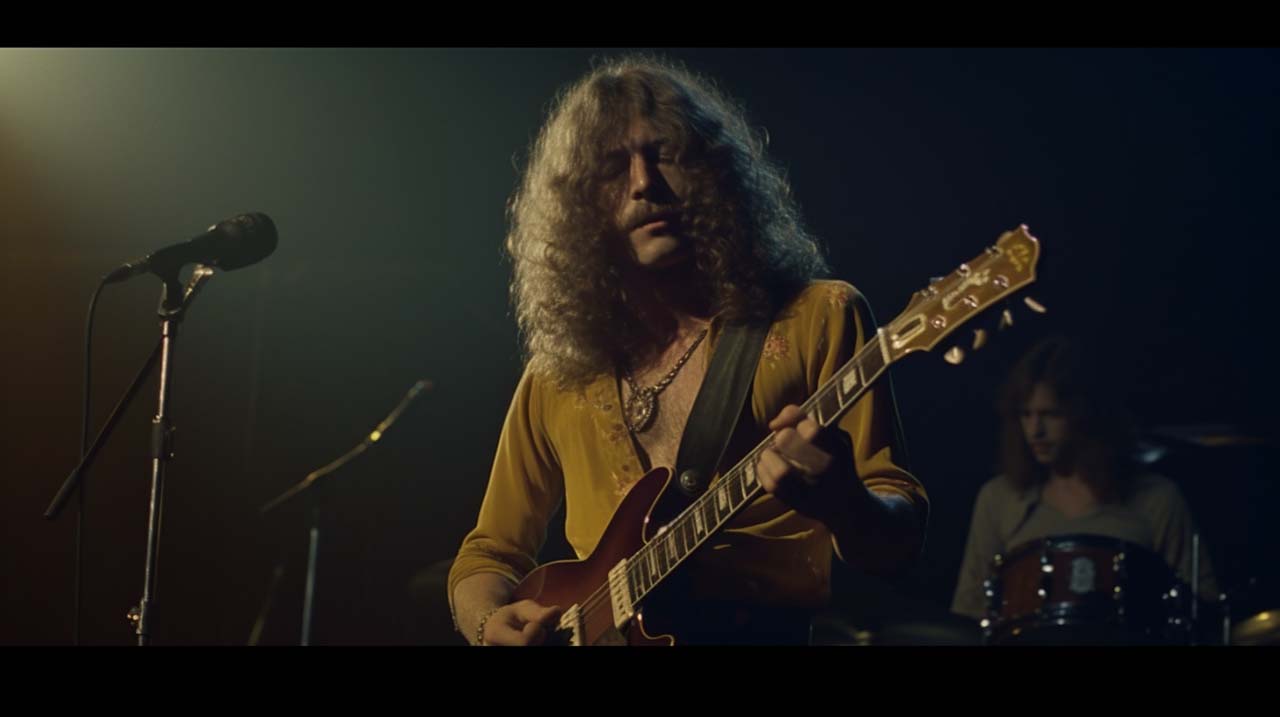
Midjourney has some incredibly powerful possibilities and I've included some of the better results I've had below with some of the phrases used in the prompts, but it's about more than just creating realistic images. In terms of cameras it can understand everything including GoPros, but the "style by" parameter has some stunning potential. For example you could specify anything from superhero comics to the photographic style of Ansel Adams. You can also experiment with lighting styles, particularly in relation to the colour of the light and its position, such as front lit or back lit.
As I mentioned earlier, there are some things that it doesn't do well. Another example of this was when I asked it to produce an image of a surfer on a wave or carrying a surfboard along a beach. Midjourney doesn't understand the relationship between a person and actually standing on a board or holding it, so it took me a large number of regenerations before I finally got an image that did what I wanted it to do. The key is patience, and attention to detail in how you make your descriptions. Vary them a bit, and tweak them to see what has an effect and what doesn't. But I hope some of the tips I have described above help you to get better results.
Tags: Technology Featured AI text to image

RedShark 2020 @ All rights reserved.

Comments