3 minute read
Last year, logistics and budget combined to require Neil Oseman to shoot day for night on Season Two of Ren: The Girl with the Mark. These are the four main tips he learned from the experience.
From epics like Ben Hur through classic Bond films to the modern likes of Mad Max: Fury Road, the technique of day-for-night shooting has long been a challenge for DPs and colourists, but it’s also an opportunity to capture “night” scenes that couldn’t be done any other way.
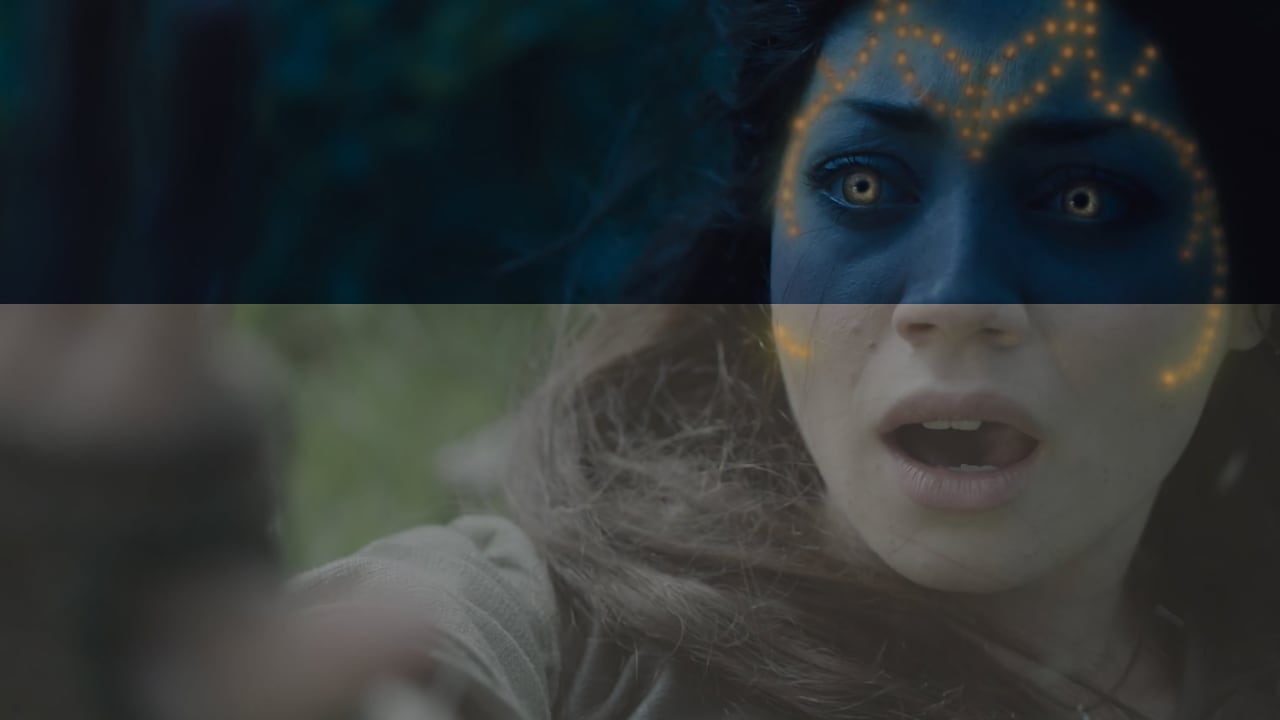
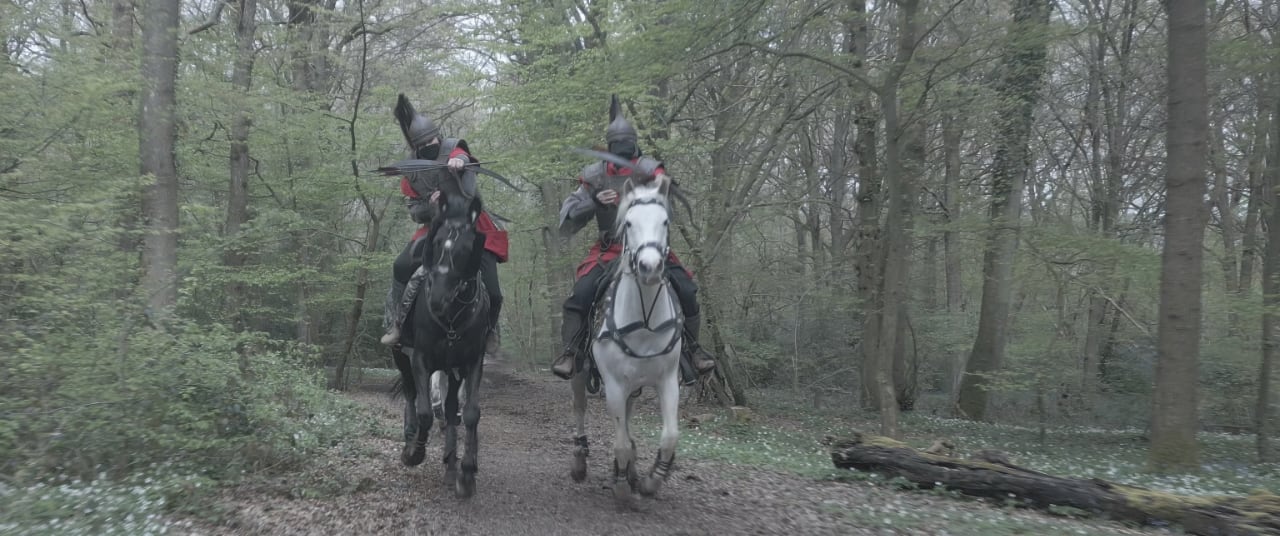
Last year I produced and photographed Season Two of Ren: The Girl with the Mark, a short-form fantasy-adventure series, which has just been released. The season opens with an ambitious sequence in which the lead characters, Ren and Hunter, are pursued on horseback by three enemy archers.
For continuity with the end of the previous season we knew that the sequence had to be set at night, but it was immediately obvious that real nighttime shooting was out of the question. Even if we could have afforded the lighting package and generators to illuminate a sufficient stretch of forest, which we couldn’t, we could not have worked the horses late into the night. (I’ve been on sets before where animals became tired and consequently irritated and dangerous. Not to mention crew!)
I was resigned to shooting the sequence day-for-night, so, having not done much of that before, I asked around for advice from other DPs and colourists. “Don’t do it,” was about all that came back.
I did find a few articles online discussing whether or not you should avoid having any sky in frame. The prevailing opinion seemed to be that sky replacement is fairly easy nowadays, so don’t worry. I knew that there wouldn’t be much visible sky in the forest anyway, so not worrying seemed like a reasonable plan.
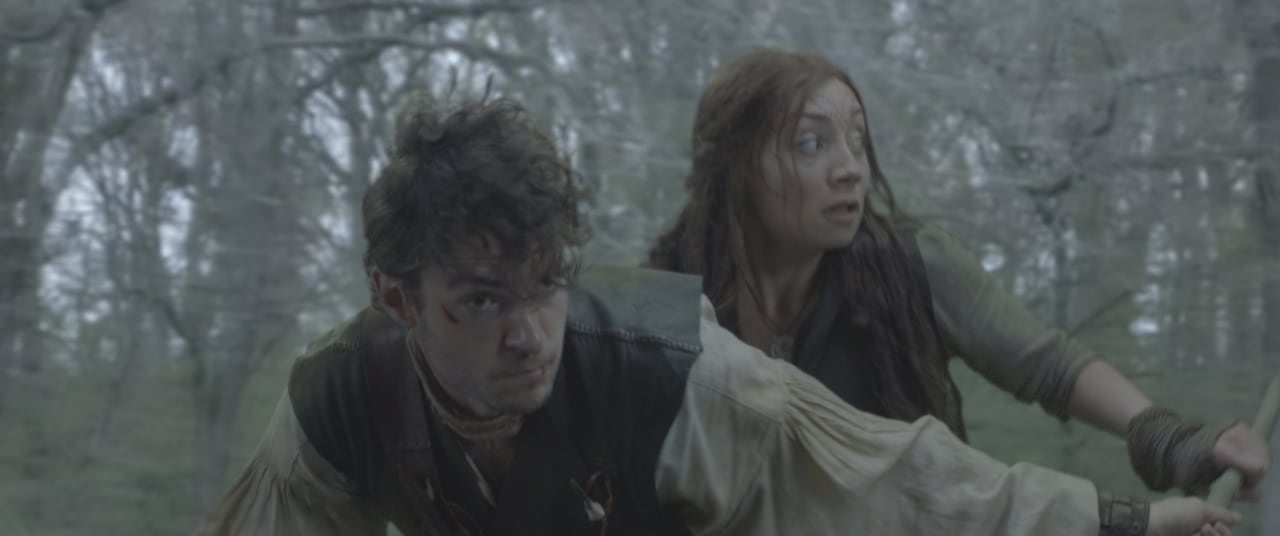
On a bigger budget I would have shot tests, but this wasn’t an option, so I decided to underexpose by a stop, stick at the native ISO, cool down the white balance to 4000K, and cross my fingers.
The only other thing I did was to avoid bounce. Where normally I might have filled in actors’ eye sockets on closer shots with a reflector, especially under the toppy natural light in a forest, I refrained. My logic was that this would preserve the contrast, making it look more like night.
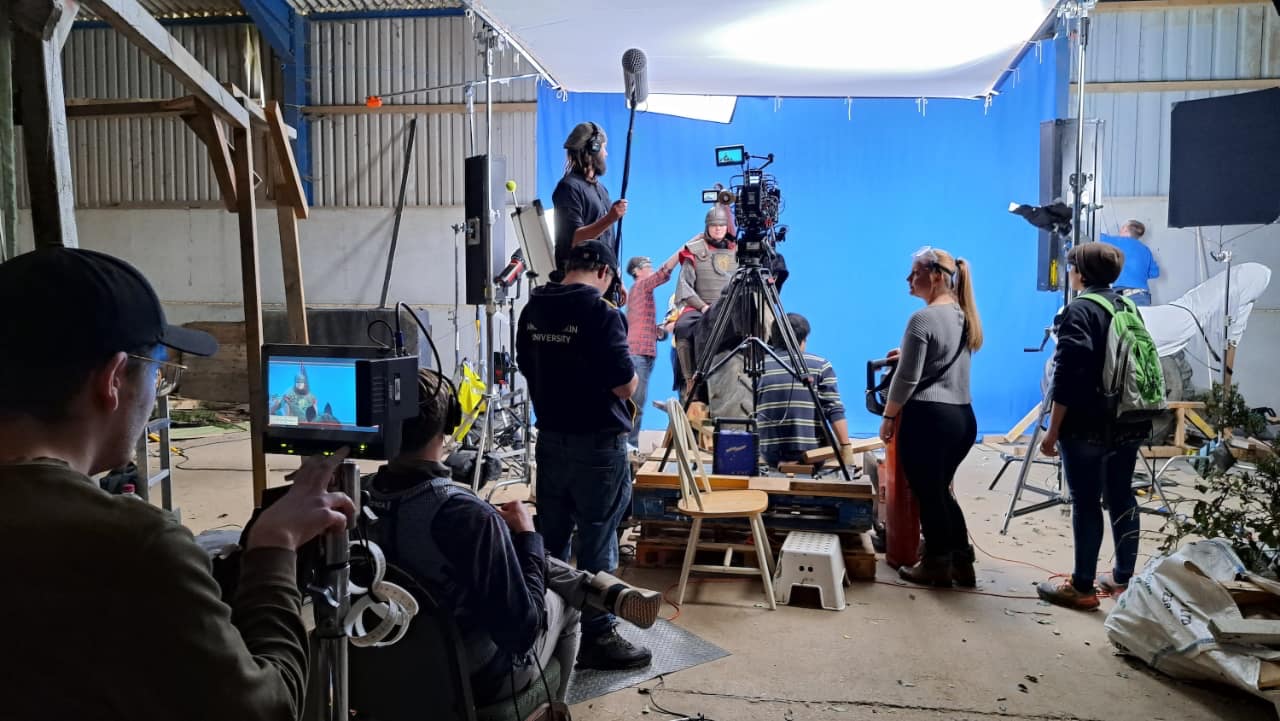
(As an aside, all the closer horse-riding shots in the sequence were captured against a blue screen, which perversely required me to replicate overcast daylight on the stage so that it would match the real exteriors. I did this with an Aputure 600D fired into an overhead 12x12’ Ultrabounce as the “sky”, and added a very soft and subtle key, fill and backlight.)
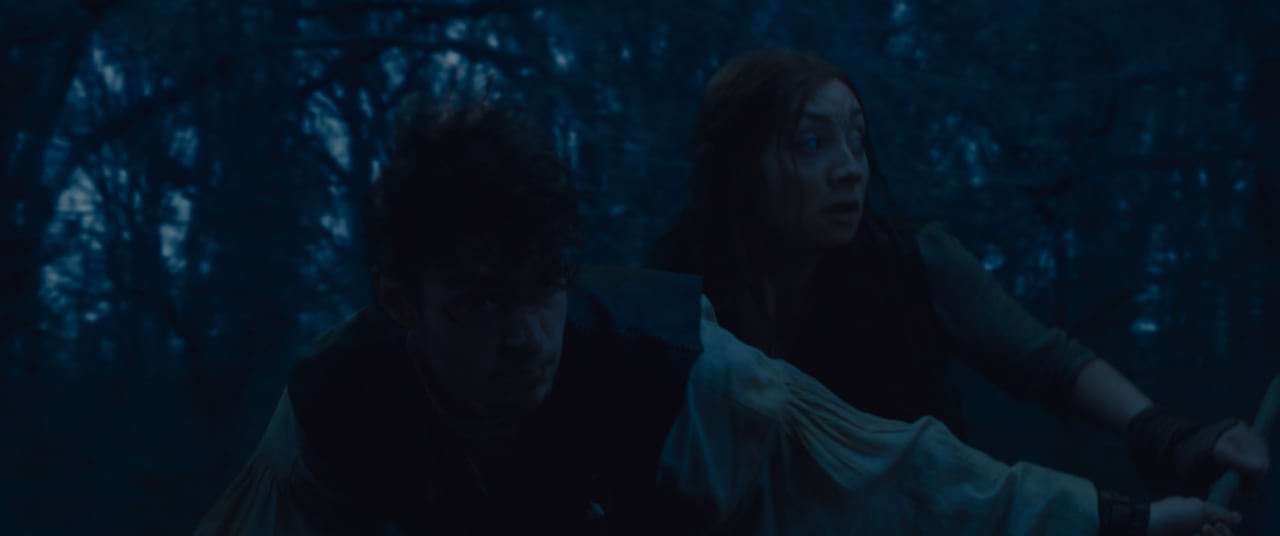
I was lucky enough to find a talented junior colourist at Cheat to grade the series, Mara Ciorbǎ. The first draft that came back from her was very convincing and looked great on my Apple Thunderbolt Display, but after viewing it on a few other devices I decided it was a little too dark, and that viewers might miss too much of what was going on. “We don’t want to be Game of Thrones,” Mara agreed when I told her.
I don’t know all the tricks and techniques that Mara used to make the sequence work, but I assume she spent a lot of time isolating and darkening what sky was visible, and windowing the faces so that too much performance wasn’t lost. By the end of the process I had learnt a few things that I’ll take forward to any future day-for-night endeavours.
Firstly, avoiding sky is something you should worry about if that sky has a lot of blurry leaves in front of it. It’s all very well pulling a nice key when the boundary between sky and foreground is sharp, but as soon as you’ve got a lot of pixels graduating smoothly between the two you’re in a world of pain.
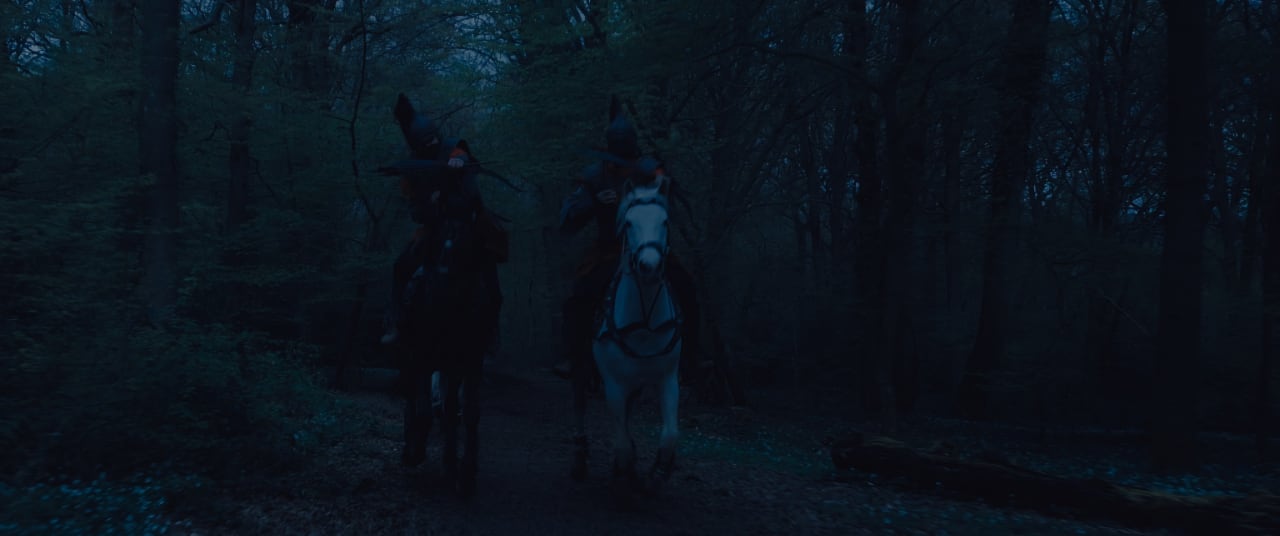
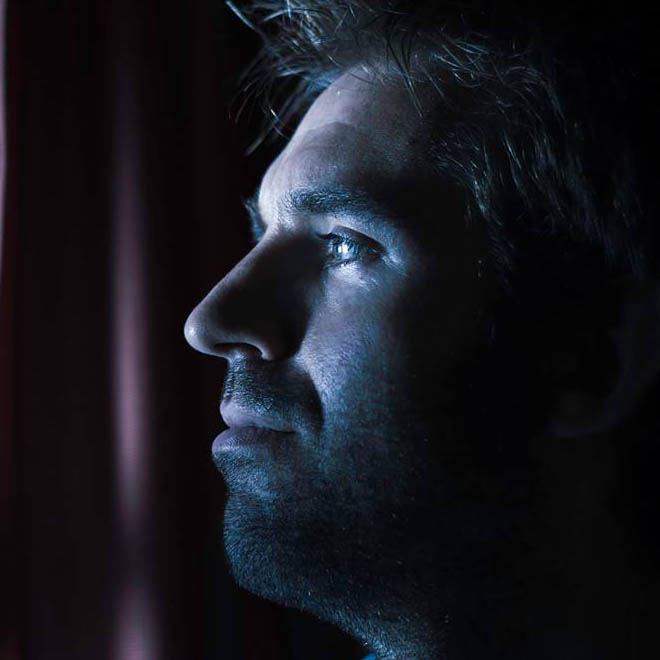
Secondly, do fill in actors’ faces. Yes, night scenes tend to be high-contrast when they’re genuinely shot after dark, but day-for-night scenes end up as much lower in contrast, and without that sparkle in people’s eyes it’s very easy for the performance to get crushed into the shadows.
Thirdly, test your workflow - up to and including your final delivery format. Ren: The Girl with the Mark’s main release platform is YouTube, which has notoriously bad compression. And what part of the image is compressed most heavily? The dark tones, i.e. your entire day-for-night image.
One fourth tip I discovered is that you can force YouTube to use the superior VP9 codec by uploading in 4K (even if that means upscaling). This looks much better all round, especially in the shadows, but unfortunately anyone watching in 1080p or below will still see the nasty AVC1 version.
Overall, while I can see numerous ways to improve it, and I’m sure some viewers will still find it too dark (or too bright) on their particular devices in their particular viewing conditions, I feel the final sequence is effective. Certainly it’s preferable to getting kicked by an irritable horse at 3am on your fourth consecutive drizzly night shoot.
Watch the finished results here.
Tags: Production

RedShark 2020 @ All rights reserved.
Comments