
5 minute read
Your home is now your studio. With webcams and live streaming now having become so incredibly important, here’s how Panasonic’s LUMIX cameras can give you that all important professional edge.
Webcams have long been a functional tool, allowing us to communicate visually using a laptop or desktop computer, but they have never been our primary form of communication. Traditionally web chats are informal, or were fairly quick, but recently due to world events they have become a lifeline for conducting business. Far from being a novelty, now businesses across the globe are having to organise events and meetings in the virtual sphere, and users are now beginning to learn that this entails a whole new way of presenting themselves.
Traditional webcams are not designed for outright picture quality. They are either embedded into your laptop screen or sit on your computer table. Low light performance is generally not well suited for professional applications. In the sphere of professional business how you present yourself is incredibly important, and as a result users are beginning to learn that their approach to web chats needs to be approached with a professional mindset as well.
The recent increase in web chat usage has meant that people who would otherwise not have considered learning about how to make video are now learning techniques that professionals traditionally use. However, while lighting things properly and choosing a more suitable background work wonders for how things look, the built in camera in your laptop is still quite limited in its abilities.
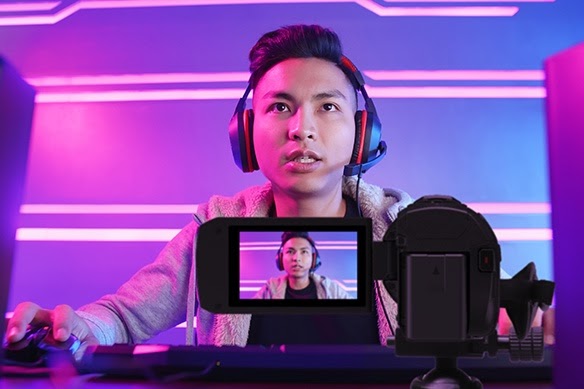
Perhaps the best way to improve the way in which you present yourself on a web chat is by upgrading the camera that you use to take those video calls with, as well as taking more care over your lighting. Today’s mirrorless cameras offer a picture quality that is galaxies away from the grainy, poorly defined image that you are used to seeing with a traditional webcam.
Using a professional camera in this way might seem at first like overkill, but if you think about it, it isn’t that much different to ensuring that you look your best in a traditional video. Having a really good web chat image not only makes you stand out from the crowd, it can also help draw people into what you are saying. Psychologically it has the effect of making you look much more professional and competent, and those are traits that really cannot be underestimated within working environments. In fact using a better camera doesn’t just help the overall initial look of the image, but because the image is lower noise to begin with, as well as being capable of much shallower depth of field, it helps the streaming compression system as well.
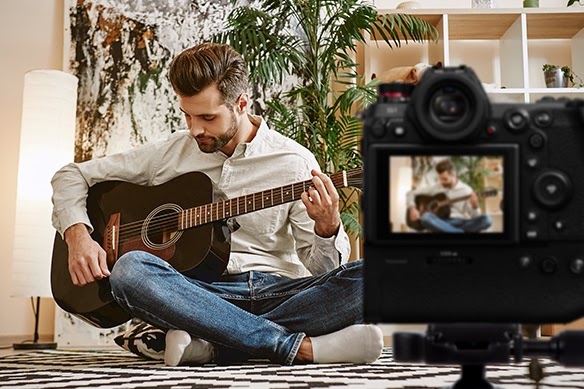
Panasonic LUMIX cameras can be used for web conferences via USB using the LUMIX Webcam Software (Beta), which lets users simply connect the camera to their computers with a USB-C cable. This software is compatible with DC-S1H, DC-S1R, DC-S1, DC-S5, DC-GH5S, DC-GH5, and DC-G9 cameras with the DC-G100 following soon. The software offers compatibility with all the major web chat and conference software apps, so no matter what your company’s preferred web chat software is, you’ll be covered.
Now that you can use your LUMIX camera as a webcam you’ll want to ensure that you are using it to the best of its abilities, so here are a few tips to help make your web chat video as good as possible.
One of your primary considerations when using a mirrorless camera as a webcam is power. The one thing you don’t want happening is for your camera to cut out midway through a chat! Always ensure that your camera is running from freshly charged batteries. Some models of LUMIX camera can be powered off a USB connection, which means that you can either use a power supply similar to your laptop or you could use a battery power pack.
If there’s one thing that separates professional video from amateur video it’s lighting. Lighting doesn’t have to be complicated or expensive. Take the time to understand how the sun is positioned at the times that you are going to be conducting your web chat and work out how you can position yourself and the camera for best effect. For example backlighting, where the primary lighting source is coming from behind you, might look beautiful from a cinematography perspective, but it might not be the best solution for a web chat because you’ll need a fill light in front of you so that your colleagues and friends can see your face clearly.
Instead you could use the sun as your key light, lighting you from the front. However depending on the sun’s strength and the time of day this could cause issues for you since you could be facing it fairly directly.
The best, and most flexible solution is to have some inexpensive LED lights on hand, which can be placed strategically and give good light on your face. These can be used to fill in shadows where the natural light is causing problems, or they can be used to light the room from scratch if windows are blocked off with curtains. How far you want to take things will be a personal decision, but by purchasing a couple of small and inexpensive LED lights you can drastically increase your flexibility no matter which room you find yourself in.

You wouldn’t want to go to all the effort of getting things looking perfect only to end up with the picture out of focus. LUMIX cameras come equipped with advanced autofocus features, including facial recognition. Make sure that your camera is set to continuous focus and that the facial recognition feature is turned on. This will ensure that no matter where you move within the frame you will always be in pin sharp focus.
Remember that when you are on a web chat ideally you want to be looking directly into the camera. You’ll want to ensure that the camera is mounted on a secure base such as a tripod and that this is set to roughly eye-level. Depending on whether you are using a desktop computer or a laptop you will need to factor in the position of your main viewing screen. This may necessitate that the camera is placed either looking over the top of the screen, or to the side. The closer you can position the camera to face you directly the better.
This is an important setting to get right, particularly if the room that you are in uses fluorescent lighting. The general rule is that in 50Hz areas, such as the UK, the shutter speed should be set to 1/50th, while in 60Hz countries such as North America it should be set to 1/60th. By doing this you will help to ensure that there is no chance of light flickering ruining your shot. If you do still notice flickering taking place you can try increasing the shutter speed until it disappears, or if your camera has it, such as on the LUMIX DC-S1H and DC-GH5S, use the synchro scan feature to help eliminate it.
A great way to improve the look of your webcam shot is to defocus the background. The latest generation of mirrorless cameras make this effect incredibly easy to achieve. In simple terms the lower your f-stop number the more out of focus you can make the background. We recommend between f/2.8 and f/5.6 for the best effect. However you will need to be aware that by opening up the iris like this more light will hit the camera sensor, which in turn increases the exposure. As a result you will need to balance all of the camera settings until you have both the effect you want and the exposure you desire.
On older cameras increasing the ISO could drastically increase the noise in the picture. On modern cameras such as the current LUMIX series this is no longer the problem that it once was. Modern cameras can now produce quiet pictures even at relatively high ISO settings. Because of this we can recommend leaving the ISO setting to auto depending on your camera experience. If you want to prevent the ISO from becoming too high a limit can be set within the menus. However if you are sufficiently lighting your environment using our previous tips, this will never be a problem for you.
Last, but no means least, is your lens choice. This is subjective and it is up to you how much of your room environment you wish to show. For the most flattering results you probably want to be aiming for a lens of between 30-50mm depending on how far away you are positioning the camera. Because most of the time the camera will be mounted on a desk you won’t have the distance to be able to use lenses with more focal length than this. Wide angle lenses are an option, but consider that if you are sitting close to the camera a wide angle lens can create distortions at close distance that give a less flattering image.
Setting up a much more professional looking webcam has never been easier and we hope this has given some insight into how you can use Panasonic LUMIX cameras to hugely improve your web conference experience. For more information about the LUMIX Webcam Software, along with step-by-step guides on how to use it, visit Panasonic’s website.
Tags: Production

RedShark 2020 @ All rights reserved.

Comments