
4 minute read
 Understanding Compression, Part Two
In part two of our four part series on compression, we profile compressor concepts and the benefits of various options. By Shawn Skead.
In the last article, I spoke about Compression as a concept and why it's so crucial to improving overall sound quality. In this article, we will look at different types of compressors, from the quick and dirty, to the complex.
First off, it needs to be said that, absolutely, compressors are one of the most invisible tools that we use and are known by most musicians as "highly mysterious voodoo." It wasn't until I went to audio engineering college that one of my professors finally explained to me what was actually going on.
Most audio effects are obvious, but in the case of compression, it takes trained ears and eyes. Audio engineers are known for saying, "trust your ears first," which is true, but it's also crucial that you trust your eyes. Using audiometers with a memory function is quite helpful, because you can see where the signal has been: the lowest, quietest parts, the average levels (RMS) and the Peak levels. Depending on how adept your metering is, you can get direct information and instant feedback on every adjustment you make, meaning you can fine-tune it down to a science.
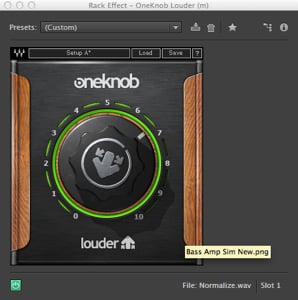
Diagram 1
Pictured in Diagram '1', we see the 'louder' plug in from the WAVES One Knob Series. Compression doesn't get any easier than this, folks, and I call it the "lazy man's compressor." Clockwise to compress, counter-clockwise to create a brick-wall limiter instead. Don't forget to watch your meters though, because the visual feedback on this is not exactly 'scientific'.
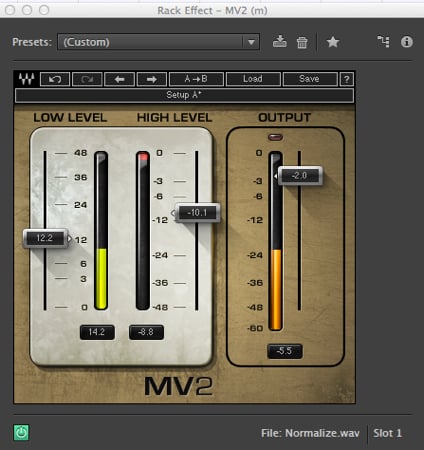
Diagram 2
Pictured in Diagram 2 is another fine WAVES product called MV2. This is my quick and dirty 'go-to' comp; when I'm quickly setting up my gain stages in a mix, I throw it on any track that needs some 'help'. I've used it on absolutely everything and, for whatever reason, it just seems to work on everything, no matter what I apply it to. The fader on the left allows me to 'make the quieter stuff louder'. The fader in the middle allows me to 'make the loud stuff quieter'. The fader to the far right gives me a Master volume, 'Post' compression. A red clipping light is provided on the output to tell me when I have entered into the 'no-fly zone'. It's challenging to follow those numbers though, so we're still going to need some meters or more detail.
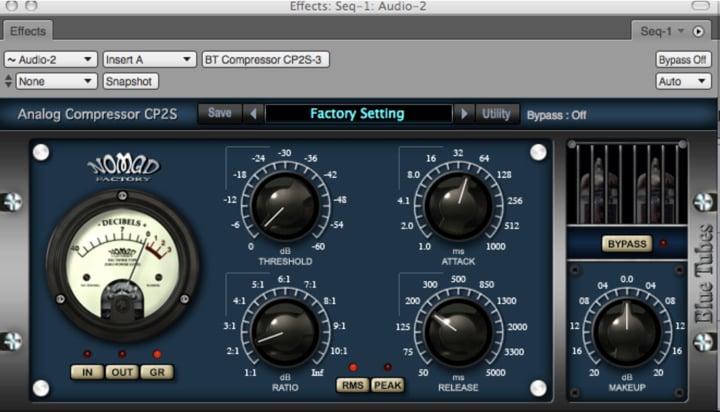
Diagram 3
Pictured in Diagram 3 is a really cool unit made by Nomad Factory called Blue Tubes. This is pretty much what you would typically see on an external piece of hardware, modeled to look as such. (Note the rack screws!)
We see a VU meter on the left, giving us the visual feedback that we need. You can see by the switches below, I can choose to see my incoming signal before compression. I can also see the signal after I've compressed it. In the third part of this series, we will discuss precisely what the Threshold, Rate, Decay, Release, RMS/Peak and Make-up controls do, but for now, let's continue on with the concepts.
Previously, multi-band compressors were only available to mastering engineers, you needed to have external speaker crossovers units to do it or other really expensive hardware to split the frequency bands into separate signals.
Now, in this amazing new world where virtual plug-ins rule, we have a myriad of multi-band compressors to choose from. (WARNING: After you have gone multi-band, you may never go back!)

Diagram 4
Featured in Diagram "4" Is WAVES C6. Imagine all of the above controls, but having 6 compressors working all at once on specific frequency ranges!
I was a bit daunted by these when they first came out, because I still felt like I hadn't really mastered basic compression yet. And really, if you're not completely confident with compression, you might want to avoid these, because you can absolutely mangle your sound and get completely lost down a rabbit hole otherwise.
Multi-Band compressors are powerful. The possibilities are endless. If you have one in your tool kit, you also effectively have a parametric equalizer as well.
You can use these powerhouses to:
- Add, clean up, or tighten the bottom end. (Bass frequencies)
- Compress only the very high frequencies in the signal to create a shiny polish to the mix. (Similar to what an Exciter does)
- Zone in tightly on the mid-range frequencies and make vocals/dialog cut through a dense mix.
- Bring out the 'snap' on a kick drum or sharpen up dull sounding gun shots/explosions.
- Hone in on an actor speaking dialog on a busy street, effectively pushing the background traffic lower in the mix.
- Remove wind noise from the boom mic recordings, without losing the bass frequencies of the actor's voice.
- Remove the low frequency rumbling from that pesky air conditioner, as well as A/C hum, and fluorescent lights.
- Remove "plosives" from dialog/vocals, effectively rolling your own De-Esser.
- Create tonal character in ADR that sounds sonically similar to what you're trying to replace.
- Use it in live music performances to control nasty feedback from the musicians' speaker monitors.
- Roll your own crossover to the front of house speakers for a tighter and more accurate, better controlled mixing experience.
And in my case, living in tropical Thailand, I can push those pesky cicadas (that only decide to sing whenever we need to shoot something at night) into the background instead of the foreground.
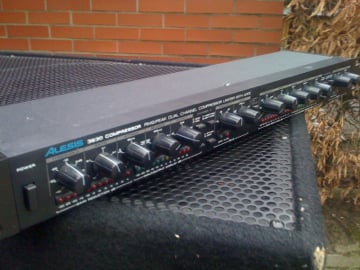 Diagram 5
Obviously, keeping your signal path in the digital domain is the safest bet in terms of signal integrity. Adding cables to your setup invites all kinds of potential problems, like 60Hz hum, ground loops and possibly even radio interference.
However, a lot of hardware compressors, especially vintage compressors, offer some great tonal characteristics for those of us who love the sound of analog. Vintage compressors being offered up as software plug-ins is all the rage now, made possible through the technology of tone matching/modeling. If you have tube power amp for your home stereo, you know exactly what I'm talking about – chasing after that 'warm' analog sound. Coincidentally, it's the same reason why tube amplifiers are more popular with electric guitar players than transistor based amps.
Even without tubes, having an external hardware compressor really comes in handy! If I'm up at night watching YouTube videos, the volume of these videos can jump from one to eleven from one video to the next.
My Alesis 3630 takes care of the quiet videos, bringing them up to listening levels, and acts as a brick-wall limiter, protecting my expensive near field monitors from blowing up on the louder videos. Set the 'Make-up' knob as an overall listening level and, voila, problem solved.
Also, if I'm not mixing front of house with a computer, having this little number in my signal chain before the power amps can make even the sloppiest bands sound tight and professional!
In the third part of our 'Understanding Compression' series, we will get down to the nuts and bolts of using them!
Tags: Audio

RedShark 2020 @ All rights reserved.

Comments