
4 minute read
Review: Landscape Pro 3 is an app that makes bold claims to be able to transform otherwise dull landscape photographs into masterpieces. We find out if it really works.
I admit it, I clicked on a Facebook advert. There, I've said it. But the reason I did so was because I was intrigued for a couple of reasons. The first was that the advert I saw was for an app that looked like it got incredible results by transforming otherwise dull photos into something much more interesting. The second was that the comments I read about it suggested that there might actually be some truth in its capabilities.
Landscape Pro is a photo app with a difference. It is solely dedicated to editing landscape photographs, as its name suggests. But the difference is that it leverages "AI" to recogise objects so that they can be masked out and adjusted, effectiverly in layers. This, so the app makers promise, allows you to carry out major work on the picture, such as replacing the sky, and even relighting it, with ease. Pah! Yeah right! Not a chance! I hear you cry! Well read on, because you might be surprised.
On booting up Landscape Pro you are presented with the option to open an image to work on, or to watch one of the many tutorial videos on how to get the best from the software.
Once an image is loaded, such as a JPG, TIFF, or even a Raw file if you have the Studio version and above, you are asked to drag labels over parts of the picture to tell the software what each part is. For example where the sky is, where trees are, where rocks are, grass, water reflections, bridges, and more. This gives the software a rough idea of what everything is, and then it presents you with a colour coded overlay so that you can see what it has identified.
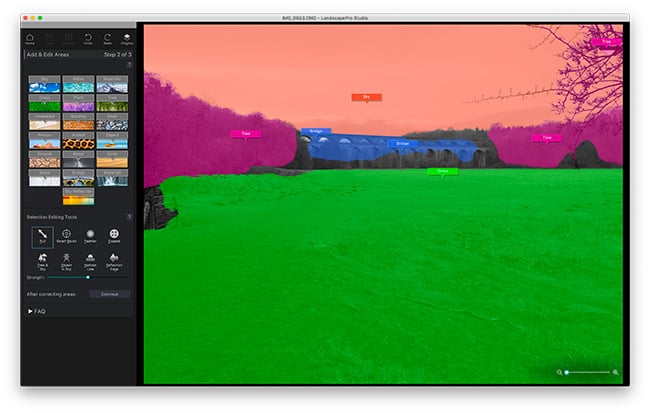
At this point things will be quite rough, so you will need to fine tune these masks using the next set of tools you are presented with. These allow you to drag and extend areas, or use various smart brushes to paint over objects, or isolate them. For example one tool is called "Tree in front of sky". By painting this tool over trees that are overlaid onto sky, the software will intelligently create a fine detailed mask.
Getting this masking stage right is important, and if you want to do it properly it is not a quick fix job. You need to invest a bit of time getting to know the tools and how best to use them, as well as being patient to get all the areas masked out correctly. But if you do this you will be rewarded with the amount of control you have over adjusting the picture.
Once the object areas are identified, and you have told it where the horizon line is, you can move onto the fun bit of manipulating the image. There is a whole myriad of stuff you can do to completely change the character and look of the picture. Let's start with sky replacement.
If you click on the sky replacement tab you are presented with a huge number of sky presets. These range from fluffy clouds, through to storm clouds, sunsets, sunrises and a whole lot more. You can also add your own skies as well as fined tuning how it appears.
What makes this function so interesting though, is that the software doesn't just simply slap on a sky and be done with it, it actually adjusts the light in the entire picture to match it. Now, if you go to extremes and select a sky that has no relation to the scene you originally shot, the results can still be jarring. So the key is to find something that compliments and goes with your image.
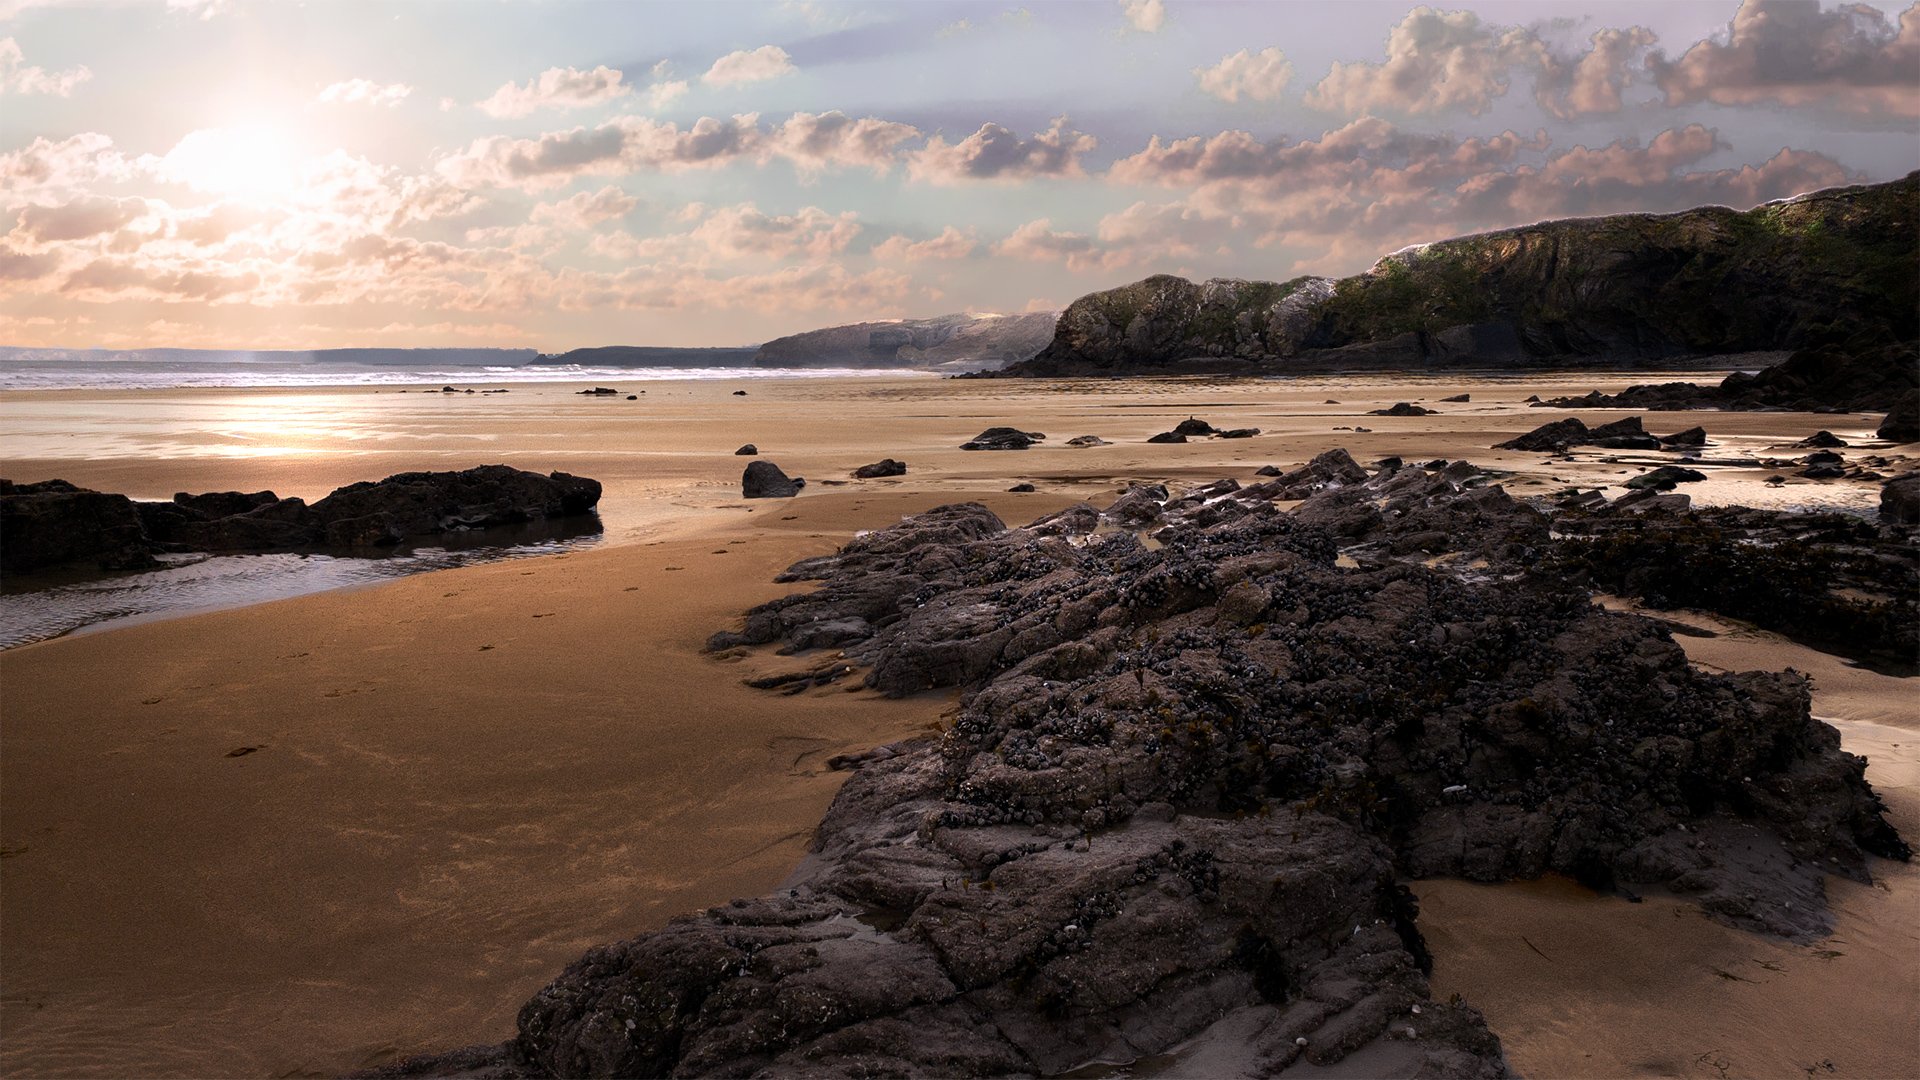
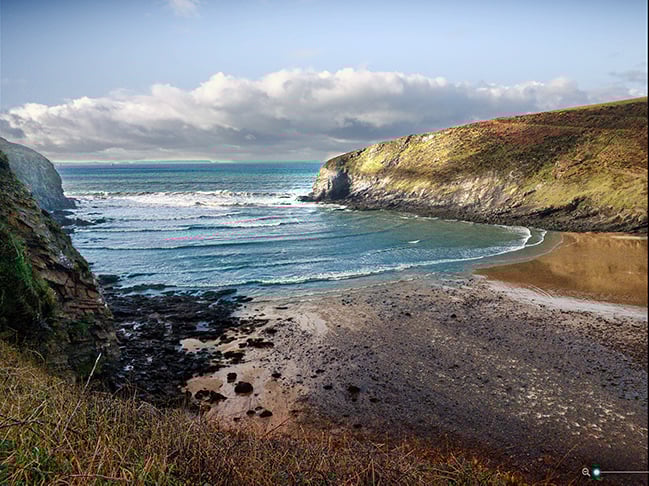
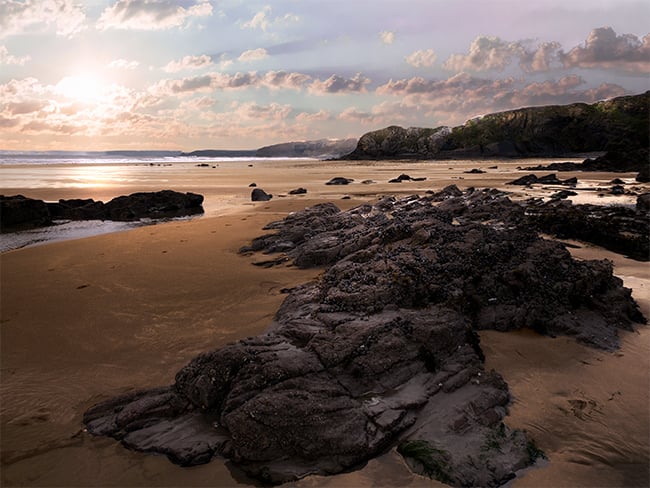
You can then through each of your layers and adjust them individually, either using the adjustment sliders, or by selecting presets. For example you can select how lush you want your grass to look, how detailed it is etc. With the right picture it is really quite staggering the results you can achieve. In the example below for example, the original photograph was very flat. It was taken on a cloudy blustery day. With some effort and manipulation, as you can see it is totally transformed. Okay, maybe I went a bit over the top and the result is bordering on over the top, but how far you go with the effects in terms of sublety is entirely up to you. The result below was obtained in around 20 minutes.
Once you have your general look in place you can really go to town and use some of the more detailed features such as the light brushes, which I used in the above photo on the rocks, top of the cliffs, and to create the sub reflection. You can also add a light source so the app knows where the light is coming from.
The app isn't perfect. We are after all talking about the type of manipulation that is notoriuously difficult to do well. Occasionally I have encountered the app crashing out, so it as well to save work regularly. Hopefully this will addressed in an update.
The biggest limitation comes with complex pictures. If you have a clear horizon line, with clearly defined objects and simple composition then the app can be put to very good use. Where I found it fell apart was when it came to indistinct objects. For example I had a photo of a viaduct, and the boundary between trees and the grass was a bit muddled, and trees that covered part of the viaduct were almost impossible to isolate properly. Perhaps a feathering tool might be useful on such occasions to provide a blending ability.
The other question is one of honesty. I know there are RedShark readers out there who might object to this sort of manipulation and fakery. However, there is a place for everything. If what you need is simply a nice looking landscape, and whether it is real or not has no bearing on how it is used, then Landscape Pro could be a very useful tool. If you are trying to convince your friends that you went to a tropical paradise when all it did was rain all the time, then that is perhaps a little more morally dubious.
But with all that said, I enjoy using Landscape Pro, and it can be very powerful indeed. just don't expect one click transformations. Expect to put a little bit of work in to get the best results. Frankly I find it stunning what it can do when the time is taken.
Landscape Pro starts at £29.95 for the basic edition, £49.95 for the Studio edition and goes up to £99.95 for the Studio Max edition, which copes with batch jobs.
Tags: Production

RedShark 2020 @ All rights reserved.

Comments