3 minute read
 Editing, grading, effects and more - all completed in the one package
The Beyond is the first feature film written, directed, produced and edited by long-standing RedShark contributor HaZ Dulull. Here he explains why he chose to complete the whole project, editing and all, in DaVinci Resolve 14.
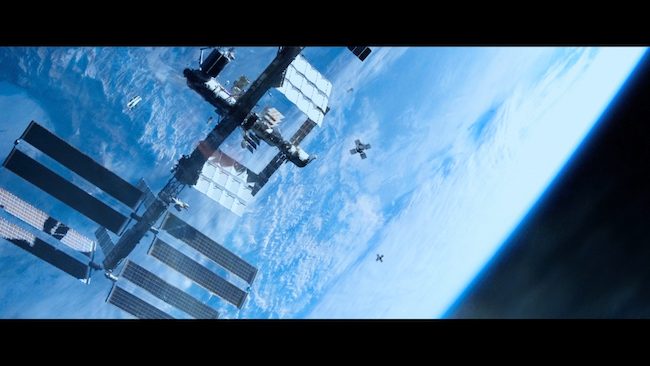
The Beyond is due out next year from Distributor – Gravitas Ventures, with a US release date announced for Jan 9th 2018. Loosely based on my breakout short film Project Kronos (2014) - It is a sci-fi documentary feature that chronicles a ground-breaking mission which sends astronauts, modified with advanced robotics, through a newly discovered wormhole. When the mission returns unexpectedly, the space agency races to discover what the astronauts encountered on their journey.
It was shot on Blackmagic cameras in ProRes 4444 and ProRes 422 HQ. This included the VFX shots that were re-projected back into the camera too.
As with most of my films, VFX is integral to the storytelling, and therefore I decided to use Resolve not only to establish the looks before shooting began, but also for editorial right through to the grade.
I don’t like dipping in and out of various applications to edit, and this way there was no offline or online edit; there was just one edit process. I didn't do any transcoding, it was simply a case of whacking the footage straight into the BINS, doing some media management, and then editing the material.
I also do a lot of basic VFX in Resolve and reframe 4K footage as I edit. For me, to be able to do this on the fly as I was crafting the story is one of the big reasons why this film was not only delivered on time, but also meant I was able to achieve all the things I wanted without any restrictions editorially or in post.
The big challenge is ensuring you have military-style organisation on your server and that naming conventions make sense. Since I was the editor as well as the director, writer and producer, I was able to ensure that the names for VFX shots made sense so that I could search for things in my BINs on the fly. As such, I avoided traditional file names like VFX_0010_0939_0393 — which meant nothing to me! — and instead I had names such as Wormhole_EST_0010 or Mission_Cont_ScreenGFX_0010.
The other big challenge lay in mixing framerates and codecs from the archive stock footage licensed for the film, from NASA and elsewhere. Since the movie is told in a documentary format, it was a case of grabbing as much supporting source material as possible (which I later augmented further in VFX) to tell the story, so I used Resolve’s retiming feature to help this process.
I carried out a first pass grade as I edited. I can’t edit with Log images or Rec 709 basic LUTS; I like to define a look as I edit. That way, when I watch the cut back for review it matches the colour tones and mood I am after. Since I was editing in Resolve, the colourist can take my Resolve timeline and can choose to evolve my first pass grade further or delete it and do it from scratch. But the point is that I have communicated the tone and mood visually on each shot, so the colourist understands it quicker and can work from my visual direction much quicker.
On The Beyond I worked with colourist Max Horton (“Gravity”) and he pretty much worked from my first pass grade and took it further to the finishing line.
I wanted the film to have a cinematic quality yet still retain the grounded documentary tone throughout.
Paula Crickard, my co-producer on the project, suggested we do an HDR grade to ensure we got the likes of Netflix, Apple and Amazon interested, especially as they demand HDR content as standard nowadays. We didn’t want to go back further down the line and re-deliver in HDR, and since our budget only allowed for a few days of grading, we went straight in and did an HDR grade using my first pass as the basis to work from. Then we ran it through a process at Dolby Vision to create the Rec 709 version, and I have to admit, I was very surprised how well it carried the grade over.
At first, I was very sceptical about HDR for this sort of project, especially since we didn't shoot for HDR. But what helped was that all my VFX was in 32-bit float EXRs anyway, so the data was already in there to work with. And most of our drama footage was shot on Blackmagic URSA Pro which contained the data we needed to get the HDR luminance advantage.
The thing I learnt quickly was about using HDR to tell your story rather than using it as a gimmick or function to have HDR content. Each scene should be treated on its own merits as opposed to just whacking an HDR grade across the whole thing.
When it comes to editing a movie, if it’s your first or your hundredth, trust your storytelling gut, as nine times out of ten it’s right. The other thing you learn quickly is to let the scenes breathe and establish themselves, rather than cut too harshly.
There are plenty of advantages to using Resolve, especially given the big advances Blackmagic has made with version 14, as a one-stop shop for post. As a filmmaker, I’m able to merge both the offline and online editorial processes, enabling me to tweak the film editorially while still in the grade, which is fantastic both for saving time and giving me the space to be more creative.
I even used Resolve for a few visual effects, including plate augmentation and lens effects, which saved even more time as I didn’t have to go down the traditional route of exporting plates into an external VFX software. And that is invaluable when you have feedback coming in last minute from exec producers or the distributor!
Have a look at the trailer below:
Tags: Production

RedShark 2020 @ All rights reserved.

Comments