7 minute read

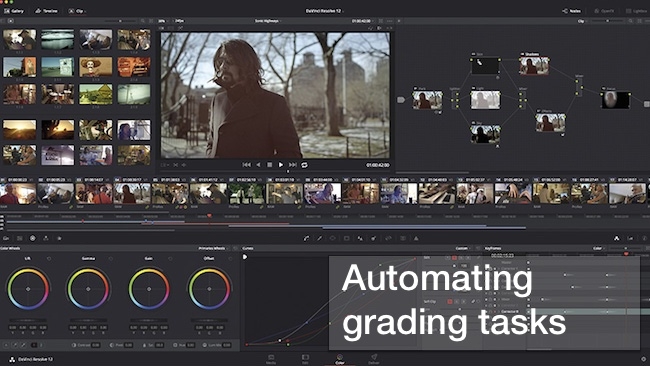
Eric Escobar looks at some of the new automatic colour grading tools in Resolve 12 that promise to usher in a whole new world of ‘editor-friendly’ grading...whether editors like it or not.
[You can read Jonny Elwyn's initial thoughts about the editing tools in Resolve 12 here: Blackmagic DaVinci Resolve 12: The editor's point of view]
There are three tools that I want to cover in some detail because I think they form the critical basis for a rapid, editor-friendly, colour grading workflow: Auto Color, Color Match and Shot Match.
When I say “editor-friendly”, I mean exactly that — feature updates in Resolve 12 have made the application a full-featured NLE, robust enough to meet the needs of a professional editing environment. As an NLE, it’s fully integrated with the industry leading color grading suite in the exact same application. As you edit, you have all of the color management and grading tools available to you. For facilities that handle editorial and color, using Resolve 12 as an NLE will greatly speed up workflows and process. No more conforming EDLs, chasing down assets or needing to get editorial to send clips and XML files before color work can happen.
Having the NLE and grading suite “living under the same roof”, so to speak, promises that the entire post process of cutting and coloring can suddenly become seamless and iterative. No reason to wait for picture lock before grading can begin. It also means that editors can apply color management to clips so that clients aren’t staring at the dulled, washed out image of log-encoded footage. In fact, editors can do a whole lot of the color management and primary color correction using a suite of automated tools. Does that mean editors will now be expected to handle more of the color workload?
Yes, it absolutely does.
If you’re an editor who bristles at the thought of yet another set of tasks that will keep you at the studio late, don’t worry, Resolve 12’s color tools make the process a lot easier than you think. Black Magic has mercifully kept all of the complex stuff “under-the-hood”. All you have to do it point and click. While it’s unlikely that you’re going to get the final grade without the skill of a seasoned colorist, you will: get your show looking a whole let better; improve shot to shot balance; make clients reviewing edits happier; and have assets ready for the final grading session.
Here are three tools and a step-by-step, editor-friendly guide on how to use them to get from an ungraded timeline to a clean, even primary correction pass.
As an editor cutting in the world of log encoded video (cLog,sLog,etc), flat video, and the flavors of raw video, you are tasked with looking at the dull grey-green images that have become routine as every camera eschews the “ready to wear” color gamut of Rec 709 or Rec 2020. If you have been at this a while, then you’re already a perfect techsplainer to clients about how “this gives the colorist a lot of room to make choices blah, blah, blah” or maybe your company has purchased you a monitor that has built-in LUT options and you can push a button and the video almost looks right, as long as every clip benefits from the exact same LUT. Or, perhaps, you’ve gotten really fast at dropping in an instance of some kind of color correction plug-in on top of every single clip in your timeline that does some kind of LUT operation and makes your footage almost right. This last option, while wildly popular, slows down editorial while also creating more work for the colorist to undo later.
In Resolve, you have some amazing color science built right into program. For clips that were shot in the raw flavors for RED, ARRI, Sony, Vision Research and, of course, Black Magic Design, the debayering and making into normal looking footage using the presets in the Camera Raw control panel, for instance. For much of what you’re working with, this will be fine, but there may be some clips that will need a little individual attention from the Camera Raw controls like color temperature, shadows, detail, etc. You can make changes to a single clip, or shift-click and make changes to a group selection.
If your footage is not one of the Camera Raw flavors mentioned above, this preliminary tool set will be disabled, however, you still have the ability to apply a preset LUT to your footage right inside the Color Page, very easily. Just select a clip, or group of clips, and right click to bring up the menu. You can select from a menu of 1D LUTs or 3D LUTs depending on what your material was shot with and where you’re trying to land in terms of gamut.
With your Color Science in order, now it’s time to do some color correction.
Auto Color is exactly what it sounds like: an algorithm that analyzes a frame of video and determines a primary color correction balance based on values in the image. These values are derived from the single frame that the playhead is parked on. It’s fast, requires almost no work on your part, and when it works the results are exactly what you need. When it doesn’t work it makes an ungraded shot look like a badly graded shot.
To avoid that, here are some tips on how to get the most out of Auto Color:
Steps
Color is wildly subjective, but measuring and capturing good color is scientific, it’s colorimetry: the precise measurement, analysis and effective management of color in an image. The best way to get it right is to measure it at the point of capture. This is where chip charts are so important. Think of it as the color version of “room tone”. We are all used to standing silently for thirty seconds before breaking down a set up so the sound recordist can capture the precise version of “quiet” for the scene that was just shot. We all know how important tone is for the sound editor — crucial for filling in gaps and making the scene sound continuous and full.
A chip chart allows for the even, continuous, neutral starting point for color in a scene. For every scene in a show, there are a number of set ups and shots that you, the editor, will need to assemble together to make it appear as though it’s a real moment unfolding in real time in front of the viewer. As an editor you know that these individual shots are captured out of order and sometimes in multiple locations across many days of production. It is your task to create that smooth mise-en-scene with movement, action and composition. Color is a crucial tool in pulling it all together.
The colors on a chip chart never change, and Resolve knows what those colors are. By showing the application a chip chart filmed for each lighting set up, a quick, automated understanding and correction is applied. And it doesn’t take thirty seconds of standing around silent to capture.
Steps
You don’t have to have a chip chart for every single shot, just each lighting set up.
My new favorite tool is really useful for the situation I mostly find myself in: no one shot a chip chart, I am putting together shots from twelve different cameras, on a project that spans months and a heavy reliance on stock footage of dubious quality. After crying quietly to myself, I get to work and spend a lot of time making adjustments to individual clips just to get them to a neutral starting point. What I would love is a tool that did all that for me: let me select a single clip in the scene, and say “match it all to this one”. This is what Shot Match is, and in my short time of using it, I think it does a decent job of it.
To be clear, Shot Match isn’t designed to grade your selection of shots and make them look finished. Rather, it is designed to color match a selection of shots to the values in a single, key shot. At its best, Shot Match is a tool that does the drudgery-work of shot-to-shot matching, so that you can focus on doing the interesting and creative work of grading.
Steps
Lastly, experiment.
This is a new tool, in a public beta release of a piece of software. It’s not done, it is a work in progress, but it points towards a future of really interesting automated tools that remove the mundane tasks from the interesting. At worst, you undo oddball results and try again. At best, you end up with a neutral, color-consistent timeline ready for a skilled colorist to finish, or for you to take a stab at.
[You can read Jonny Elwyn's initial thoughts about the editing tools in Resolve 12 here: Blackmagic DaVinci Resolve 12: The editor's point of view]
Tags: Post & VFX

RedShark 2020 @ All rights reserved.

Comments