7 minute read
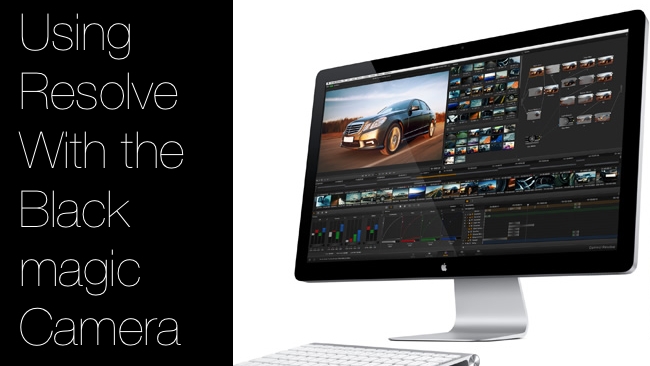
 BMCC + Resolve
Blackmagic have just released a firmware update for the Cinema Camera which together with the latest version of Resolve bring a few changes to the workflow
After various production problems we are now starting to see shipments of the Blackmagic Cinema Camera, a groundbreaking camera at an amazing price. The camera features a 2.5K sensor, roughly equivalent to a frame of Super 16mm film, and can be fitted with Canon EF lenses (there will be a Micro Four Thirds version later in the year)
The new firmware update (version 1.2) adds a couple of new features: Timelapse recording with settings from one frame per second to one frame every 10 minutes, the ability to use SSD drives formatted in the ExFat format, an aperture indicator in the UI when using compatible lenses and the camera will now be recognised as a compatible device when connected to Thunderbolt equipped Windows PCs.
Recording is to off the shelf SSD drives (as long as they can sustain a data rate of around 500mbs: Blackmagic have a list of supported drives on their website).
Recordings can be made in three different formats:
Apple ProRes 422 HQ - a compressed format which can be used directly in most editing programs
Avid DNxHD - a compressed format which can also be used in most editing programs.
12 bit RAW CinemaDNG - the uncompressed images from the sensor, with 13 stops of latitude.
Of course it is the 12bit RAW that everyone is interested in, as this will allow for far more creative control over the look of the final images, but how do you work with 2.5K RAW files?
The bad news is that most editing systems cannot open the CinemaDNG files from the camera, and just about the only application that can currently read the files is Blackmagic’s own DaVinci Resolve. The good news is that Blackmagic give you a free copy of DaVinci Resolve 9 with the camera. (As well as a copy of Ultrascope)
Since Blackmagic bought DaVinci in 2009 Resolve has gone from a hugely expensive linux based colour grading system to a multiplatform package at a very affordable price. In fact the Lite version, which will work at up to HD resolutions but does not support multiple GPU’s or noise reduction is completely free.
The version of Resolve that is included with the Cinema Camera is the full version for Mac or Windows, it will run on most current hardware but for best performance you should have Nvidia graphics cards with CUDA support. The latest Nvidia Quadro cards are ideal but if you are on a tight budget even some of the gaming cards will do a reasonable job. There is a full guide to building and configuring a system for Resolve on the Blackmagic website.
So once you have your Cinema camera and your computer running Resolve, what is the workflow? How do you go from the 12bit RAW files captured by the camera to your final output? It’s relatively simple but there are a few gotchas along the way.
The first one is formatting your SSD drives for use in the Cinema camera. Until recently they had to be formatted using the Apple HFS+ format which could only be done on a Mac or on a PC running emulation software such as MacDrive or Paragon HFS+ but with the new 1.2 firmware update you now have the option to format the drives as ExFat, which is a format supported by both Macs and PCs. This makes dealing with the SSD’s in a PC environment much simpler.
The second gotcha is transferring the files from the SSD to your computer running Resolve, although the Cinema camera has a Thunderbolt connection this is used purely for monitoring the output of the camera and cannot be used for transferring data from the SSD.
You will need to purchase a SATA dock which can be used to mount the SSD and connect it to your computer. There are a number of different docks available with connections ranging from USB2 to Thunderbolt. I would recommend the Thermaltake docks as they are well built but reasonably priced. They do an E-Sata version if you already have a computer with an E-Sata port or a USB3 version which would give you high speed transfer at up to 5gb/s which is ideal for moving data quickly off the SSD’s. USB3 is starting to appear on new computers, such as the new Macbooks, but you can also add a USB3 card to an existing computer.
So once you have your footage transferred to your computer there are a couple of options as to how you proceed. If your edit is fairly straightforward you could do the whole thing directly in Resolve, as it has a multilayer timeline with some good basic editing capabilities as well as the grading. However if you want to edit on another system there are two options open to you.
Firstly, you could grade all your shots in Resolve and then render them out to a format that is compatible with your chosen editing software. Resolve can render to various formats depending on your computer and which other software you have installed.
Once you have exported your graded shots from Resolve you can then proceed to edit as normal but of course you have now lost the ability to grade using the full range of the 12bit media. You would render your final output from your editing system.
The second way is to “round-trip” from Resolve to your editing system and back to Resolve for final grading and output.
If you are working with Final Cut or Avid, Resolve makes this very easy for you, there are “easy setups” in the Deliver menu that are designed for sending media to the editing system and back again. If you are working with another editing application you can always fall back on using edls.
Important settings in Resolve when working with CinemaDNG files.
As I mentioned earlier, the Cinema Camera has the option to record media as 12bit RAW CinemaDNG files. These can be opened and edited in Resolve but you should be aware of some options as to how Resolve will deal with the files.
The first thing you should be aware of is in the project settings menu, under “Camera RAW”
Here you have project wide settings for how Resolve displays the RAW media, including White Balance, Colour space, and Gamma.
There are three basic settings:
CinemaDNG default - which will apply default settings.
Camera Metadata - which will apply settings used at the shoot
Project - which gives you manual control of White Balance, Colour space, Gamma, Colour temperature, tint and exposure.
The metadata entry panel on the Cinema Camera gives you options to adjust these settings in the field and those settings are saved as part of the file. When you load your clips into Resolve choosing the Camera Metadata option will tell Resolve to use those settings. Because the clips themselves contain all the RAW data from the camera sensor, choosing “project” gives you the option to manipulate your settings. Effectively you can go back and change all your settings after the fact.
Once you have applied the settings at project level all of your CinemaDNG clips will be displayed using those options. However, you also have the option to make changes at clip level.
In the “colour” tab of the Resolve interface the bottom left panel has four options: Colour wheels, Primaries, RGB mixer and Camera Raw. By selecting Camera raw you can choose the decoding options at clip level. Again you have options for White balance, Colour space, Gamma and exposure.
I would suggest for the initial step to use the project settings and then maybe in the final grade change any shots that need special treatment.
At this point you are free to go through and grade your shots as required. At this stage I would suggest a quick pass to give all your shots a consistent “look”. Final grading will be done later.
These are the steps you need to follow in order to edit your media in your current editing software, but still use Resolve to do the final grade and output.
Having copied the media to your computer, go to the “media” tab in Resolve and import the clips into your project.
Choose your Camera RAW settings in the project
settings.
Optionally do a rough edit in the “conform” tab of Resolve
Optionally do a rough grade in the “colour” tab of Resolve
Export your clips from the “deliver” tab in a format suitable for your editing system.
Edit those clips in your editing software of choice
Export an XML, AAF or EDL from your editing system
Conform the original clips in the “conform” tab of Resolve
Work on the final grade in “colour”
Export the finished project from Resolve
Easy isn’t it?
Obviously there are still some things you need to look out for.
When you import your media into Resolve it will create a “Master timeline” which is all your media in time order. So basically as shot. If you want to do all the editing in another system you should output this timeline.
However, if you want to save some time and disk space, you could create a new timeline in Resolve and make a rough edit. Then when you export the shots you will only be exporting your selected takes.
At step 5, Export your clips, you should go to the “deliver” tab in Resolve and make sure you have the correct timeline selected. Under render settings you can choose a preset for export to Final Cut Pro or Avid. Or you can choose your own settings.
Make sure the option “render timeline as individual source clips” is selected and make sure “use source filename” is selected. This ensures that every clip from your timeline will be rendered as a separate file, with the same source name as the original clip.
You can choose the destination of the rendered clips so if Resolve has access to the storage that your editing system uses you could render directly to there.
At the bottom of the render settings select “Add Job” and a job will be added to the “Render queue” Clicking on the “Start Render” button will start the export of your clips.
Once your clips have exported you can edit as usual in your editing software, however you should be aware that certain effects will not be transferred to Resolve depending on how you export the edit from your system. The following table shows what is supported by the different import options for Resolve.
Also of course it doesn’t make much sense to do any colour correction in the editing system as you will be performing the final grade in Resolve from the original Camera RAW files.
Once you have completed your edit you should export an XML, AAF or EDL and import it into Resolve, using the same project you used to export the clips. By default Resolve will name the new timeline the same as the imported file but gives you the option to rename it should you wish.
As you already have the original shots in your system you can deselect the “automatically import source shots into media pool” Resolve will link to the original Camera RAW files and create a new timeline.
You can then grade your edit with all of the flexibility that 12bit media gives you. In fact Resolve allows you to easily create multiple versions of your grade with different looks.
You also have access to the powerful tracking and masking tools and noise reduction.
The latest version of Resolve is logical and easy to use and I believe it will become a standard tool for all areas of the industry.
Once you are happy with your grade you go back to the ‘Deliver” tab and export the complete timeline, this time you should choose render timeline as single clip and choose the format that you wish to have for final delivery. Again you should choose “add job” and then “start render” and Resolve will render your edit as a single media file.
Congratulations! You have just edited and graded your first job with The Blackmagic Cinema Camera and DaVinci Resolve 9.
Obviously this is just a very quick guide to dealing with footage from the Blackmagic Cinema Camera in Resolve. The manual can be downloaded from their website and contains a tutorial and in depth guides to using all of the tools in Resolve.
Tags: Post & VFX

RedShark 2020 @ All rights reserved.

Comments