
5 minute read

 Aliasing and what to do about it
Aliasing can absolutely ruin your images, but it doesn't have to be that way.
[Ed note: Some of the following technical illustrations will only display properly if your browser is set to show pictures at 100% of their original size. If the image below doesn't look like an even grey rectangle, please adjust your settings.]

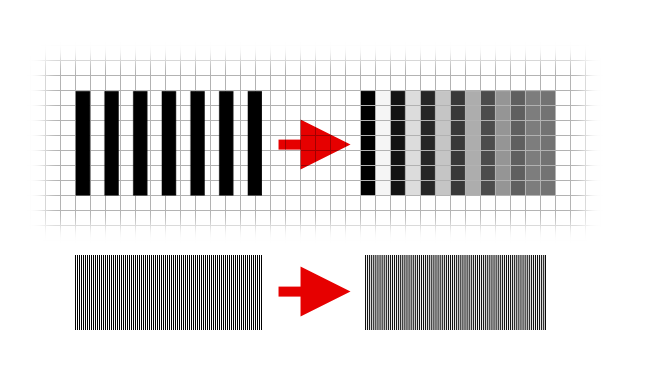
Everyone wants high-resolution pictures, even if it's just so we have the choice of choosing a filter to take the edge off in camera or post. The sharpness – visually, the acutance – of a camera system is often measured numerically by taking pictures of alternating black and white stripes. As the stripes get smaller, the black and white blend together. On film, the measured number of line pairs per millimetre which still have a given amount of contrast between them is the key figure of merit. On digital sensors, we might assume a sensor 100 pixels wide would resolve 50 pairs of black and white lines. That's possible, ideally, but there are a couple of problems which will usually prevent it in practice.
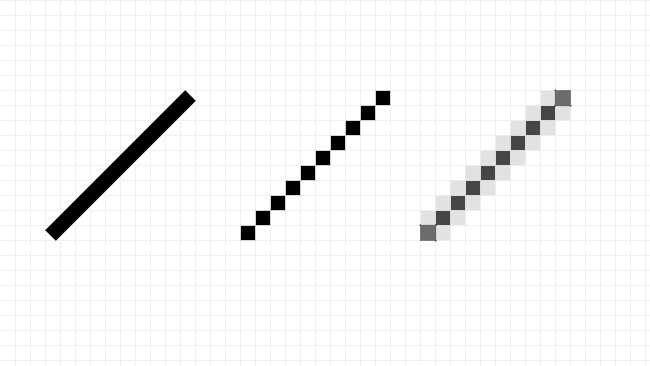
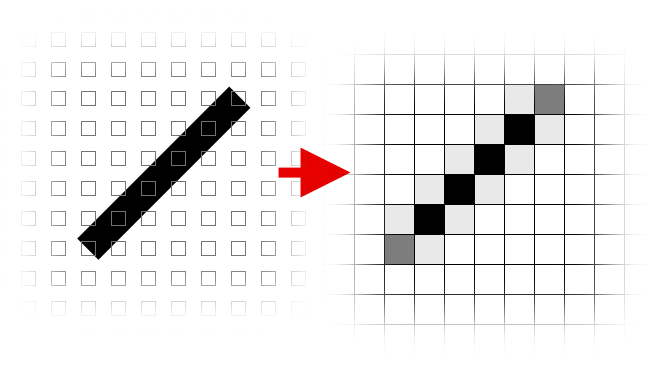
Most people understand what aliasing is, when we're trying to represent real-world images on systems that represent pictures as a grid of squares. The prototypical case is that of a diagonal line (on the left in the illustration below), which, in the worst case, turns into a staircase (in the centre). Computers can mitigate that with antialiasing, where individual pixels are shaded according to the proportion of them that's occupied by the line (on the right).
This creates a final image that most people agree looks better. Ideally, antialiasing happens automatically with cameras. Each of the photosites is a square and records the total amount of light it receives, producing a nice average reading of the total illumination for each pixel in the output file. The first problem is that if we have, for instance, a pattern of stripes that almost, but not quite, lines up with the pixel grid, the pattern will go in and out of step (on the left, below). Even if the pixels are a beautiful grid of squares that meet edge-to-edge, which they usually aren't, there will be visible bands of grey where each pixel sees partially white and partially black. There will also be areas where things line up properly and we see black and white stripes. The result is on the right:
This is the problem that causes issues when shooting brickwork, for instance, on a camera with bad aliasing.
There are also other electronics that take up space. The realities of manufacturing mean that the amount of the sensor that's actually sensitive – called its fill factor – is never quite 100%. This means that entire parts of the image can be missed out. Exaggerated to make a point, this is what a really poor fill factor can create, with the sensor's small pixels on the left and the display device's large pixels on the right. Even if each pixel faithfully averages the light falling on it, the output image has almost no antialiasing at all.
Most sensors aren't that bad, but consider a modern, single-chip colour camera. The sensor sees only in black and white, but it has some portion of its photosites filtered red, green and blue. If we consider the results of the red-filtered pixels only, we have fill factor exactly that bad. OK, no real single-chip colour camera has filters which completely exclude, say, green light from the red channel. That's a necessary compromise to make sure a reasonable image can be recovered and is the reason why single-chip cameras don't, traditionally, reproduce such good colour as three-chip types.
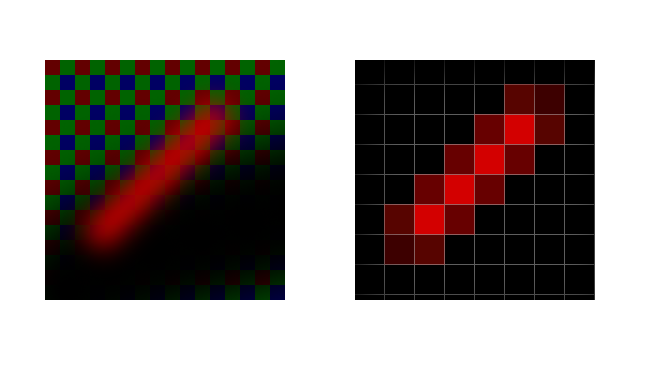
But the problem remains to a degree, especially when we're taking pictures of things which are brightly coloured. A white line on black is rendered fairly well, since all of the colour channels, and thus all of the pixels, can see it. But a red line on black has much bigger problems:
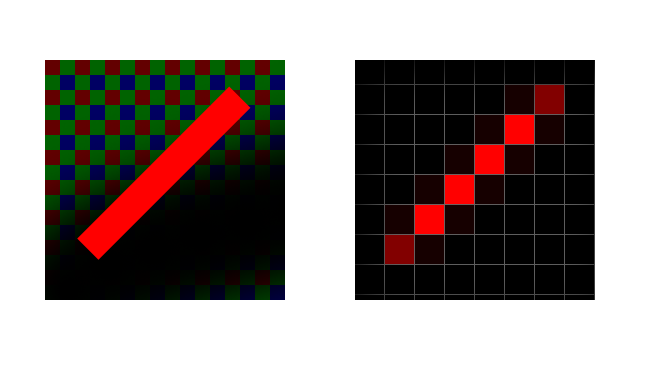
This is a slightly simplified demonstration, but the problem does exist. The ideal solution to aliasing, whatever the cause, is not to include very small image details. Shoot a picture of a flat white wall, or a red wall, and there aren't any problems, because all the pixels are illuminated to the same degree. If you process the image so there aren't any sharp edges in it, the contrast between adjacent pixels would never be large enough to produce objectionable aliasing:
The fact that the filtered version looks soft is the key compromise. Sampling theory refers to the required softening as low-pass filtering, because it allows through only low-frequency (soft) details. But the theory also says that the aliased version lacks precision just as much as the soft version, because we can't really tell where anything is. In many cases, it looks sharper, because it's got higher contrast edges in it.
This is why video footage from the Canon 5D Mk. II camera looked any good at all – it was actually badly aliased and in complex ways, because of the odd-shaped clumps of pixels the camera grouped together in order to create an HD-resolution image from a much bigger sensor. Even so, the sharp edges of aliasing created the impression of more resolution than was really there. Optical low-pass filters are available for early video DSLRs that soften the image enough mitigate aliasing before it hits the sensor, but the resulting images can look terribly low resolution.

In real cameras, low-pass filtering is performed by an optical filter mounted on the front of the sensor – it looks blue in most cameras (such as the JVC GY-LS300 above), because it includes a filter to remove infrared light that would otherwise pollute the image. The filter is often based on a birefringent crystal (details, sadly, are a bit much for this article) which effectively doubles the image in one axis, so there are two layers: one doubles the image horizontally, the other vertically. The sensor sees four copies of the image overlaid on one another, which, depending on the resolution of the sensor and the power of the filter, is enough to offset aliasing.

There are still compromises. If we blur the image enough to remove all aliasing, it can look soft. If we don't blur it enough, the aliasing will be objectionable. It's a matter of opinion. In a single-chip colour camera, it's even worse, because the spacing of red and blue elements is much wider than green elements. This creates the circumstance whereby we must either tolerate excessive aliasing of red and blue details or excessive softening of green details, mitigated by the camera's ability to guess the location of red objects by factoring in the amount they're also visible to the green pixels.
The solution? More pixels. This is one reason to look for cameras with a higher resolution sensor than the desired output. Shoot a 4K image and downscale it (whether in camera or in post) to HD and we have really good data with close to the maximum theoretical sharpness, because the mathematical software filter used in downscaling can be tuned very finely to any desired level and because there are red, green and blue pixels on the sensor for every output pixel. Shoot on a Sony F65 and you're shooting 8K-wide images with enough information to make even 4K output look really good.
Modern 4K-output cameras with 4K sensors do surprisingly well by applying clever mathematical techniques, something that's made somewhat easier by the fact that most real-world scenes actually contain surprisingly little colour information. But the issues of aliasing, especially on the single-chip colour cameras that we find so convenient, mean that shooting at a higher resolution than the final product remains the best approach.
Tags: Technology

RedShark 2020 @ All rights reserved.

Comments