3 minute read

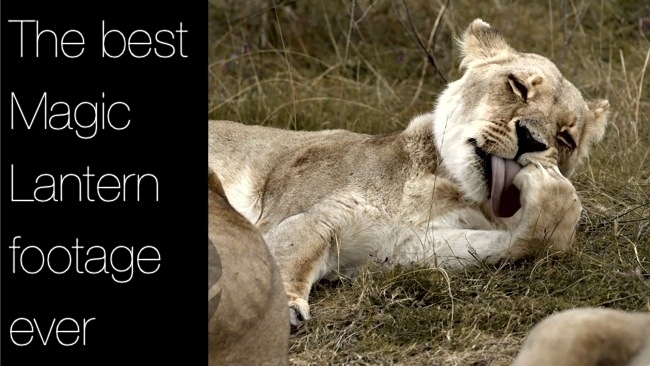
 The best Magic Lantern footage we've ever seen
Andre Meyer has produced some wildlife footage using a Canon 5D Mk III, the like of which we've never seen
Not only does this footage show how good the pictures from a Magic Lantern-equipped EOS camera can be, but they're the sharpest pictures we've ever seen on Vimeo as well.
We chatted via email to Andre and he's give his tips for encoding later in the article.
This really has been an amazing year for unofficial third-party software innovations. We've been blown away by what's achievable - even from obsolete cameras that were never designed to record video at all!
Raw is now part of the DSLR moviemaker's vocabulary and with tools like Blackmagic Resolve, as well as a few intermediate processes, the workflow isn't too bad at all, although necessarily more complex than shooting straight to ProRes in Rec 709.
There's never been a wider choice of kit and technologies for filmmakers. If you're prepared to put up with a slightly more complex workflow, and to take responsibility for the final look of your images (and what serious filmmaker wouldn't?) then there's no reason why you shouldn't go out and shoot world-class images on an everyday budget.
Andre has added to his Vimeo notes to explain how he achieved such an incredibly sharp-looking Vimeo image
After five trips to the game reserve, some test footage and a 10 day holiday in Mossel Bay we ended up with 1 terabyte of raw stock footage. I've now edited this down to 3 minutes. Everything was graded with the new Resolve 10. Finally the pink fringing problem is completely gone with Resolve 10! Another great new feature is a special RAW sharpening tool designed for RAW footage that really improves the quality.
I did not apply noise reduction. I have Resolve Lite free so I cannot do that. I do have Neat Video for FCP but didn't use it on any of the shots because it was not necessary.
After filming and grading 1 terabyte of footage with zero drop-frames or any problems whatsoever I am starting to trust Magic Lantern RAW firmware more and more. I am still running an old build of 27 July. It can only get better from here on!
I used the 3x crop mode on a lot of these shots. I discovered that the crop mode has the same effect as the 2x extender in that it magnifies the image, so any imperfections of the lens get more noticeable, although this is hardly noticeable as you will see from the footage. Turning my 200mm 2.8 into a 600mm 2.8 with a click of a button was really great.
All the wildlife shots were filmed from a car with a big pillow rested on the window.
Once you get to know the workflow, working with RAW footage is a breeze. I think of RAW as Prores 444 with a conversion step in between. All you need to do is to purchase and learn Davinci Resolve Core Training - Ripple Training by Alexis Van Hurkman. He is a excellent teacher and you will master resolve after this. You will also have to watch raw - resolve - PP roundtrip tutorial videos on youtube as well
Resolve
Import into Davinci Resolve and export proxies. Edit sequence in FCP. Import xml into Davinci and automatically relink to original DNG's. Grade and export beautiful Prores 444 sequence.
I used "son of batch" software to convert the .RAW files to DNGs straight from the CF card or NextoDi HDD to my local HDD. Basically copying and converting at the same time.
The part I loved most about Resolve's workflow is that you can apply the BMD Film color space and gamma to all the clips which turns them into super flat gradable footage. An excellent starting point.
Prores 4444
For archive of the footage I decided to render all clips in Resolve to Prores 4444 with the BMD super flat color space applied to it and the white balance and exposure set as desired. I did a few tests and applied the exact same grade from a RAW clip on the same Prores 4444 clip and even at 400% there is no difference at all. The only difference between RAW and Prores 4444 is that you can change the white balance and recover exposure, so do this before you export to Prores 4444. By archiving Prores and not RAW you save 60% on storage. Prores HQ is just not good enough as you can see the difference so be sure to use Prores 4444.
Encoding
I used an Adobe CC media encoder Vimeo 1080P template but changed the target bitrate to about 15. Overkill I know but for a 3 min video it's only 500mb. I also checked "render at Maximum Depth" and "use maximum render quality"
Tech specs
Camera: Canon 5D Mark III Lens: 70 - 200 2.8 IS II & 24 - 70 2.8 II CF Card: 2x 32gb Lexar & 2x 64gb Lexar (all 1000x) HDD: NextoDi NVS1501 750gb Support: Tripod & Pillow :) Software: DaVinci Resolve 10 & FCP
Video after the break (Click "Next" below)
Tags: Production

RedShark 2020 @ All rights reserved.

Comments