2 minute read

 Telestream Switch 3 Pro
RedShark Review: Telestream Switch 3 Pro offers a host of options to measure the quality of video.
Quality control is more than a visual check of a clip and watching the scopes for colour accuracy. It includes finding out about the codec and transport wrapper, the colour space the clip was shot in, its bitrate, audio channels, subtitles, chapter markers and much more.
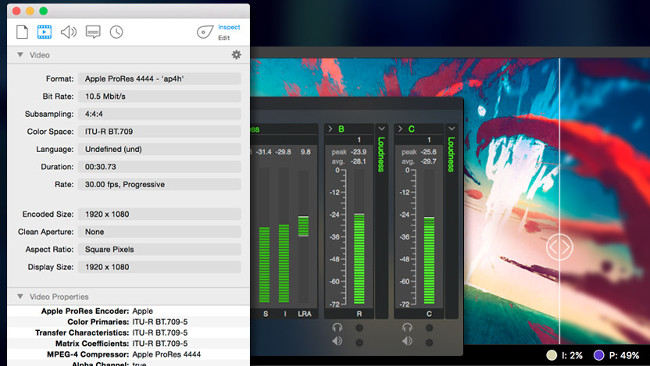
Telestream Switch, the QC and quick-export app for videos up to 4K, comes in three flavours. The play-only Player version is free and offers basic inspection features, such as the subsampling applied to a clip and its codec. There's also a Plus version, which adds more playback support, em-bedded caption playback, audio meters, more publishing destinations and single file transcoding. And then there's the Pro version. The Pro version is designed for broadcast and media QC professionals. It adds even more playback support, loudness monitoring, an advanced metadata display, a compare media feature, the ability to preview clips on an external monitor and iTunes package export.
QC functionality in the Pro version includes information on aspect ratio, clean aperture, bitrate, frame rate, metadata and encoding formats. The ones that I personally find indispensable are the comparison capability and, above all, the Timeline feature.
The compare media functionality lets you open up to 16 alternate media files. Once opened, you can view these files in full view, split view or difference view. First off: don't do what I did. I didn't bother to take a couple of minutes and go through the Telestream how-to videos. Instead, I just opened the files the usual way. If you do this, the menu where you select the viewing type won't work. After viewing the video covering this feature, I found out you have to open the alternate media files from the dedicated submenu in the File menu.
Once you do it the right way, you'll find a real gem. For example, did you know that transcoding certain files using Squeeze adds a mild noise to the result? I didn't either, until I saw the original clip and the ProRes file side-by-side. The compare mode comes with some nifty viewing modes that al-low you to see differences better. That way it's easy to see frame lag intro-duced by transcoding, for example.
The Timeline feature allows you to view the GOP structure of a video seg-ment. Especially the distribution of I, P and B frames tells you a lot about the quality of a clip. You can also see the data rate of the video.
Switch 3 Pro supports output to external monitors through AJA devices and HDMI/SDI output to an external screen via Blackmagic Design capture cards. Switch Plus and Pro users can export video directly to services such as Vimeo, YouTube and Facebook. Switch will publish directly to your destination and automatically save a local copy on your computer. As Telestream based Switch's export features on its flagship transcoding app Episode, you won't have to do anything special. It will automatically create the necessary files for the destination.
While the first two versions of Switch Plus and Pro were limited when it came to transcoding footage, you can now even export to MXF OP-1a and OP-Atom containers. This streamlines workflows and makes it possible to share MXF files.
Personally, I don't use the QuickTime Player anymore, except for the odd AVCHD file. I have changed the 'Always Open With' preference for video files to Switch in the OS X Finder. QuickTime Player lacks QC controls and isn't DPP/AMWA certified. Switch can visually QC DPP files on the desktop, play back the files and display DPP AS-11 MXF metadata.
Tags: Post & VFX

RedShark 2020 @ All rights reserved.

Comments